
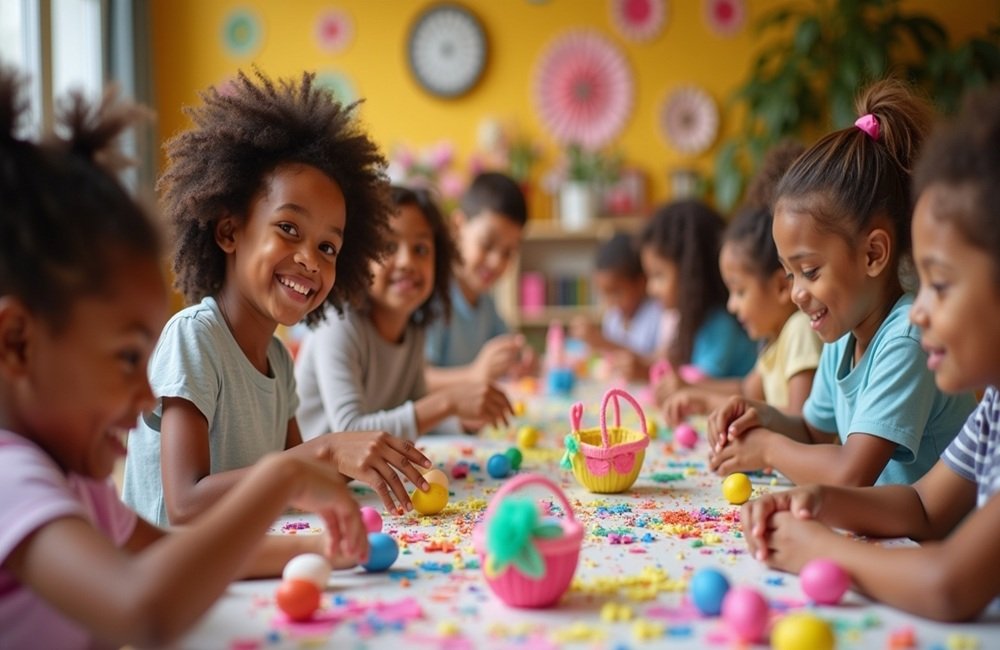
Easter craft night ideas provide the ideal occasion to get everyone together around the kitchen table. Spring brings with it that time of year when you feel the need to make something lovely with your hands. These initiatives transform routine nights into unforgettable experiences full of colorful chaos and joy.
Crafting together creates bonds that endure long after the glue dries, whether you’re hosting friends or simply your family. The completed items that hang on your refrigerator aren’t even the greatest part.
Charming Vintage Decoupage Eggs for Your Easter Craft Night
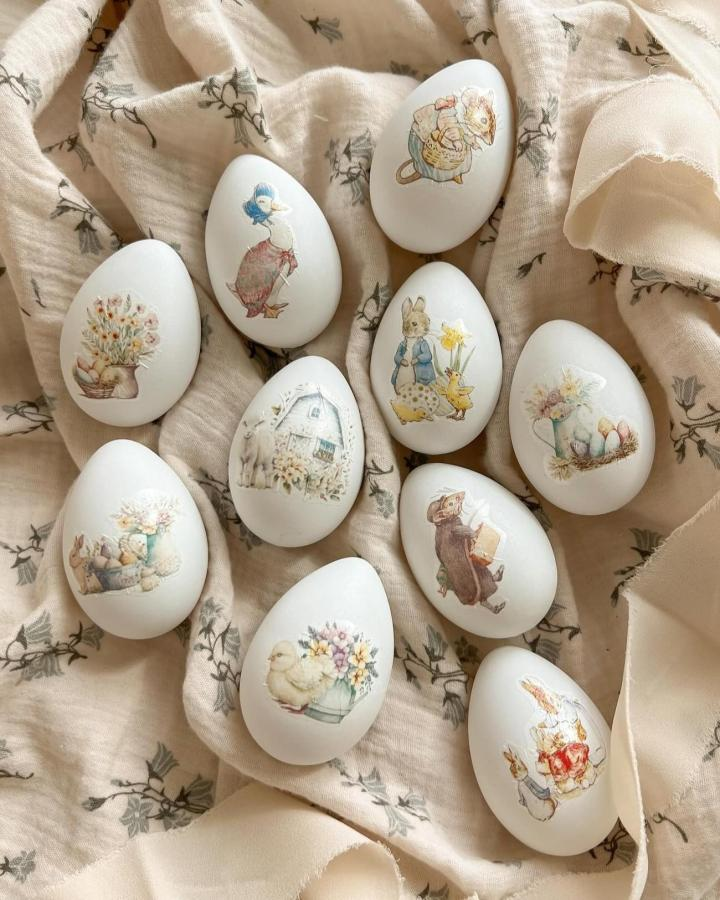
Transform basic white eggs into delightful, storybook‑inspired treasures with vintage‑style decoupage. This classic technique lets you turn plain plastic or real eggs into soft, nostalgic pieces of art that fit beautifully with springtime and Easter festivities.
To begin, select smooth white eggs — craft store plastic ones work great if you want long‑lasting decor. Carefully cut out designs from vintage‑looking napkins or sheets of printed craft paper. Using a decoupage medium such as Mod Podge, gently adhere each cutout to the egg, smoothing out wrinkles and edges as you go for a polished, seamless finish.
This method thrives on subtlety. Choose floral motifs, old‑fashioned characters, or classic holiday imagery in gentle pastel hues to enhance that soft, vintage feel. You can even add a whisper of pale glitter for a touch of sparkle that doesn’t overpower the vintage aesthetic.
The end result makes lovely table centerpieces, mantel accents, or thoughtful handmade gifts. Whether you’re crafting alone or hosting a group Easter craft night, these well‑worn‑charm eggs add a cozy, storybook feel to your seasonal celebrations.
Nostalgic Folded Paper Egg Decorations for Easter
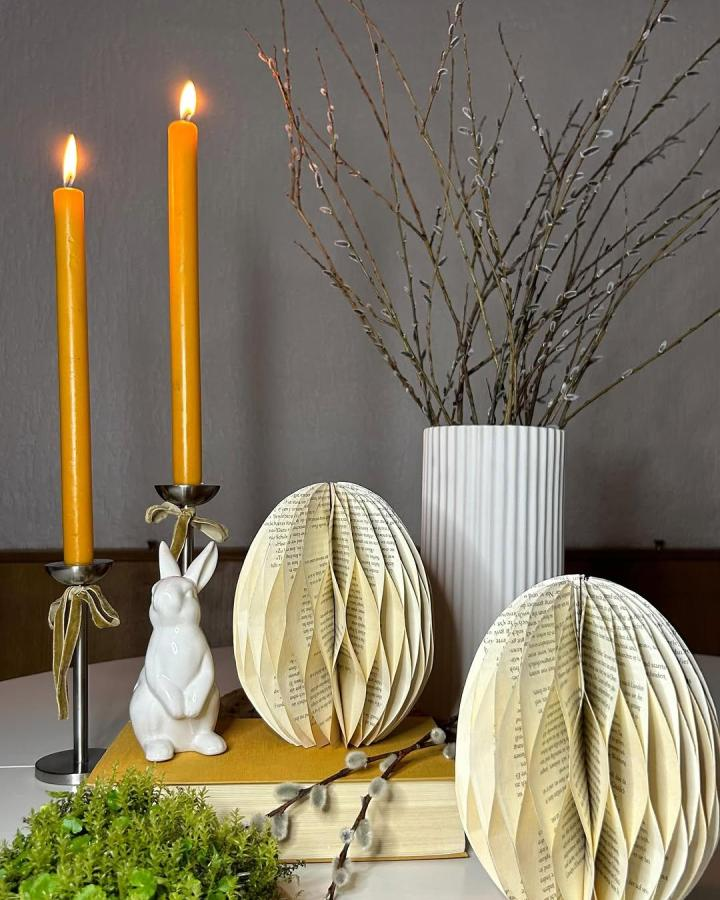
Looking for something delicate and tactile for your craft night? Folded paper egg decorations provide a creative twist on traditional egg crafting that brings old‑world elegance into your spring décor.
Start with recycled book pages, old sheet music, or vintage‑style print paper. Cut the sheets into uniform strips, then fold and glue them into a honeycomb pattern, gradually building up a three‑dimensional egg shape. The soft beige or faded print tones naturally evoke an antique vibe, lending your decoration an heirloom‑worthy turnout.
Display these paper eggs with natural elements like sprigs of moss, twigs, or pussy willow branches for a gentle contrast that feels very organic. You can also experiment with lighter colored or custom‑printed paper if you prefer a brighter palette.
The process is simple enough for crafters of all skill levels, yet the final product feels delightfully intricate and rich with rustic charm. These paper eggs make wonderful accents for wreaths, tabletops, or Easter baskets and are perfect for group crafting evenings because they’re easy to personalize.
Soft Floral Bunny Wreath You’ll Love for Easter
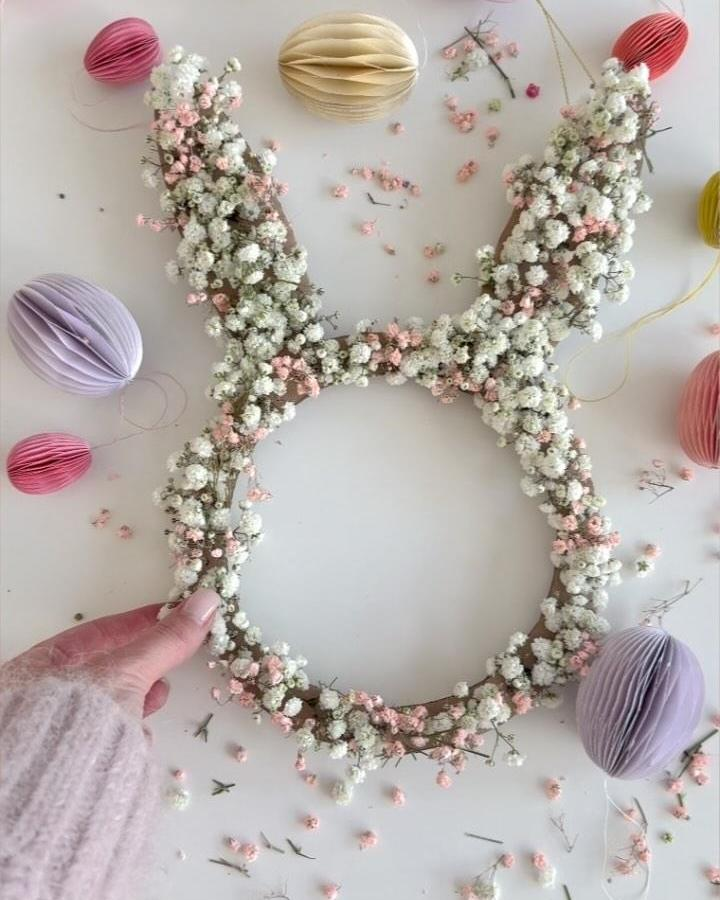
If you’d like a festive accent that’s both elegant and whimsical, a floral bunny wreath adds instant spring flair to any wall or door. This project uses lightweight greenery and tiny blooms to form a soft silhouette that’s charming yet refined.
To build yours, wrap a simple wire frame with floral tape or twine, then attach clusters of tiny baby’s breath — blush pinks and creamy whites work especially well. The small, airy flowers fill out the bunny shape without feeling heavy or overdone.
Add pastel‑colored paper honeycomb eggs around the wreath to enhance its seasonal appeal. If fresh flowers aren’t available, high‑quality faux blooms provide durability while retaining that garden‑fresh look.
This wreath works wonderfully as an Easter craft night project because it’s forgiving and flexible. Crafters can adjust colors, switch in alternative flowers, or even wrap the wire base with ribbon before attaching blooms for a fuller appearance. The finished look is fresh, delicate, and distinctly spring.
Elegant Floral Decoupage Easter Eggs
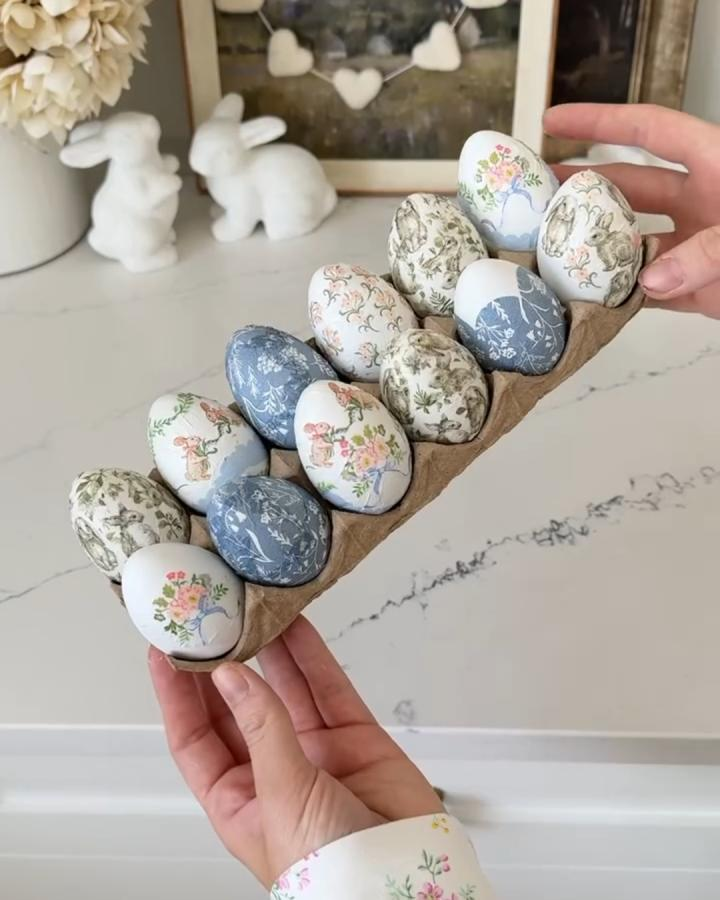
Elevate your Easter décor with floral decoupage eggs that feel both handcrafted and artistic. By layering printed tissue paper or lightweight scrapbook sheets onto eggs, you create a detailed surface that feels soft and refined.
Select patterns with dusty blues, gentle greens, and muted pinks for a palette that feels antique and refined. Cut or tear tiny pieces of paper, then use a smooth decoupage medium to adhere and seal each bit. Working slowly gives you the best results — the layering creates depth and detail that plain painting can’t match.
For added charm, include subtle bunny silhouettes or tiny floral sprigs in the design. The look pairs beautifully with a simple egg carton display or nestled in natural straw on a decorative tray.
This approach is ideal for anyone who wants handcrafted décor with an elegant edge. It’s simple enough to do in a group setting yet produces polished, gallery‑worthy results that elevate your Easter presentation.
Rustic Twine Carrots for Festive Easter Flair
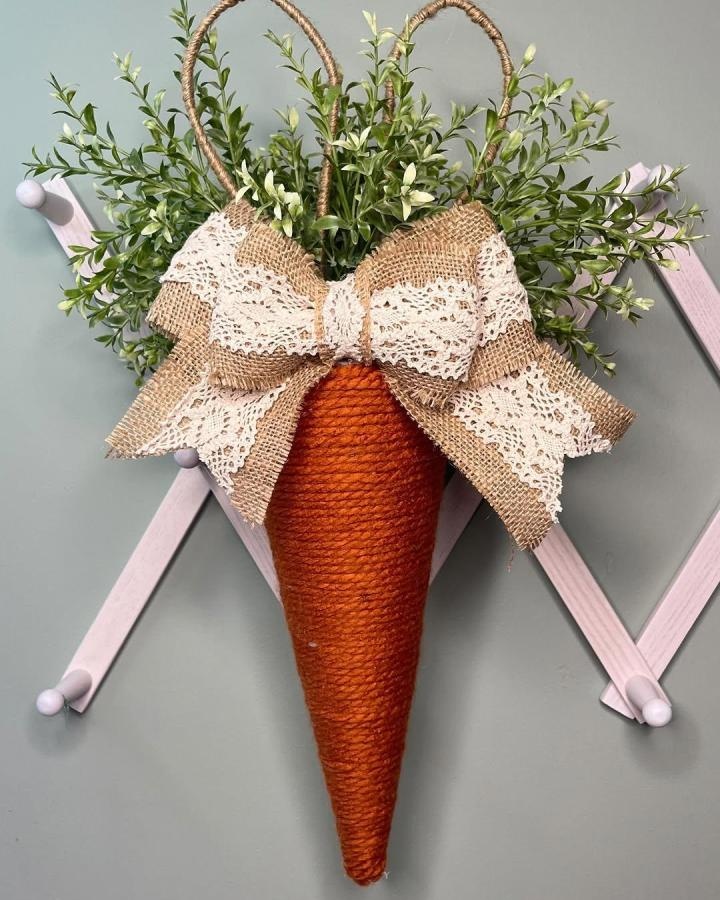
Bring a touch of farmhouse charm to your Easter crafts with rustic twine carrots. These bright, textured accents are easy to build and add a cheerful, spring‑inspired pop to mantels, tabletops, or wreaths.
Begin with cone‑shaped bases made from cardstock or foam. Wrap them tightly with rich orange twine, securing the twine with glue as you work for a smooth, even finish. Once the base is covered, add greenery to the top — this could be faux leaves, sprigs of fern, or even colorful craft feathers.
Tie a bow of burlap or lace around the top to soften the texture and add cozy visual interest. The contrast between rough burlap and soft greenery creates a pleasing rustic aesthetic that pairs beautifully with other handmade Easter décor.
These twine carrots are customizable too — choose other colors if you want a playful twist, or attach them to garlands and wreaths for larger installations. They’re a fun, inexpensive, and eye‑catching project for any Easter craft night.
Rustic Bunny Garland to Cheer Your Easter Space
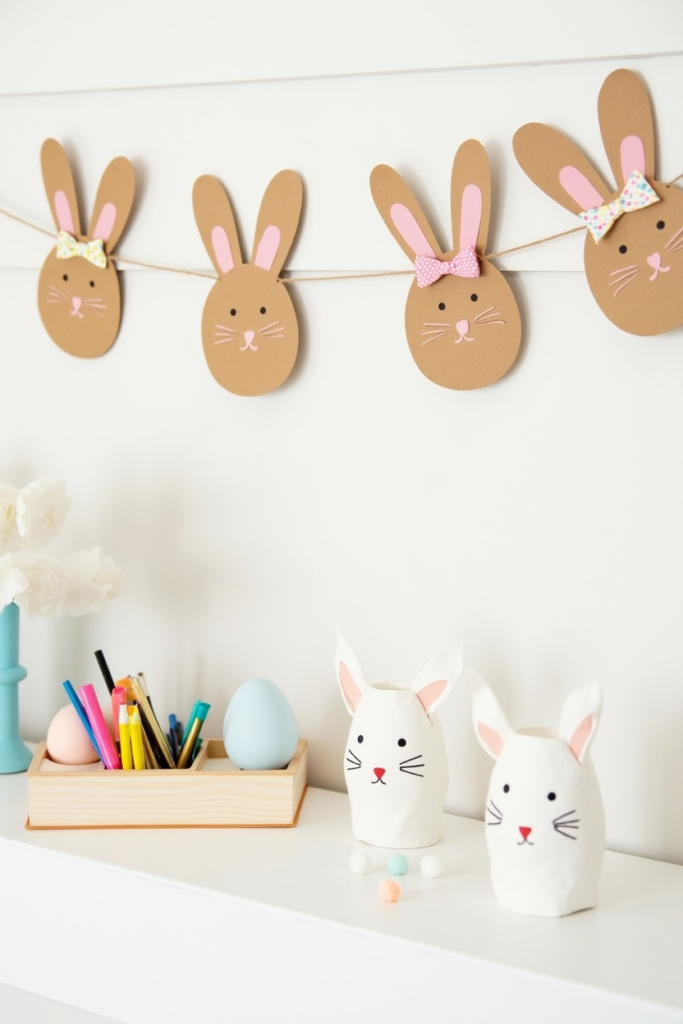
Add a handmade bunny garland to your Easter decorations for a cute, rustic accent that’s perfect for mantels, doorways, or party spaces. This simple craft combines basic materials for a sweet, personal touch.
Start with plain brown kraft paper or recycled paper bags. Cut out bunny head shapes — big ears and rounded cheeks give the cutouts a playful charm. Use soft pink paint or markers to color the inner ears and gentle white or cream tones for details like highlights or nose shapes.
String the bunny faces together on natural twine, spacing them evenly for a cohesive look. You can also decorate them with tiny patterned bows, glitter accents, or even small pom‑poms for a whimsical feel.
What’s great about this garland is how approachable it is: no advanced tools are required, and each bunny can be customized. Let adults and kids decorate their own bunny faces during your Easter craft night for an evening full of smiles.
Toilet Roll Bunnies and Chicks: A Playful Craft

Turn humble toilet paper rolls into adorable Easter critters with bright paint, felt, and a little imagination. This hands‑on project is especially fun for families with kids, blending simple materials with joyful personality.
Paint the tubes in cheerful colors — think sunny yellows for chicks, soft blues and pinks for bunnies, and earthy greens or purples for accents. Once the paint dries, add felt ears, cotton ball tails, and tiny beaks or noses.
For extra tactile appeal, glue on felt flowers, mini feathers, or little carrots to create detailed features. You can even give your sheep a fluffy body made entirely of cotton!
The possibilities are endless, and every creature will be unique. This project inspires creativity, invites playful decorating, and provides cheerful little figures you can tuck into baskets, place on shelves, or use as tabletop accents.
Elegant Blue & White Decoupage Eggs for Stylish Easter Decorating

Give your Easter décor a refined makeover with blue and white decoupage eggs that look timeless and elegant. Start by selecting decorative napkins with delicate blue patterns — florals, geometric designs, or classic prints all work beautifully.
Carefully separate the printed layer from the napkin backing. Then, using a smooth decoupage medium, gently adhere the napkin pieces to your egg surface. Take your time smoothing and layering for the most polished outcome.
Display these eggs in a woven basket or natural nest filler to enhance their serene, artistic vibe. They’re perfect for minimalist décor schemes where clean lines and soft colors reign, or they make a beautiful contrast when paired with brighter accents.
These make particularly lovely showpieces for Easter gatherings, seasonal shelves, or craft night displays.
Honeycomb Paper Eggs to Light Up Your Easter Gathering
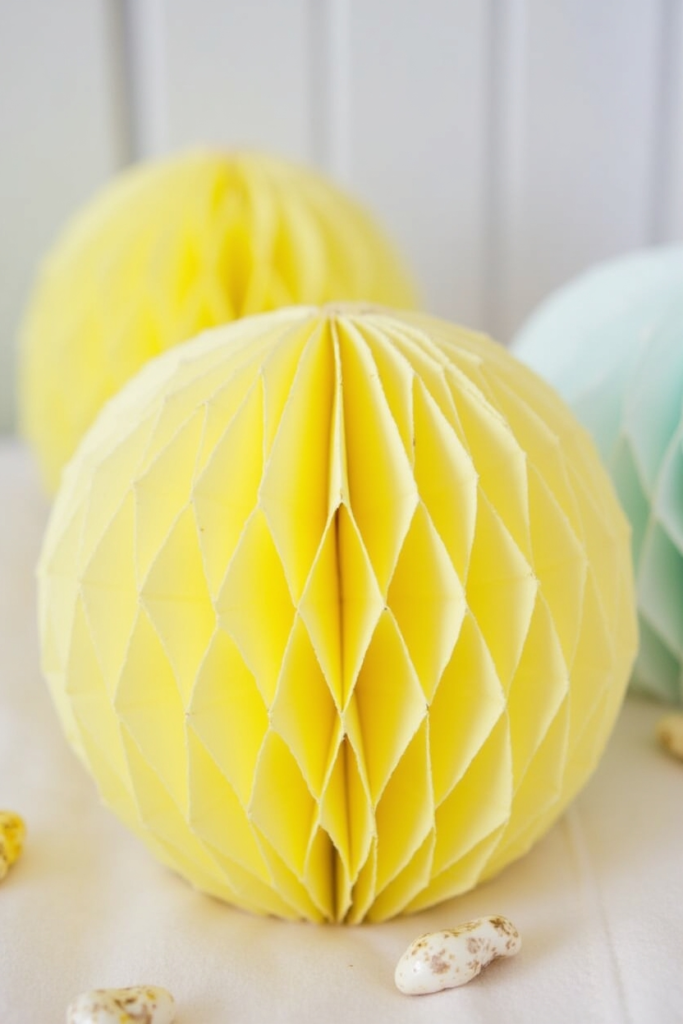
Honeycomb paper eggs bring playful texture and visual interest to your Easter décor. These layered paper designs open up to create charming egg shapes that look great on their own or nestled in decorative settings.
Yellow honeycomb eggs add a glow‑like warmth to tablescapes, especially when mixed with pastel pinks or subtle grays. The layered texture adds dimension that flat paper can’t replicate, making these eggs feel elevated and special.
Add small tags with fun Easter phrases — like “Spring Joy” or “Hippity Hop” — for personalization. The process is entertaining but rewarding, and these eggs blend seamlessly with baskets, wreaths, or mantel décor.
If you’re hosting an Easter craft night, this is a satisfying group project that yields cohesive, eye‑catching results.
Half‑Painted Glitter Easter Eggs for Festive Shine

Put a fun, modern twist on Easter egg decorating with half‑painted eggs that combine matte pastels and sparkling glitter. Begin by painting one half of your egg in soft hues — lavender, mint, blush pink, or buttercream are lovely choices.
Once dry, cover the remaining half with a layer of glue and apply your chosen glitter. Use a light touch so the sparkle complements rather than overwhelms the image. Seal the glitter with a clear decoupage layer if you prefer less shedding.
These eggs are endlessly customizable. Try metallic accents, tiny stickers, or even hand‑painted details for added flair. They look especially delightful nestling in clusters with sprigs of baby’s breath or tucked into decorative bowls.
This style is ideal for anyone who wants a balance of understated charm and joyful shine.
Whimsical Natural Shape Garlands for Easter Ambiance
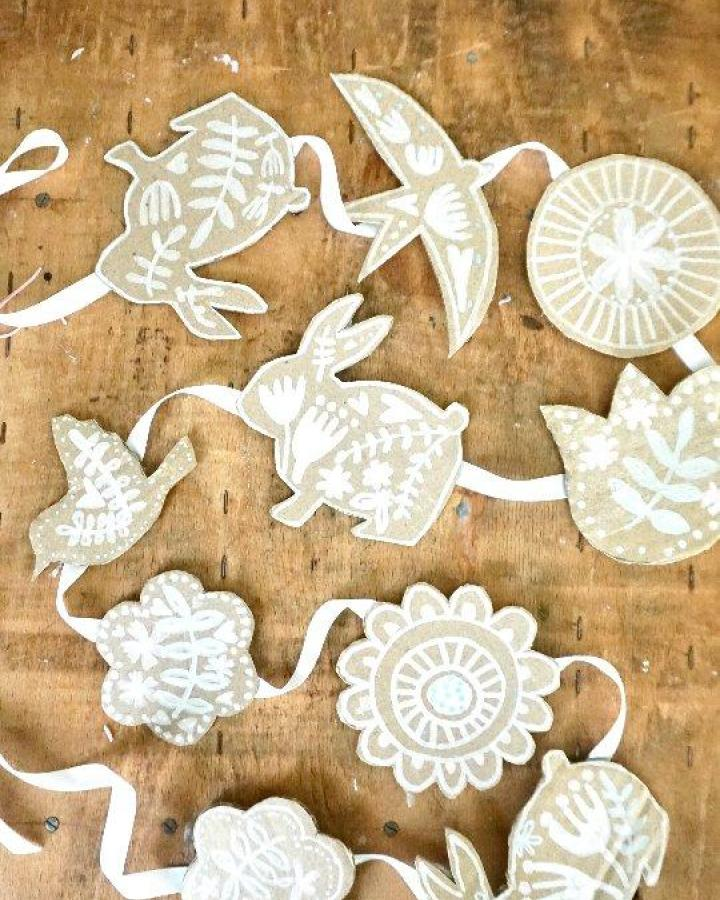
Create a whimsical garland featuring simple natural shapes — bunnies, flowers, birds, or eggs — cut from neutral kraft paper. Add delicate white painted designs to give the shapes a modern folk‑art feel.
String them together with ribbon or twine for an organic, easygoing accent you can hang across fireplaces, windows, or stair rails. These understated shapes and earthy tones fit beautifully with casual, cozy décor styles.
If you want extra dimension, consider swapping a few flat cutouts with small yarn‑wrapped cork cones or paper shapes for added texture. Invite participants at your craft night to paint or decorate their own cutouts, showcasing a variety of creative interpretations.
The result is festive, handcrafted, and full of personality.
Creative Bird Nest Egg Holders for Easter Displays
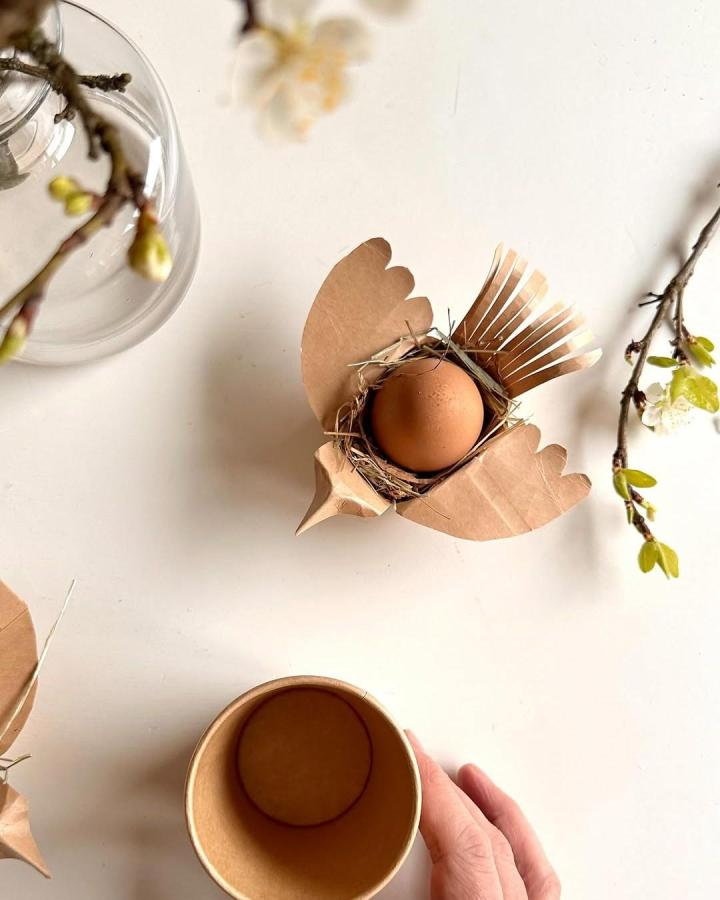
Give your Easter eggs a cozy, artistic home with handcrafted paper bird nests. These charming holders combine rustic elements with playful design to create functional artwork.
Cut and fold kraft paper to form nest bases, then shape wings and tails so they resemble sweet little birds curled protectively around their eggs. Fill the nests with natural straw, moss, or shredded paper for texture and contrast.
Pair these nests with your favorite decorated eggs — vintage decoupage styles or pastel classics both work — and place them on mantels or tabletops for a whimsical presentation.
These nests are great for craft nights because they’re multi‑step and rewarding, and guests can personalize details like bird colors or nesting materials.
Cute Eggshell Planters to Highlight Spring Growth
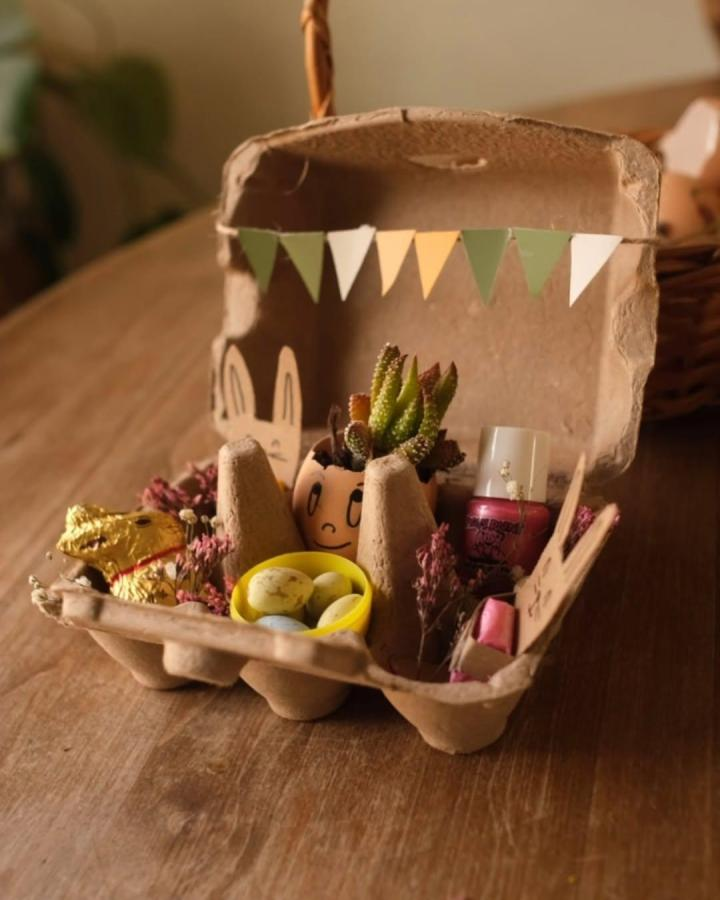
Don’t toss those eggshell halves — turn them into adorable mini planters! Gently clean empty shells and decorate them with soft pastel faces, patterns, or doodles for personality.
Nestle each planter into a recycled egg carton that you dress up with tiny paper bunting or ribbons in soothing spring tones. Add miniature succulents, dried flowers, or candy eggs for a layered, eye‑catching centerpiece.
This idea is great for all ages because it blends drawing, painting, and planting into one lively project. The result is a playful, nature‑inspired display perfect for Easter brunch tables or porch décor.
Springtime 3D Floral Pop‑Up Cards for Easter Greetings

Send joy with handmade 3D floral pop‑up cards that bloom when opened. Using pastel cardstock, craft delicate blossoms and leafy vines that spring to life inside the card.
Soft pinks, gentle greens, and subtle kraft paper form a softly woven palette reminiscent of early spring gardens. Add tiny paper bunnies or Easter eggs for thematic accents.
These cards are heartfelt keepsakes and a wonderful addition to your Easter craft night lineup, blending simple paper crafting with cheerful holiday messaging.
Cozy Miniature Beds Inside Decoupaged Eggs

For a whimsical and imaginative Easter project, transform hollowed egg shells into tiny textile beds. Once decoupaged on the outside, fill each shell with a miniature quilt, gingham pillow, and tiny mossy base.
The contrast between the delicate shell and the cozy interior creates a delightful surprise that’s sure to spark conversation. These miniature scenes are perfect for display on shelves, in shadow boxes, or as part of a larger Easter tableau.
This project blends textile craft with traditional decoupage, offering a playful, unexpected twist on classic Easter decorating.