
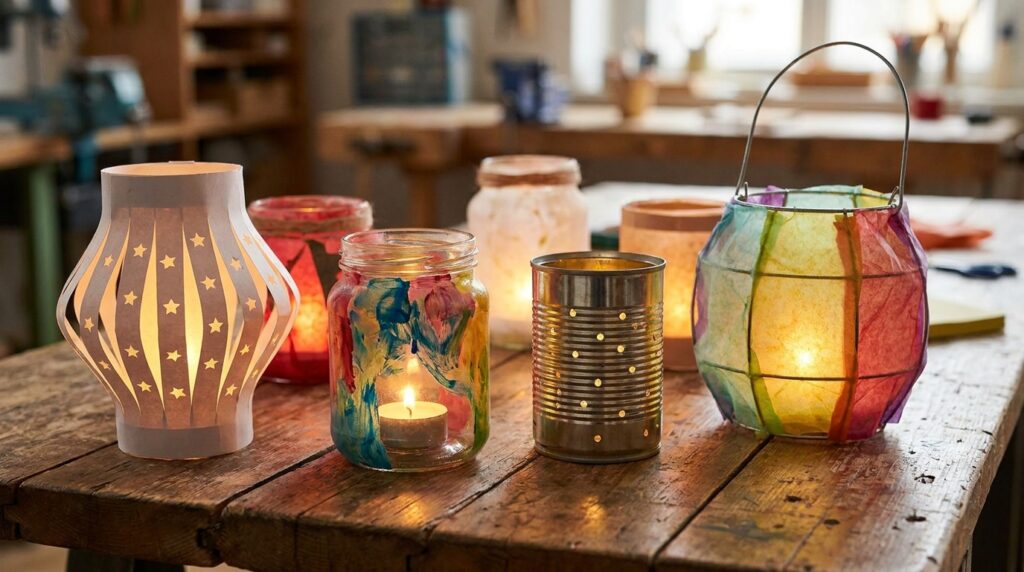
Lanterns can add a warm, charming touch to your home decor, seasonal displays, and special celebrations. Making your own lanterns is also a fun way to explore different materials, colors, and designs while creating something unique. From rustic lanterns made with simple household supplies to colorful paper creations and decorative pieces for your porch or garden, there are plenty of projects to try.
You can keep things simple with beginner-friendly crafts or experiment with more detailed designs to match your personal style. If you’re looking for creative inspiration, these lantern craft ideas will help you discover fun ways to make beautiful decorations for your home or next celebration.
1. Make Enchanting Fairy Lanterns From Recycled Mason Jars
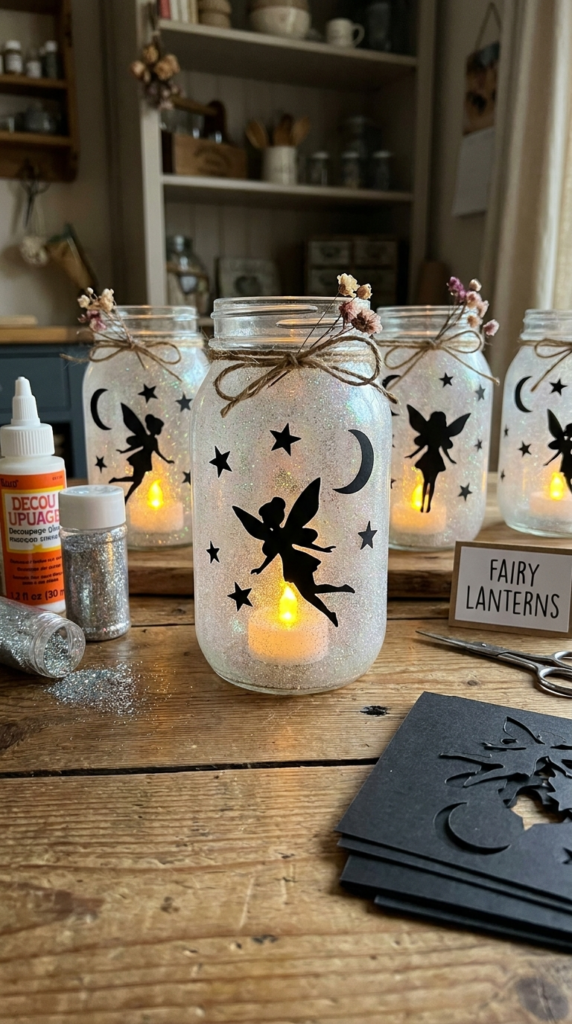
Transform empty glass jars into decorative fairy lanterns with glitter, paper silhouettes, and soft LED lighting. This project gives ordinary containers a new purpose while creating a charming accent for shelves, bedside tables, or covered outdoor spaces.
Start by cleaning and drying a glass jar thoroughly. Apply a thin layer of decoupage glue to the interior, then sprinkle fine glitter over the coated surface. Rotate the jar gently to distribute the glitter, removing any excess once the adhesive has dried. Cut a simple silhouette from black craft paper, such as a fairy, tree, butterfly, or crescent moon, and attach it inside the jar where it will remain visible.
Place a battery-operated LED tealight inside to illuminate the design. The light reflects off the glitter and highlights the silhouette, creating a soft decorative effect without requiring an open flame.
For the best results, choose a silhouette with clearly defined edges and leave enough transparent space around it. Avoid using real candles in jars containing paper or glitter, since these materials can ignite or become damaged by heat.
2. Create Rustic Twig and Canvas Lanterns
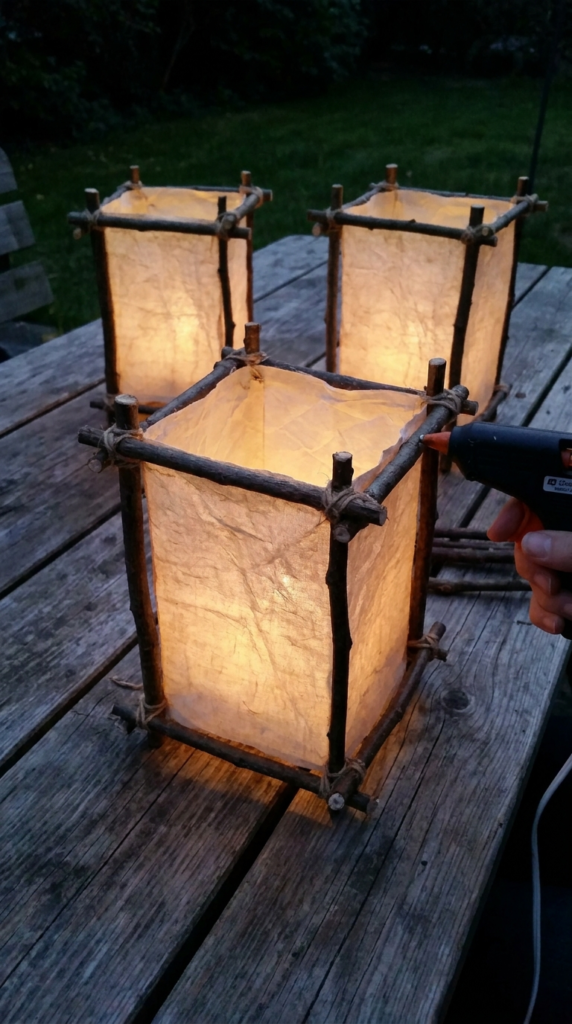
Twig lanterns bring natural textures into home decor and can complement farmhouse, woodland, or rustic-inspired interiors. Their simple construction combines small branches with a lightweight frame to create an interesting pattern of lines and shadows.
Gather straight, dry twigs that are similar in thickness. Remove loose bark and dirt, then allow the branches to dry completely before using them. Build a square or rectangular frame from suitable wooden pieces, ensuring that the corners are securely joined and the structure sits evenly on a flat surface.
Attach parchment paper or another suitable translucent craft material to the frame to create a light-diffusing background. Arrange the twigs vertically along the sides and secure them with an appropriate adhesive. If using hot glue, work carefully and allow each section to cool before handling it.
Place a battery-operated LED light inside the finished lantern. The branches create a layered appearance, while the translucent panels soften the illumination.
This design works well on side tables, covered porches, and sheltered patio surfaces. Because dry twigs and paper are combustible, keep the lantern away from real candles, heaters, and other sources of heat. A flameless light offers a safer way to enjoy the natural look.
3. Design Colorful Stained-Glass Lanterns With Tissue Paper
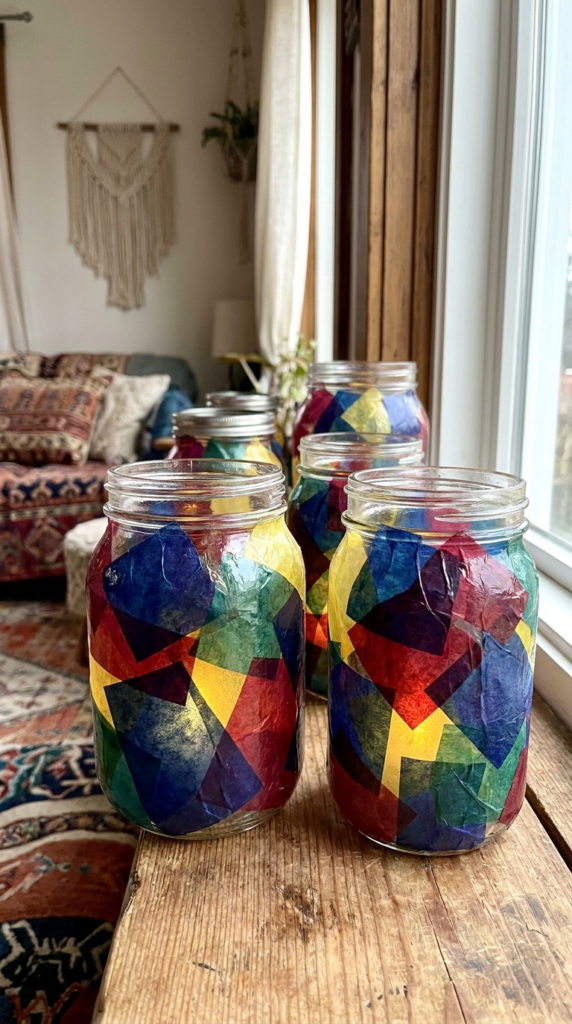
Tissue paper lanterns offer an easy way to introduce bold color into a room. When several shades overlap on a transparent surface, they create a stained-glass-inspired effect that changes as light passes through the paper.
Begin with a clean, clear glass jar or cylinder. Cut colored tissue paper into small shapes, such as triangles, diamonds, circles, or irregular pieces. Brush a thin layer of decoupage medium onto a small section of the glass, then press a tissue paper shape into place. Continue adding pieces until the desired area is covered.
Overlapping the edges of different colors creates additional shades and visual depth. Sapphire blue, emerald green, amber, and magenta can produce striking combinations, while pastel colors create a softer appearance. Smooth each piece gently to reduce wrinkles and air pockets without tearing the tissue paper.
Once the adhesive has dried, place a battery-powered LED tealight inside the container. The light brings out the colors and gives the finished lantern a warm, decorative glow.
Choose tissue paper that is thin enough to transmit light, and test a small piece before covering the entire jar. Avoid placing an open flame inside the lantern because the paper and adhesive may catch fire or deteriorate from heat.
4. Decorate Glass Lanterns With Pressed Flowers
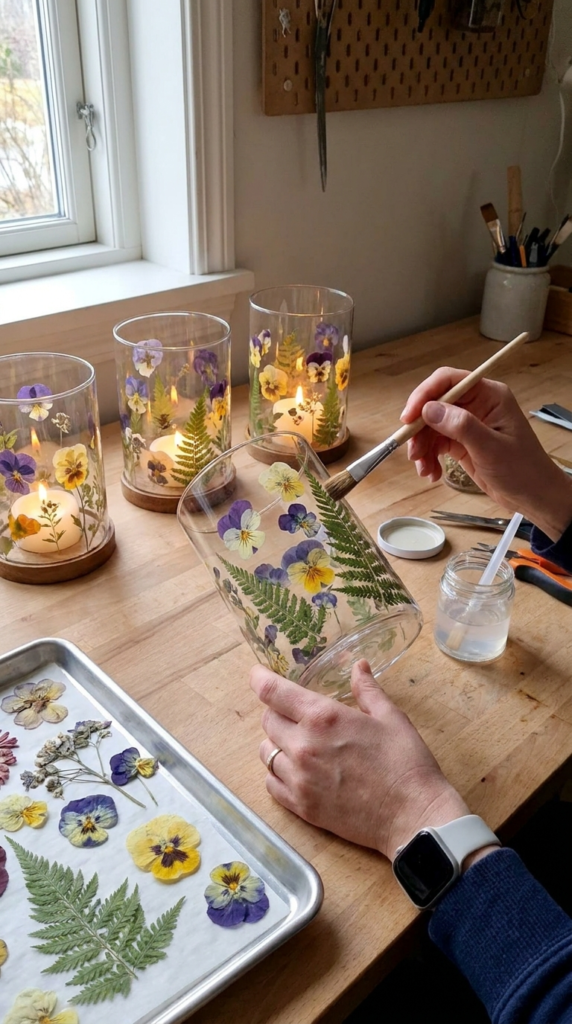
Pressed flower lanterns capture the delicate shapes and colors of botanical materials in a decorative light display. They are particularly suited to spring tables, bedrooms, reading corners, or nature-inspired interiors.
Choose small flowers and leaves that can lie relatively flat against glass. Place the botanical materials between sheets of absorbent paper and press them inside a heavy book or flower press until they are fully dry. Thin petals often work better than thick blooms because they are less likely to retain moisture or create bulky edges.
Clean a clear glass cylinder or jar and let it dry. Apply a small amount of clear craft adhesive suitable for glass, then position the dried flowers carefully with a soft brush. Work slowly to prevent the petals from folding or tearing. Once the design is complete, apply a compatible protective coating if the adhesive manufacturer recommends one.
Allow the entire decoration to dry according to the product instructions before adding a light. A battery-operated LED tealight can illuminate the translucent petals and reveal the details of the leaves.
Pale flowers and delicate foliage tend to create a subtle effect, while colorful petals provide stronger contrast. Keep in mind that sunlight can fade botanical materials over time, so display the lantern away from prolonged direct sunlight.
Avoid real candles around dried flowers and paper-thin petals. Using flameless lighting preserves the design and reduces the risk of fire.
5. Turn Empty Tin Cans Into Perforated Lanterns
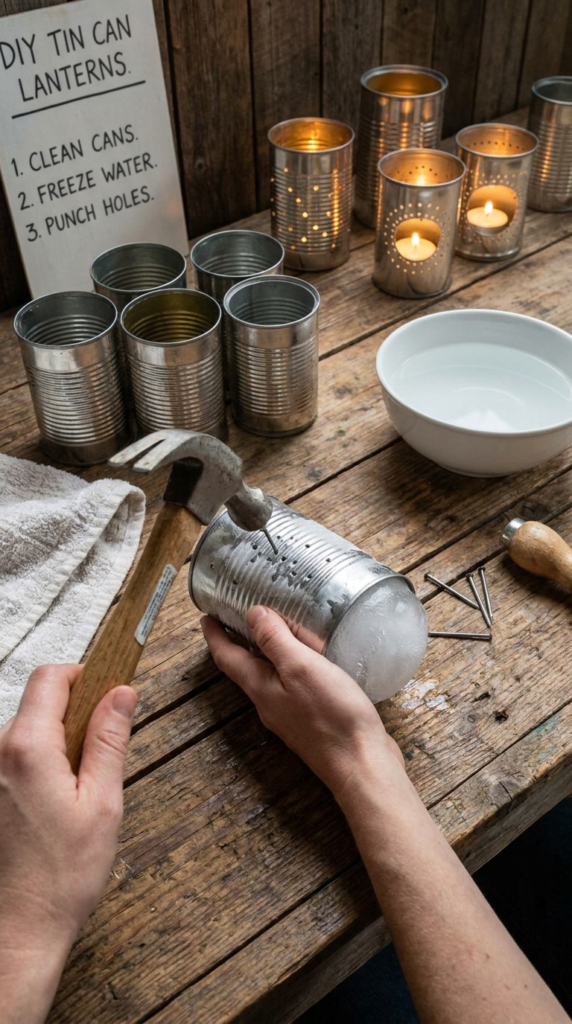
Recycled tin cans can become attractive lanterns with carefully arranged holes that allow small points of light to shine through. Different hole patterns create different effects, from simple geometric designs to stars and decorative borders.
Start with an empty metal can that has been thoroughly washed. Remove the label and check the rim for sharp edges. Fill the can with water and freeze it until the contents become solid. The ice helps support the metal while you make the holes, although the can should still be handled carefully.
Draw a simple pattern on paper and attach it temporarily to the outside of the can. Wearing appropriate eye protection and working on a stable surface, carefully punch holes along the design using a suitable nail and hammer. This step requires adult supervision and should not be attempted by young children.
Once the pattern is complete, allow the ice to melt. Dry the can thoroughly to help prevent rust, then apply a suitable metal paint if desired. Follow the paint manufacturer’s instructions and allow the finish to cure fully.
Place a battery-powered LED light inside the finished lantern. Light shining through the perforations produces small illuminated dots that can form stars, diamonds, or other repeating shapes.
Always inspect the can for sharp edges before use, and never handle it by a rough or unfinished rim. An LED light is preferable to a candle because it avoids exposing the metal and its painted surface to an open flame.
6. Fold Modern Japanese-Inspired Paper Lanterns
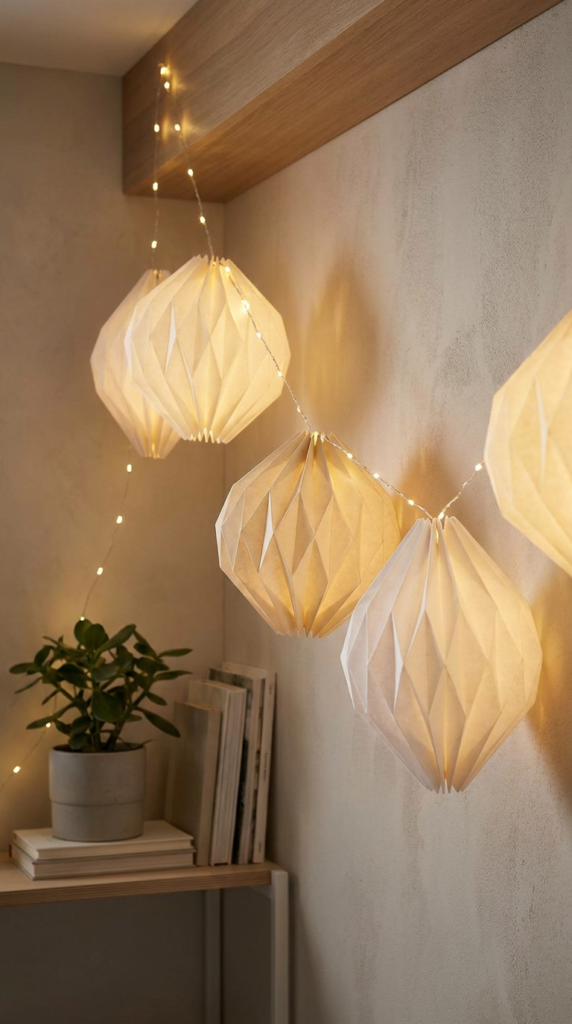
Paper lanterns inspired by Japanese folding techniques can bring a clean, understated look to home decor. Their repeated folds create geometric shadows and soften the appearance of small LED lights.
Choose sturdy paper or lightweight cardstock that can bend without tearing. Measure and mark evenly spaced lines, then score the paper gently with a suitable scoring tool. Fold along the marked lines in alternating directions to create an accordion pattern.
Form the folded sheet into a cylinder or rectangular column and secure the edges with paper-safe adhesive. Add a stable base if the design requires one, making sure that it can support the lantern without tipping over. You can also create several lanterns in different heights for a coordinated display.
Place a battery-operated LED light or a suitable LED fairy-light string inside. The folded material diffuses the illumination, highlighting the repeated ridges and valleys. White and cream paper produces a soft, neutral look, while muted colors can complement a specific room palette.
For a more polished finish, keep the folds evenly spaced and conceal visible seams where possible. Test the light placement before securing the final edges so the illumination is distributed evenly.
Paper is combustible, so never use real candles or hot bulbs inside a paper lantern. Keep the finished decoration away from heat sources and follow the lighting manufacturer’s safety instructions.
7. Make Macrame Hanging Lanterns With Glass Jars
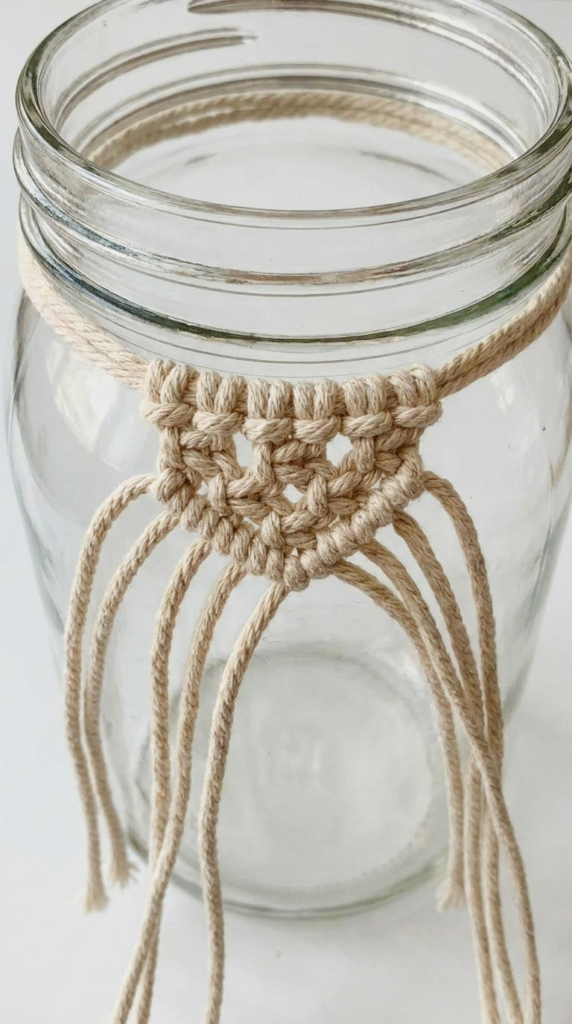
Macrame hanging lanterns combine simple knotting techniques with the transparency of glass. The cord creates a decorative net around the container, allowing the light to remain visible while adding a handmade, textured finish.
Begin with a clean, wide-mouth glass jar and several lengths of sturdy cotton cord. Cut the cords evenly and attach them around a secure starting ring or suitable support near the jar’s rim. Use basic square knots to connect neighboring strands, gradually forming a net that follows the shape of the glass.
Keep the knots consistent and distribute them evenly around the jar. The net should fit snugly enough to hold the container securely without putting excessive pressure on the glass. Finish the lower portion with a series of knots that support the jar’s base.
Before hanging the lantern, inspect every connection and test the completed holder over a padded surface. The glass should not slip, tilt, or press against a weak section of cord. Use a suitable ceiling hook or mounting point rated for the combined weight of the jar and its contents.
Place a battery-operated LED light inside the jar for a soft glow. The cord pattern creates an additional layer of texture around the illuminated glass.
Because hanging glass can cause injury if it falls, keep the lantern away from busy walkways and areas where people may bump into it. For homes with children or pets, a tabletop version may be a more practical choice.
8. Craft Coastal Lanterns With Sea Glass and Driftwood
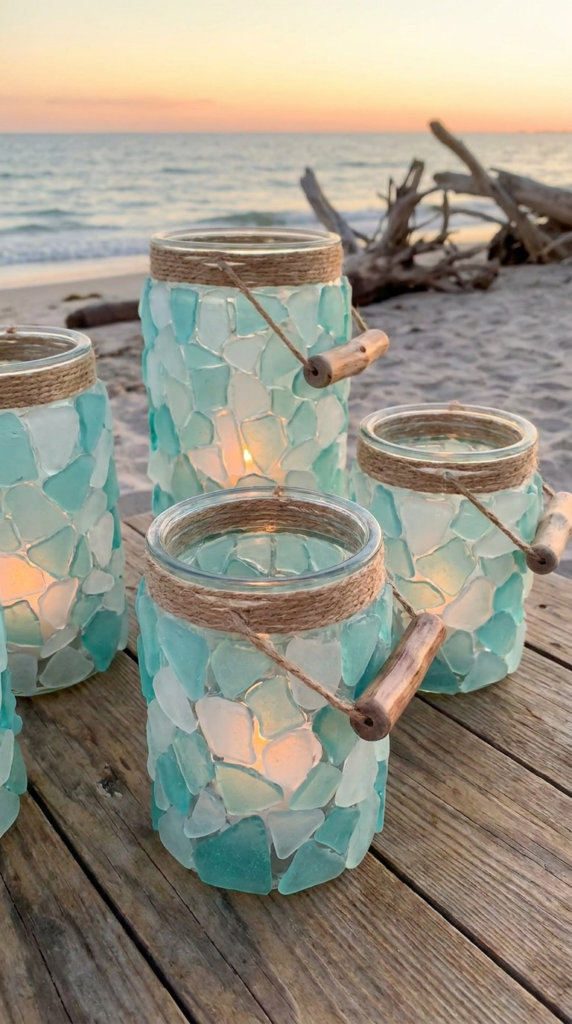
Sea glass and driftwood can give a simple glass lantern a relaxed coastal appearance. Their naturally weathered textures and muted colors work well in beach-inspired rooms, bathrooms, sunrooms, and covered patio areas.
Start with a clear glass cylinder or sturdy jar. Choose smooth decorative sea glass or manufactured sea-glass pieces in colors such as turquoise, pale blue, frosted white, and soft green. Arrange the pieces around the outside of the container before attaching them, checking that the colors are distributed evenly.
Use a clear adhesive specifically suitable for glass and the chosen decorative pieces. Apply it according to the manufacturer’s instructions, leaving enough space between pieces if you want the original glass to remain visible. Allow the adhesive to cure fully before moving the lantern.
Wrap the top rim with natural jute twine for added texture, taking care not to obstruct the opening or interfere with the light source. A small piece of smooth driftwood can be added as a decorative accent, provided it is securely attached and does not create an unstable handle.
Place a battery-operated LED light inside the lantern. The colored glass softens the appearance of the light and creates a gentle coastal accent.
If collecting materials outdoors, follow local rules and avoid removing objects from protected beaches or natural areas where collection is prohibited. Clean and dry the materials before use, and avoid using real candles near twine, wood, or adhesives.
9. Build Layered Cardstock Shadow Box Lanterns
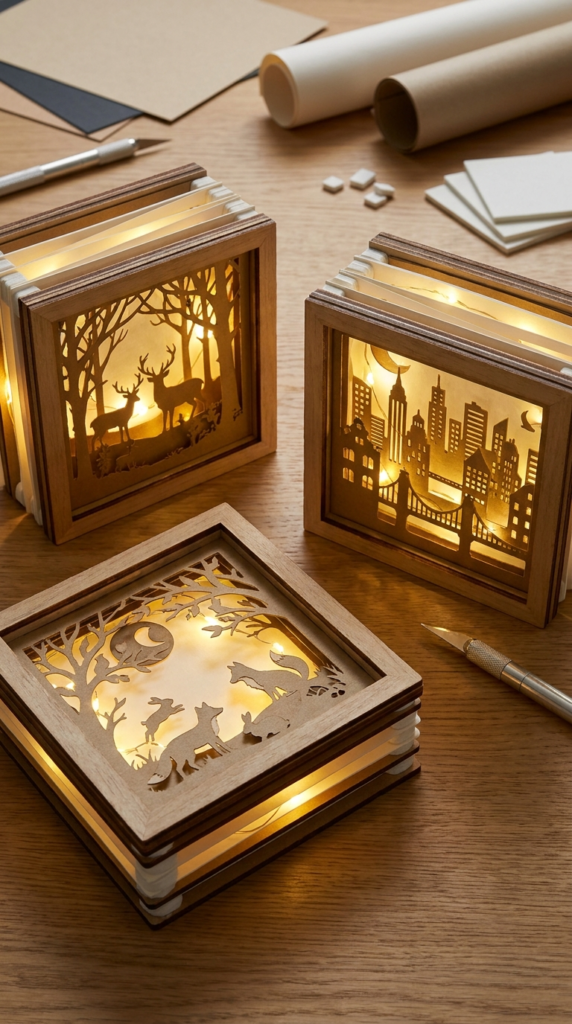
Cardstock shadow box lanterns use several paper layers to create a three-dimensional scene. When illuminated from behind, the separate layers produce depth and make simple cutout designs appear more detailed.
Choose a theme such as a woodland landscape, city skyline, mountain range, or collection of trees. Cut several panels from cardstock, making each one slightly different so the shapes overlap when viewed from the front. A craft knife, cutting mat, or digital cutting machine can help create clean edges.
If using a craft knife, work on a stable cutting surface and keep fingers away from the blade’s path. Younger crafters should use pre-cut pieces or work with adult assistance.
Build a square or rectangular frame and position the cut panels inside it. Small foam spacers or other suitable supports can keep the layers separated, creating visible depth between the foreground and background. Check that the panels remain straight and that the structure does not shift when moved.
Place a low-heat LED light behind or within the frame, depending on the design. The light highlights the cutout shapes and produces a soft silhouette effect. Warm white lighting can create a cozy atmosphere, while neutral white light may make architectural scenes appear sharper.
Keep paper panels away from hot bulbs and use only lighting appropriate for enclosed decorative projects. A well-designed shadow box should provide enough space for the light source without placing it directly against the cardstock.
10. Create Faux Terrarium Lanterns With Moss and Pebbles
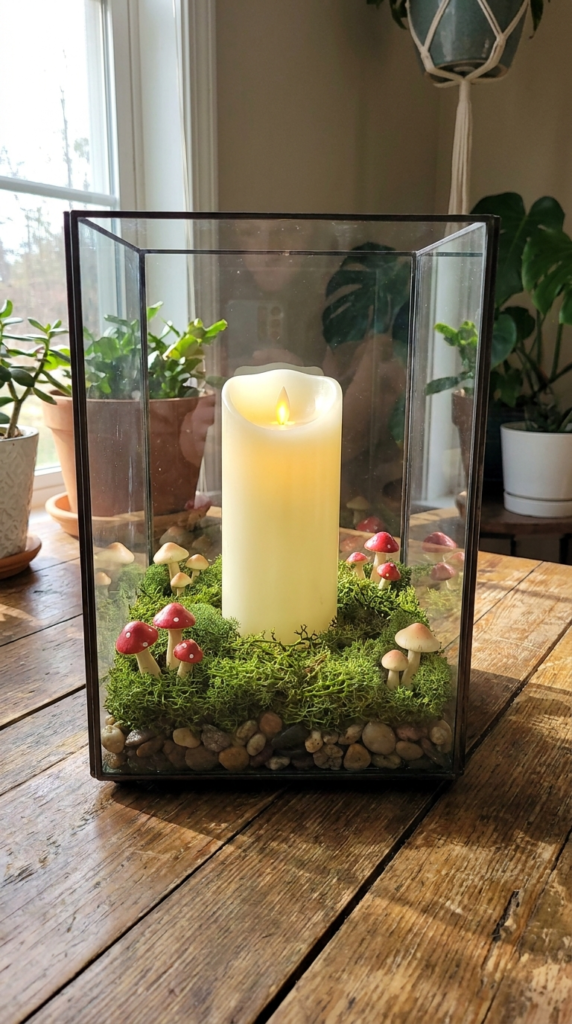
A faux terrarium lantern combines miniature garden decorations with the structure of a glass or metal lantern. It provides the appearance of a tiny planted landscape without the watering and maintenance required by live plants.
Choose a lantern with enough interior space for decorative materials and an LED light. Begin by arranging preserved moss across part of the base. Add small pebbles, artificial mushrooms, miniature ornaments, or tiny pieces of decorative wood to create a layered landscape.
Keep the arrangement low around the center so the light remains visible. A tall battery-operated LED pillar candle can act as the focal point, while the moss and stones provide texture around its base.
Before attaching any decorations, plan the layout and check that the materials will not interfere with the light or make the lantern unstable. Use adhesives only where necessary, especially if you may want to rearrange the display later.
This style can complement woodland, cottage-inspired, and nature-themed interiors. Green moss provides a natural-looking backdrop, while small decorative details introduce a sense of scale and character.
Use a flameless candle rather than a real one. Preserved moss, artificial plants, and decorative adhesives may be combustible or heat-sensitive, so keep them away from open flames and hot surfaces. If the lantern has glass panels, handle them carefully when arranging the contents.
11. Repurpose Old Book Pages Into Decorative Lanterns
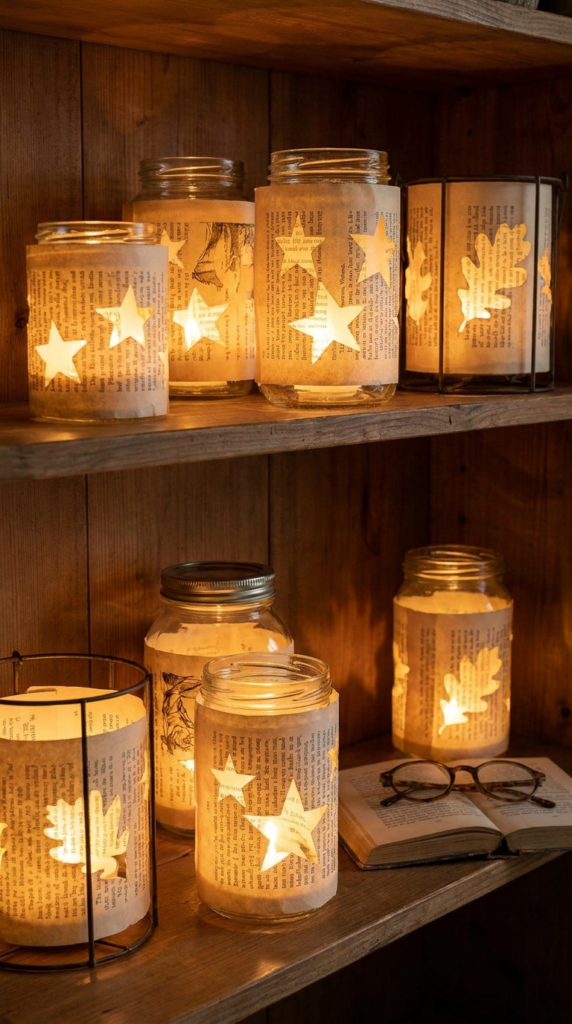
Worn book pages can become decorative lantern coverings, giving unwanted paper materials a new use. Printed text creates an interesting background, particularly when combined with simple cutout shapes and soft LED illumination.
Choose pages from a damaged or unwanted book, ensuring that the paper is clean and dry. Cut out small shapes such as stars, leaves, moons, or circles. You can place the cutouts around a clear glass jar or attach the pages to a lightweight wire frame to create a cylindrical shade.
If covering a jar, use an adhesive suitable for paper and glass. Smooth the paper gently to reduce wrinkles and allow it to dry completely. For a wire-frame lantern, secure the paper so it cannot sag into the light source or become loose during use.
Place a battery-operated LED light inside the finished decoration. The illuminated openings contrast with the printed words, giving the lantern a literary appearance that works well on bookshelves, desks, and reading tables.
For a coordinated display, use pages with similar tones or combine the text with simple botanical cutouts. Avoid overcrowding the design with too many shapes, since a few clear openings can create a more striking effect.
Keep paper away from real candles, and do not place the lantern near heat sources. If using pages from a book with sentimental or historical value, consider photocopying the pages rather than cutting up the original.
12. Make Yarn-Wrapped Globe Lanterns
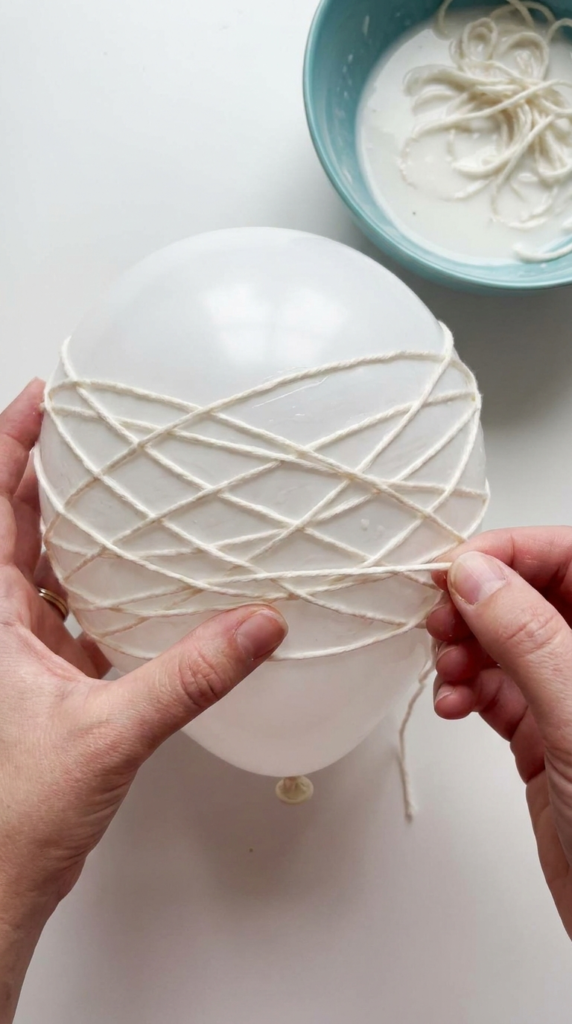
Yarn-wrapped globes create airy, rounded decorations that can be displayed individually or grouped together. Their open structure allows light to pass through the spaces between the strands, creating an attractive pattern of lines and shadows.
To make one, inflate a balloon to the desired size and tie it securely. Cover the work surface before preparing a mixture of suitable craft glue and water according to the product instructions. Dip cotton yarn into the mixture, remove excess liquid, and wrap the yarn around the balloon in overlapping directions.
Leave enough openings for the light to shine through and for the balloon to be removed later. Avoid wrapping the yarn so tightly that the balloon changes shape. Once the surface is covered, suspend the balloon in a protected area and allow the yarn to dry fully.
When the shell is firm, carefully puncture the balloon and remove the deflated material through one of the openings. Trim loose strands and inspect the globe for weak or soft sections before use.
Place a small battery-operated LED light or a suitable LED fairy-light string inside the finished sphere. Warm white lights create a cozy appearance, while colored lights can produce a more playful effect.
The globe should remain lightweight and must not be exposed to moisture. Keep the yarn shell away from candles, heaters, and hot bulbs. If hanging it, use a secure support and ensure the light source cannot become trapped against the yarn.
13. Decorate Frosted Glass Lanterns With Snowflake Patterns
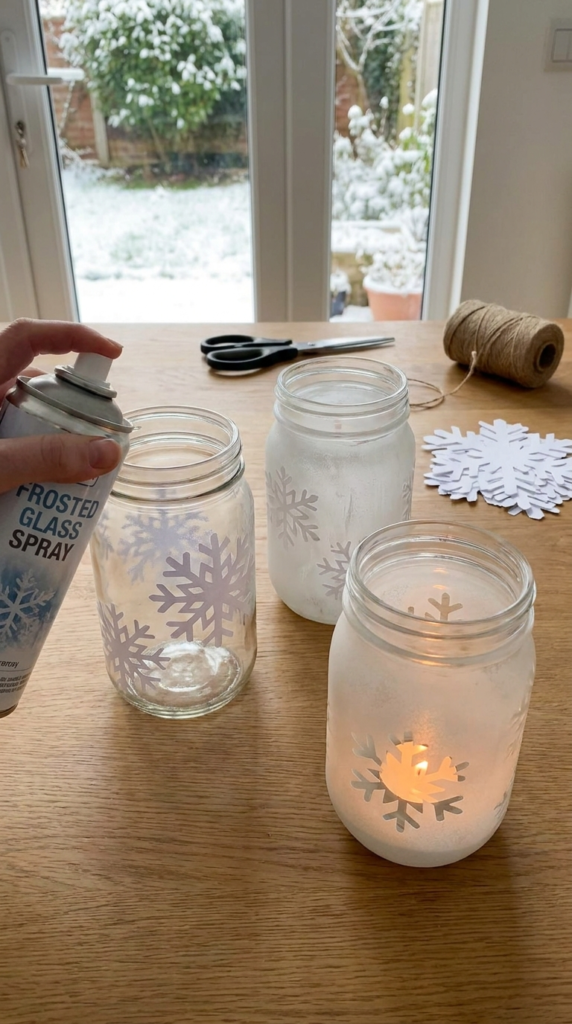
Frosted snowflake lanterns are an attractive option for winter decorating, holiday tables, and seasonal displays. The contrast between frosted glass and clear snowflake shapes creates a delicate pattern that becomes more noticeable when the lantern is illuminated.
Start with a clean glass jar or vase. Cut snowflake shapes from paper or use suitable removable stencils, then position them on the outside of the glass. Press the edges down carefully so paint is less likely to seep beneath the shapes.
Apply a glass-compatible frosted coating according to the product instructions. Use light, even coats rather than applying too much material at once. Work in a well-ventilated area and protect nearby surfaces from overspray.
If using paper stencils with a coating that permits early removal, remove them at the recommended stage to create clear windows in the frosted finish. Follow the specific product guidance, since removal timing varies between paints and coatings. Allow the decoration to cure fully before handling it extensively.
Place a battery-operated LED tealight inside the jar. The frosted surface diffuses the light, while the clear snowflake shapes stand out against the softer background.
You can adapt the technique for other seasons by replacing snowflakes with leaves, stars, flowers, or simple geometric shapes. Use flameless lighting to avoid exposing the painted surface to excessive heat, and keep the lantern away from moisture if the finish is not designed for damp conditions.
14. Paint Glass Lanterns With Moroccan-Inspired Tile Patterns
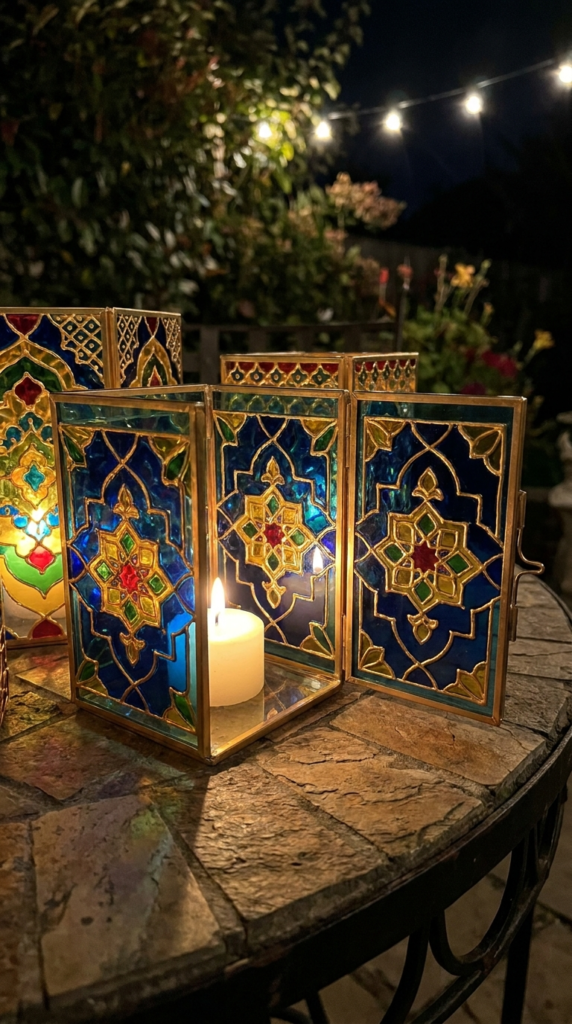
Moroccan-inspired lanterns feature geometric shapes, colorful glass-like finishes, and decorative outlines. Recreating this look on glass panels can produce a vibrant accent for a dining area, sheltered patio, or living room.
Begin with a clean glass jar or lantern with smooth panels. Plan a repeating pattern of diamonds, arches, stars, or intersecting lines. Use a glass-compatible dimensional liner to outline the shapes, allowing the lines to dry as directed before adding color.
Fill selected sections with transparent glass paint in shades such as cobalt blue, deep yellow, turquoise, or green. A limited palette helps the pattern look coordinated, while alternating colors can emphasize the geometry. Apply the paint carefully to avoid covering the raised outlines.
Allow the completed design to dry and cure fully according to the product instructions. Some decorative glass paints are intended for display pieces rather than items that will be washed, handled frequently, or exposed to high temperatures, so check the product’s intended use.
Place a battery-powered LED light inside the lantern to highlight the colors and raised details. The illuminated glass creates a colorful display without the heat of a real candle.
For a more understated version, use two complementary colors and a simple repeating motif. For a bolder design, vary the shapes while maintaining consistent spacing. In either case, keep the paint and decorative materials away from open flames and use a light source suitable for the finished container.
15. Make Floating-Effect LED Lanterns With Water Beads
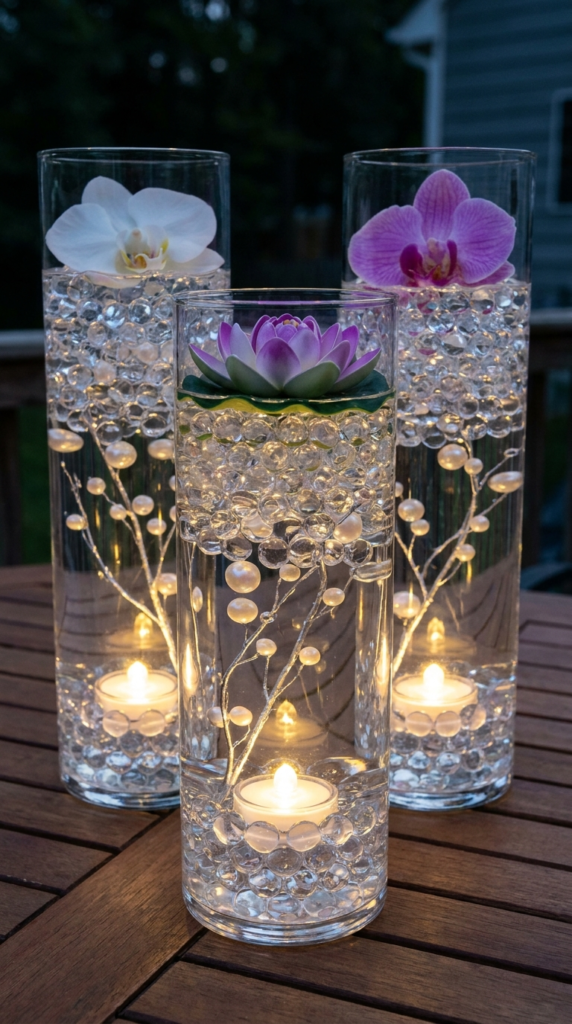
Water beads and waterproof LED lights can create a decorative display that gives the impression of floating objects inside a glass container. This idea works well for event centerpieces, themed tables, and colorful decorative arrangements.
Start with a tall, stable glass vase and follow the manufacturer’s directions for preparing decorative water beads. If the beads require soaking, allow them to expand fully before arranging the display. Never pour dry expanding beads into a finished arrangement where they could swell unexpectedly.
Add the expanded beads to the vase and arrange waterproof LED lights among them. Check that the lights are specifically designed for the intended conditions and that their battery compartments are sealed as directed. Add artificial flowers or lightweight decorative elements near the top to create a layered appearance.
The transparency of the beads allows the lighting to remain visible through the arrangement. Clear beads create a subtle effect, while colored beads can add more visual interest. Artificial flowers in white, pink, or pale blue can complement the illumination without making the container look crowded.
Water beads can present a serious choking and ingestion hazard, especially for young children and pets. Keep them securely contained and out of reach, and do not use them in homes or settings where they could be accessed by children or animals. Never allow anyone to swallow them or put them in their ears or nose.
If you need a child-friendly alternative, use decorative glass pebbles or other non-expanding materials instead. Keep the vase on a stable surface, avoid overfilling it, and follow the lighting manufacturer’s safety guidance.