
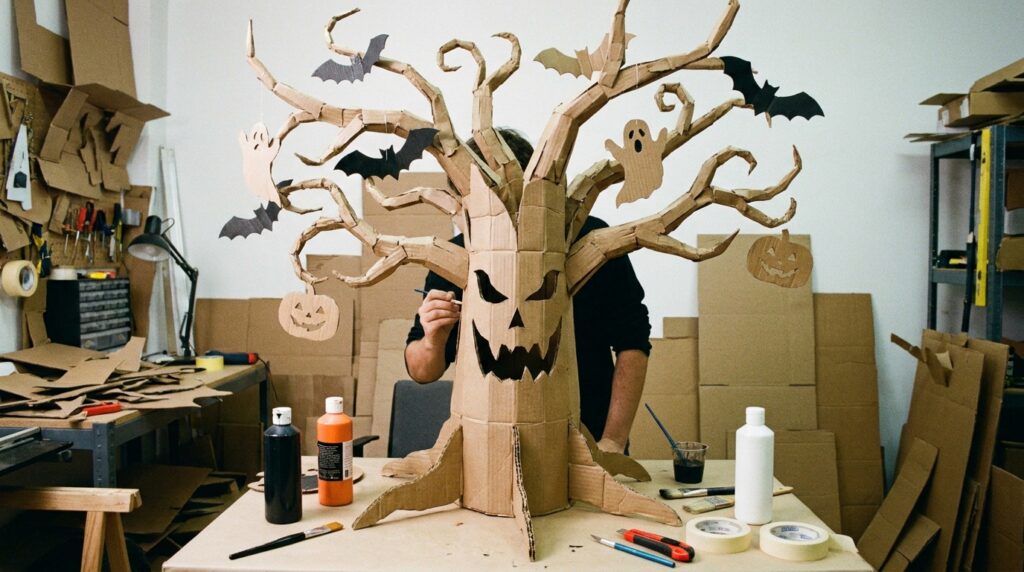
Halloween decorating doesn’t have to mean spending a lot on store-bought decorations. With some leftover cardboard, basic craft supplies, and a little imagination, you can create fun seasonal pieces to give your home a festive Halloween atmosphere. Cardboard is easy to customize, making it useful for creating signs, silhouettes, spooky shapes, wall decorations, and other creative displays.
You can keep your projects simple for a quick afternoon activity or add extra details for a more personalized look. Whether you’re decorating a porch, living room, classroom, or party space, these DIY cardboard Halloween decoration ideas can inspire affordable projects that make your seasonal setup feel unique.
Cardboard Spider Display
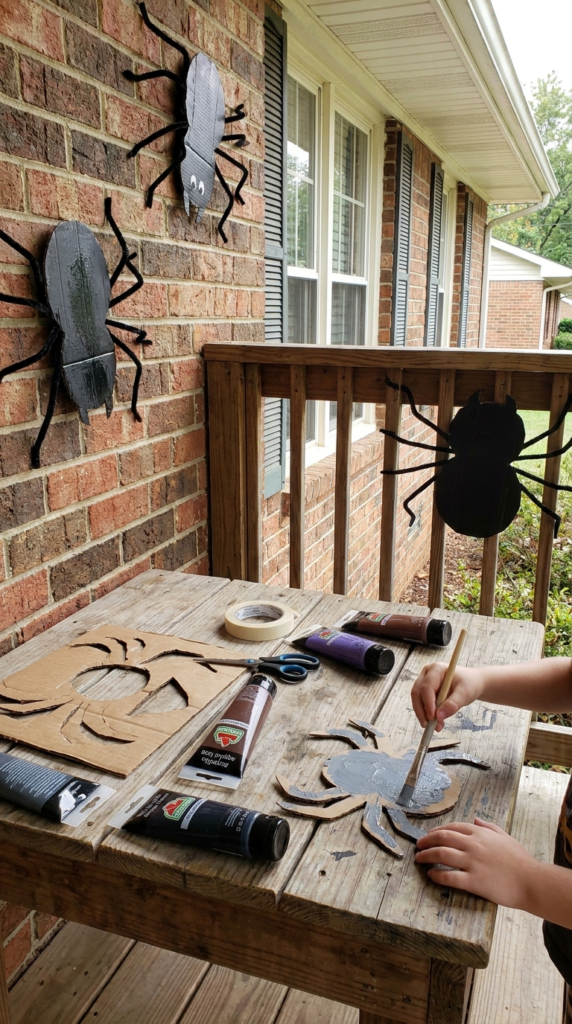
Turn ordinary cardboard into a creepy spider decoration for Halloween. This project is a practical way to reuse shipping boxes or other sturdy cardboard while creating something that can become part of a spooky display.
Cut the cardboard into the basic shapes needed for the spider, then add legs and simple facial details. Black paint can give the finished piece a traditional Halloween appearance, while gray, purple, or dark brown can create a slightly different look.
Several cardboard spiders can also be made in different sizes and arranged around an entrance, wall, porch, or Halloween party area. If children are helping, an adult should handle sharp cutting tools while younger participants can help with painting and decorating.
Hanging Cardboard Bats
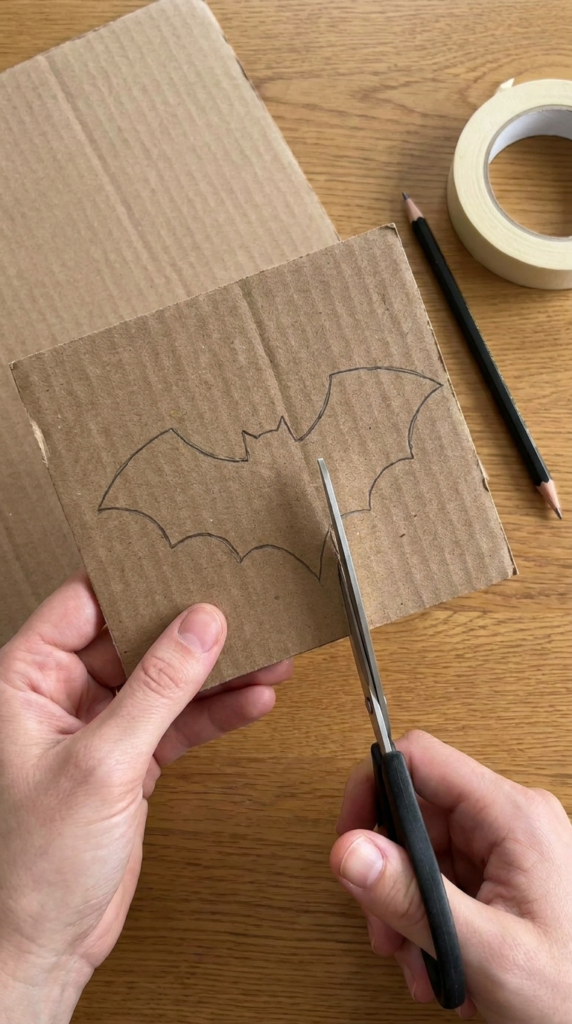
Bats are another easy Halloween shape to recreate with cardboard. Their recognizable silhouette means you can create an effective decoration without adding complicated details.
Start by drawing a bat outline onto cardboard and cutting it out. Paint the shape black or leave the natural cardboard visible for a more rustic appearance. Once finished, attach string or fishing line if you want the bats to hang from a ceiling, doorway, or covered porch.
For a larger display, make several bats in different sizes and arrange them as though they are flying across the room. You can also attach smaller bats to walls or windows using appropriate removable mounting materials.
Cardboard Mummy Decoration
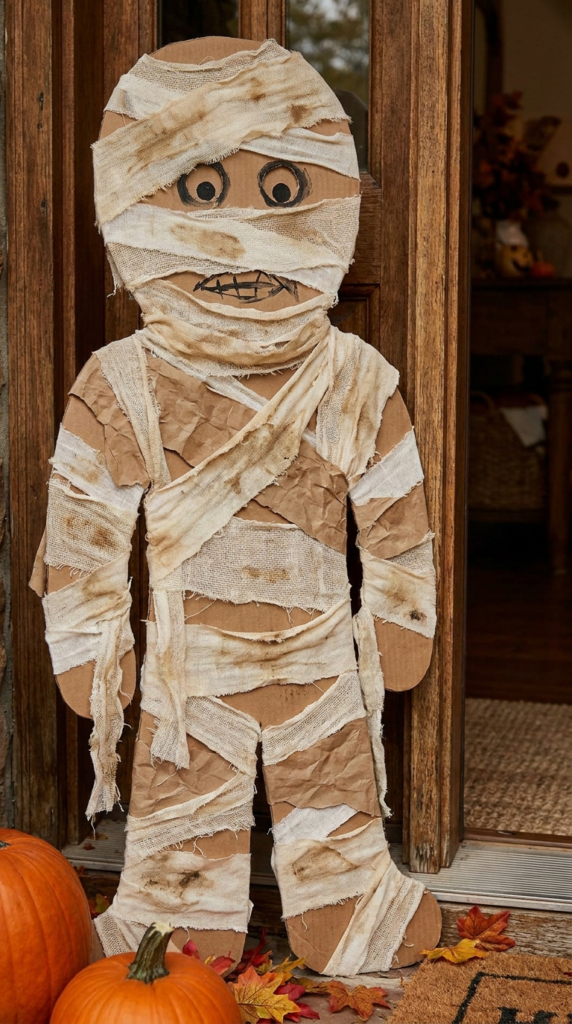
Create a mummy using cardboard as the foundation for a simple Halloween character. The basic shape can be cut from a large piece of cardboard and then covered with strips of paper, fabric, gauze, or other lightweight materials to imitate traditional mummy wrappings.
Leave an opening for the eyes and add simple facial details once the main wrapping is complete. The uneven layers can actually make the decoration look more interesting because they give it a handmade, aged appearance.
A standing mummy can be placed near a doorway, while a smaller version can be displayed on a shelf or table. Using cardboard makes it possible to adjust the size according to the space you have available.
Ghost Family Portrait
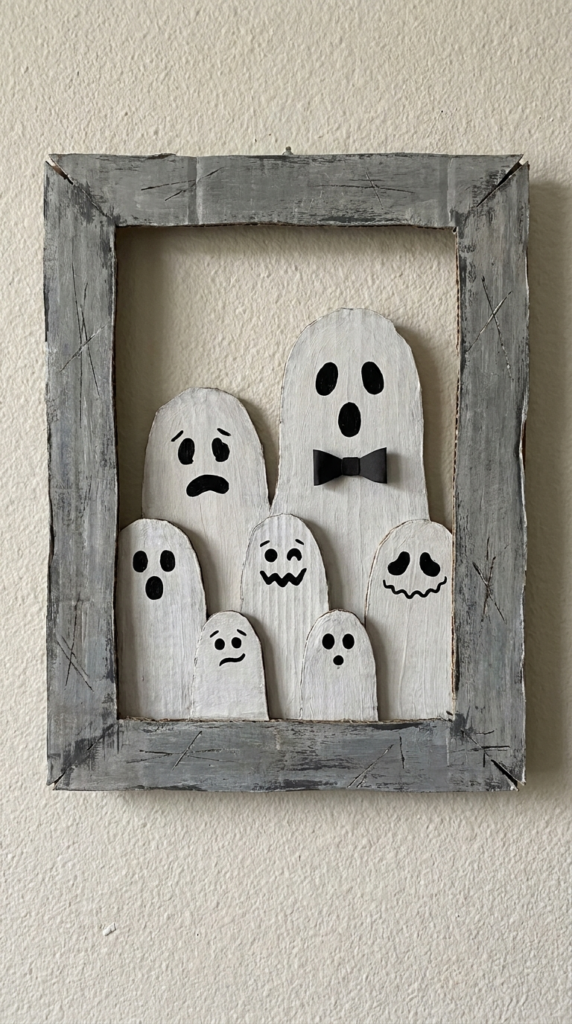
Give your Halloween decorations a playful twist with a cardboard ghost family portrait. Instead of creating one ghost, make several characters of different sizes and arrange them together like a family photograph.
White paint can be used for the bodies, while black paper or paint can create simple eyes and mouths. Each ghost can have its own expression, making the group more entertaining.
For an extra decorative touch, create a cardboard frame around the characters. A distressed gray or black finish can make the frame look old and Halloween-inspired.
This idea can work especially well as a wall display because the finished arrangement resembles a quirky seasonal portrait rather than a traditional decoration.
Cardboard Haunted House
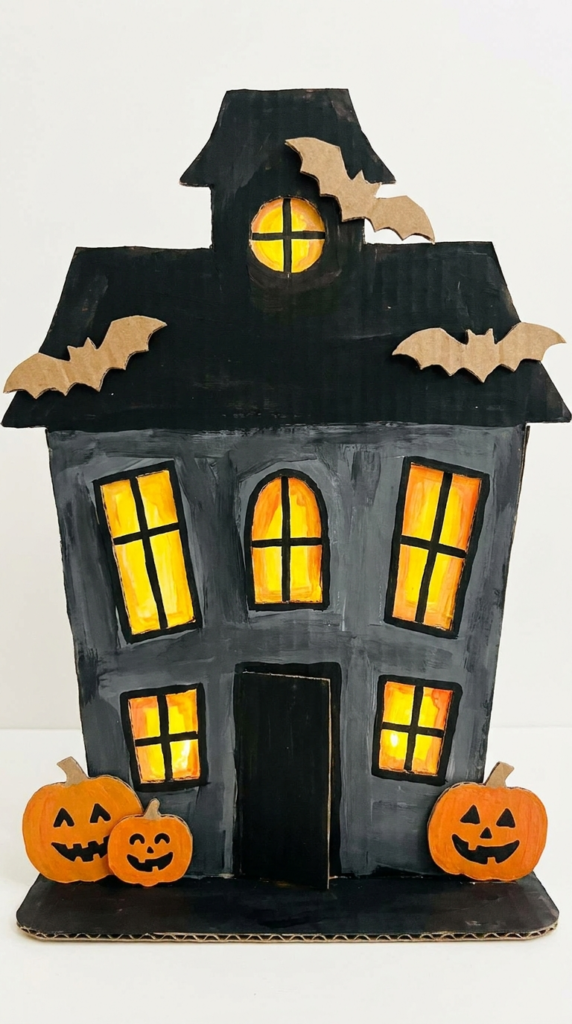
A haunted house is a natural centerpiece for a cardboard Halloween display. With a large piece of cardboard, you can create a simple house facade featuring crooked windows, a doorway, a roofline, and other spooky details.
Black and gray paint can establish the dark appearance, while yellow or orange details can make the windows appear illuminated. Add cardboard bats, pumpkins, ghosts, or branches around the structure to make the scene more complete.
The design does not have to be extremely detailed. Even a simple silhouette with uneven rooflines and unusual windows can communicate the haunted-house theme.
If you are making this with children, let them decide what features the house should have before beginning the project.
Cardboard Graveyard Scene
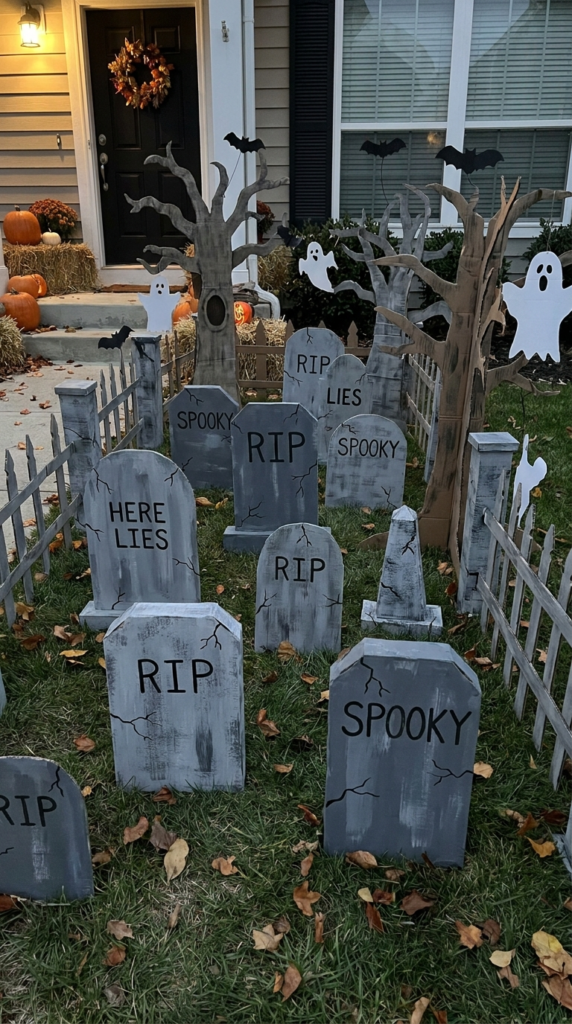
Build a small cardboard graveyard to create a complete Halloween scene. Tombstones can be cut from cardboard and decorated with simple shapes, cracks, and lettering.
Arrange several tombstones at different heights to give the display more depth. A few cardboard trees, fences, bats, or ghosts can be added around them to make the scene feel more developed.
Gray paint is an obvious choice for the tombstones, but using several shades can make the pieces look less uniform. A little dry-brushing with a lighter shade can also create the appearance of weathered stone.
This decoration can be displayed near a front entrance, along a wall, or as part of a larger Halloween scene.
Cardboard “Keep Out” Entrance Sign
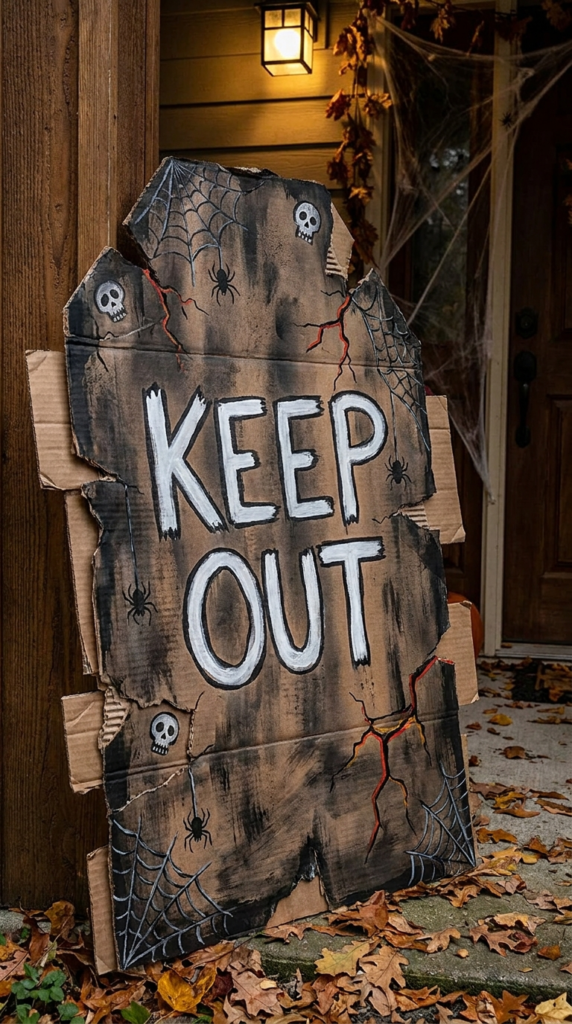
Give guests a spooky message before they even enter your Halloween setup. A large cardboard “Keep Out” sign can be placed near a doorway or entrance to establish the theme immediately.
Cut the cardboard into a sign shape and paint the background in a dark color. Add large, easy-to-read lettering and decorate the edges with cracks, cobwebs, warning symbols, or other Halloween details.
For an aged appearance, lightly distress the edges after the paint has dried. You can also layer smaller cardboard pieces behind the sign to give it more dimension.
Make sure the finished decoration does not block walkways, doors, or emergency exits.
Spooky Halloween Entrance
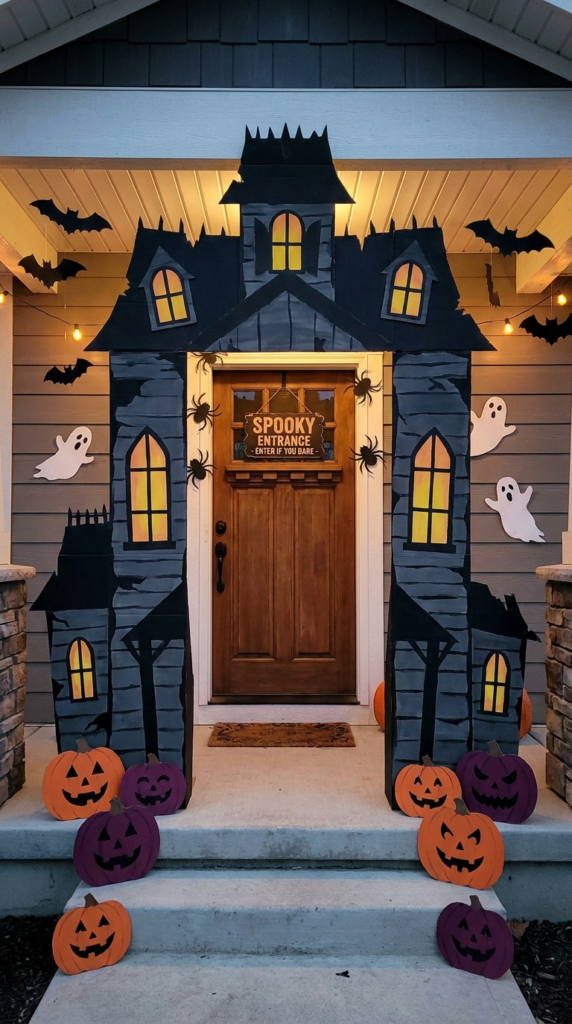
Turn the entrance into part of the Halloween decoration rather than leaving it as an empty transition area. Cardboard can be used to create panels, silhouettes, signs, arches, or character cutouts around the doorway.
A large haunted-house facade can frame the entrance, while smaller bats, ghosts, pumpkins, and spiders can fill the surrounding space.
Choose a consistent color palette so the different decorations look like part of one display. Black, orange, white, gray, and deep purple are easy combinations for a Halloween setup.
Because cardboard is lightweight, many pieces can be designed to be temporary and removed after the season.
Stacked Cardboard Pumpkins
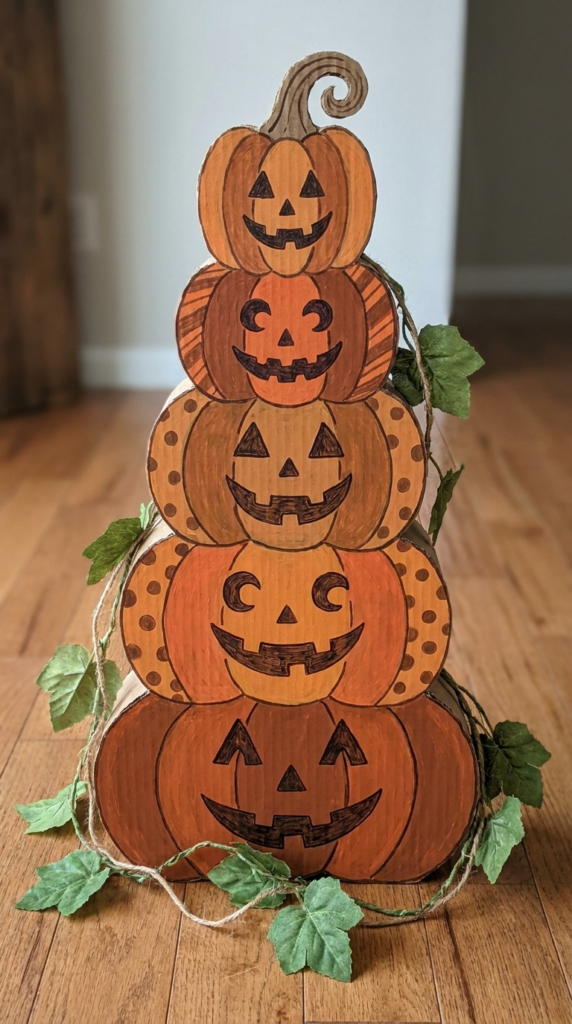
Create a vertical pumpkin display by stacking several cardboard pumpkin shapes together. This is a useful idea when you want Halloween decor without taking up too much floor space.
Cut pumpkins in several sizes, then decorate each one with orange paint and simple facial or seasonal details. Layer them from largest at the bottom to smallest at the top.
The pumpkins do not necessarily need to be identical. Try giving each one a different expression, pattern, or finish to make the stack more interesting.
A cardboard stem can be added to the top pumpkin, while leaves and vines can be used around the base or sides. Make sure the structure is stable before placing it in a high-traffic area.
Floating Cardboard Ghost
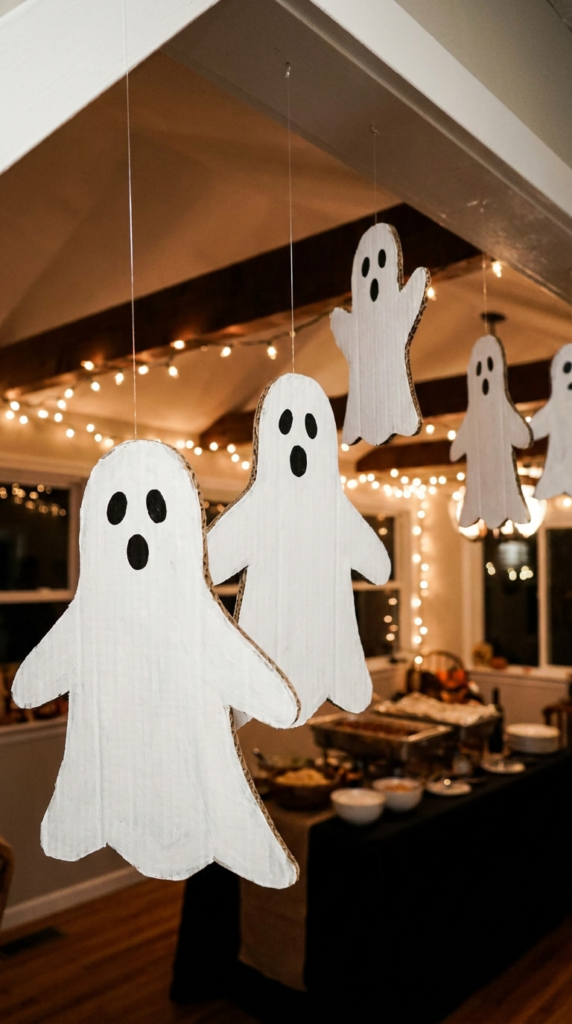
Create the appearance of a floating ghost by using cardboard for the character’s face or central structure and suspending it from above.
A simple ghost silhouette can be painted white and given dark eyes and a mouth. Hanging the piece with clear or subtle string can make the support less noticeable from a distance.
You can create multiple ghosts and place them at different heights to produce a floating group. This works especially well in an entryway, covered porch, or indoor party space.
Keep hanging decorations safely away from ceiling fans, heat sources, and areas where people could accidentally catch on the string.
Cardboard Spider Web
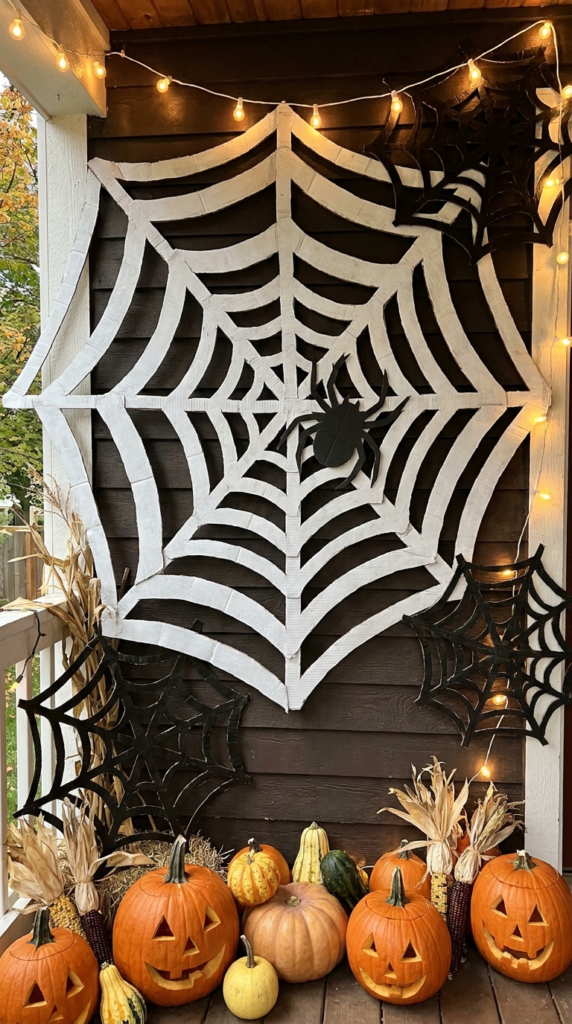
A large cardboard spider web can become a strong background piece for other Halloween decorations. Instead of making a traditional fabric web, cut the design from cardboard and paint it in a contrasting color.
White or gray can stand out against a black background, while black can work well against lighter walls or doors.
Add a cardboard spider in the center or near one of the edges for extra detail. Multiple webs can also be arranged around a larger display to connect individual decorations visually.
For a more dimensional effect, create several web pieces in different sizes and layer them carefully.
Giant Creepy Spider
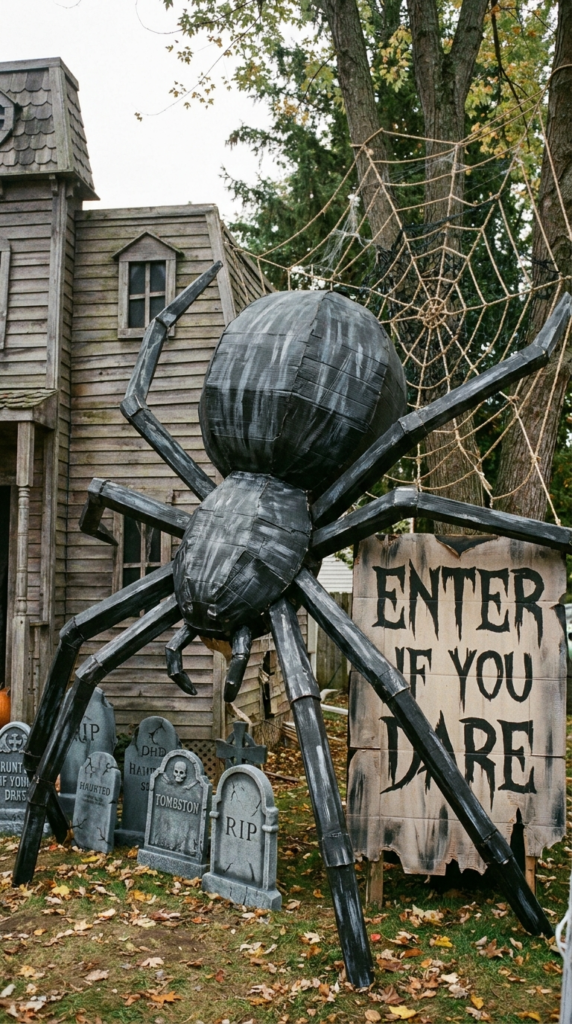
Go larger with a cardboard spider that can become one of the main focal points of your Halloween display. A large body and long legs can make the decoration immediately noticeable without requiring complicated construction.
Use sturdy cardboard for the body and reinforce the leg sections if the decoration will be standing outdoors in a sheltered location.
Black paint creates a classic spider appearance, but you can add gray highlights or subtle patterns to make the body more detailed.
A giant spider can be positioned beside a haunted house, graveyard, entrance sign, or oversized web to create a complete Halloween scene.
Cardboard Halloween Archway
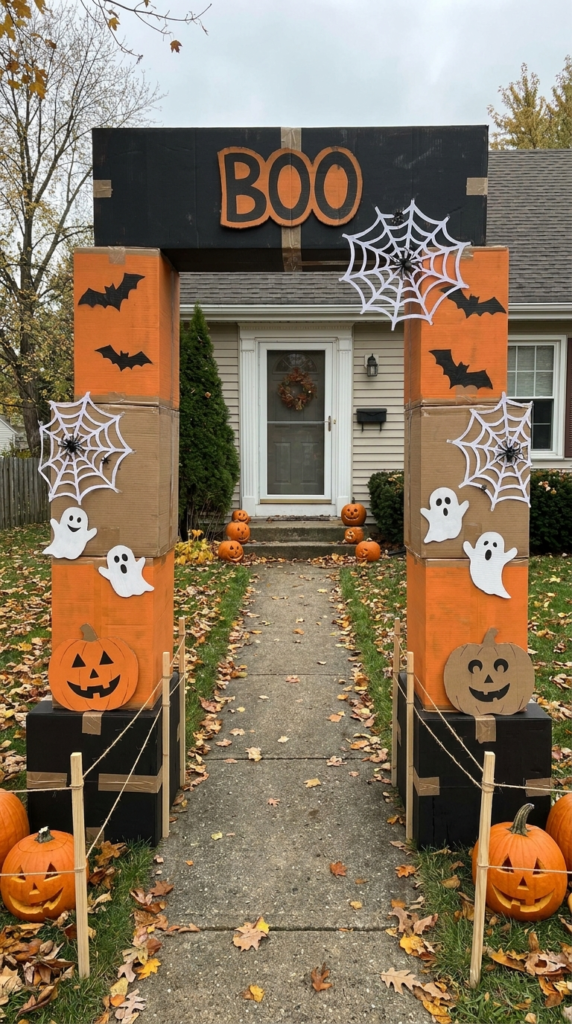
Create a dramatic archway from cardboard to frame a doorway or pathway. The arch can be decorated with bats, pumpkins, spider webs, ghosts, or other seasonal elements.
Start with a sturdy structure and make sure it is properly supported before decorating. The surface can then be painted to match the rest of your Halloween display.
An arch does not need to be overly complicated. Even a simple curved top with a few carefully placed decorations can make an entrance feel more intentional.
If the arch is being used outdoors, keep it protected from rain and moisture because cardboard can weaken quickly when exposed to water.
Cardboard Coffin Prop
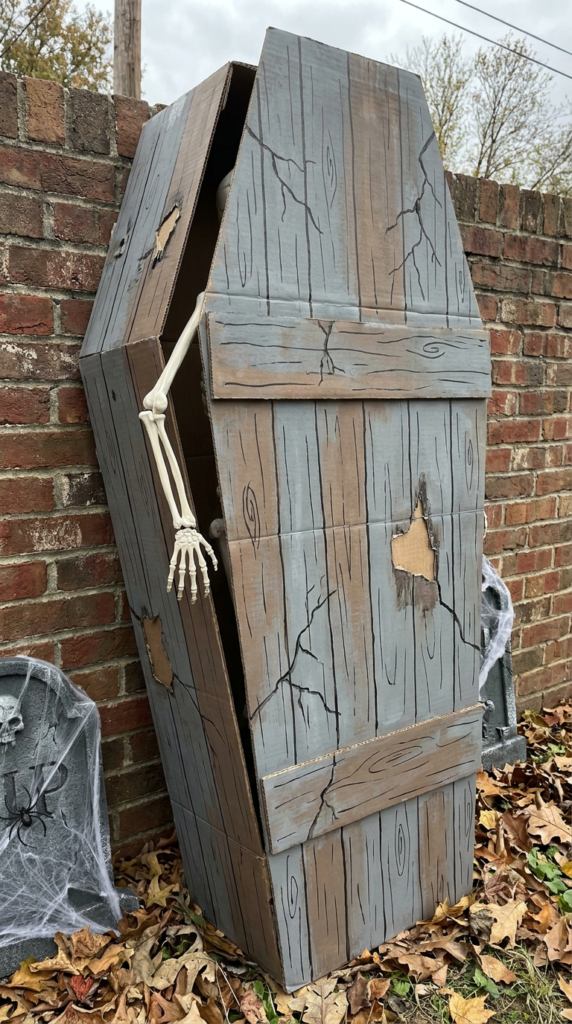
A cardboard coffin can add a classic spooky element to a Halloween display. Cut the main coffin shape from sturdy cardboard and reinforce the back if you want it to stand upright.
Paint it gray, brown, black, or another weathered-looking color. Simple decorative lines can imitate wooden boards, while small cracks or distressed areas can make the prop look aged.
The coffin can be displayed vertically against a wall or incorporated into a larger scene with skeletons, ghosts, or tombstones.
Avoid placing heavy objects on top of the cardboard structure, especially if it has not been reinforced properly.
Decorative Cardboard Garland
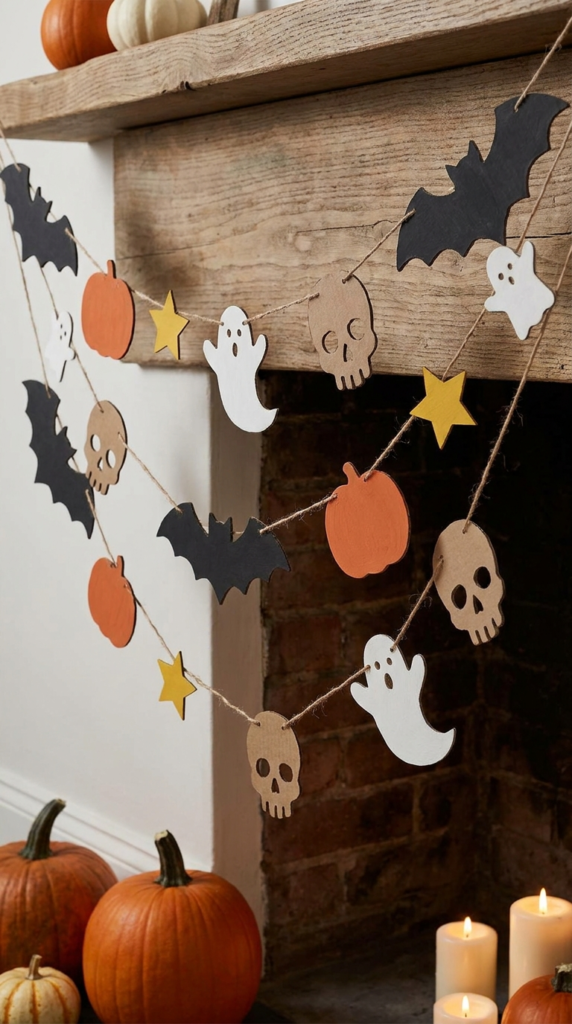
Create a Halloween garland by cutting repeated shapes from cardboard. Pumpkins, bats, ghosts, skulls, stars, and spiders can all work as individual pieces.
Paint the shapes in coordinated colors and allow them to dry completely before connecting them with string, ribbon, or twine.
Mixing several shapes can make the garland more visually interesting than repeating a single design. You can also vary the sizes so the decoration has a more natural rhythm.
Hang the finished garland across a wall, mantel, covered porch, doorway, or party table. Because cardboard is easy to customize, you can make the garland as short or long as the space requires.
Mini Cardboard Halloween House
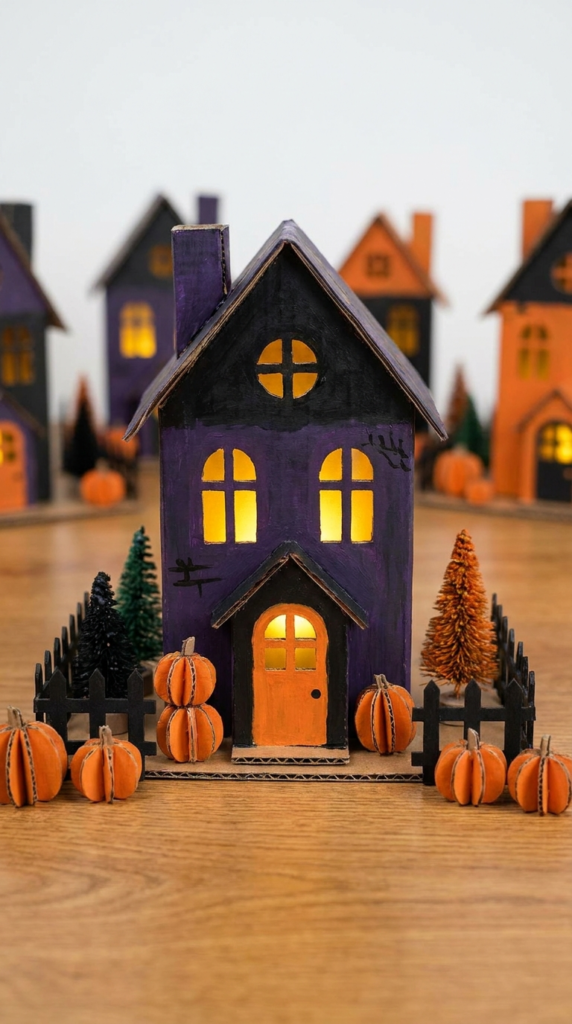
A smaller cardboard Halloween house can be used as a tabletop decoration or as part of a miniature spooky village. The basic structure can be made from cardboard panels, with windows and doors cut or drawn onto the surface.
Paint the house in dark shades and add warm-colored windows for contrast. Tiny cardboard pumpkins, bats, fences, or trees can be placed around the building.
You can make several houses with slightly different designs and arrange them together as a miniature Halloween neighborhood.
This version is particularly suitable for craft sessions because the individual pieces are manageable and can be decorated before being assembled.
Cardboard Spooky Witch
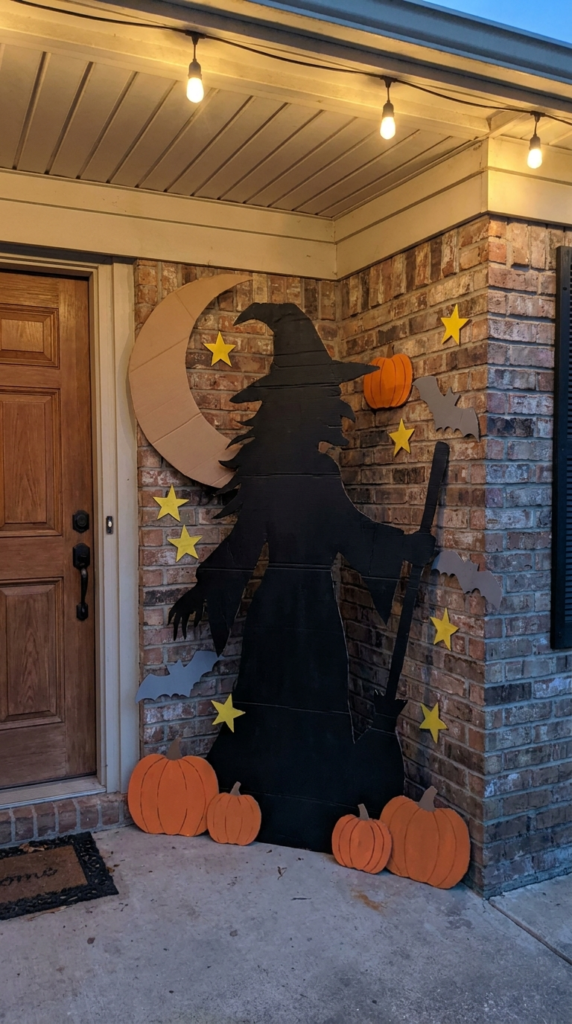
Create a witch silhouette from cardboard for a Halloween decoration that can be displayed against a wall, near an entrance, or beside a larger scene.
A pointed hat, flowing clothing, and broom can make the character immediately recognizable. Paint the silhouette black or use different colors if you want a more playful appearance.
The witch can also be surrounded by cardboard pumpkins, stars, bats, or a large moon to create a complete scene.
For an outdoor display, keep the cardboard protected from rain and make sure the figure is securely supported so it does not fall over in the wind.
RIP Ghost Display
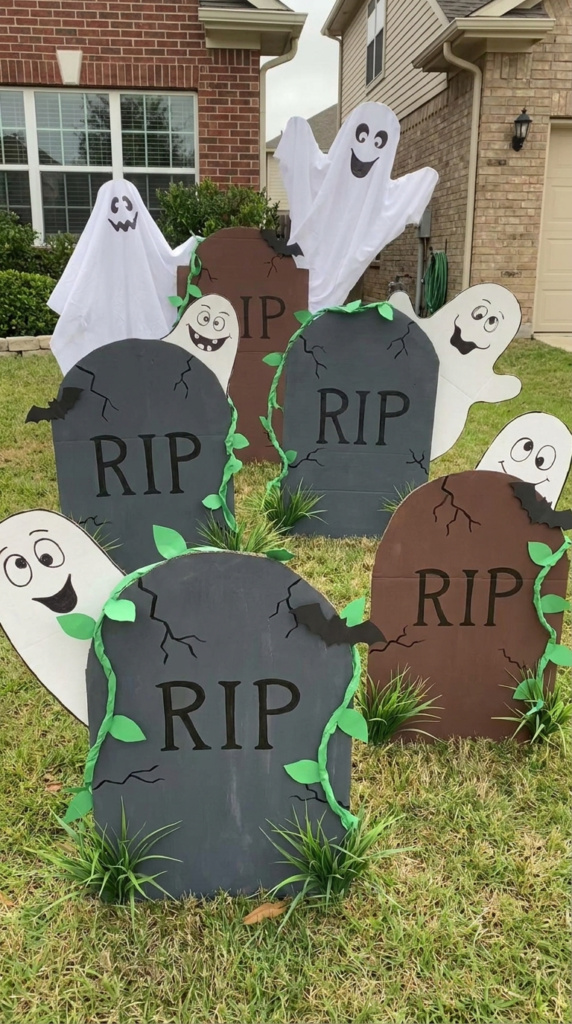
Combine ghost shapes with cardboard tombstones to create a playful graveyard-inspired decoration. The tombstones can feature simple “RIP” lettering, while white ghosts appear to rise from behind or around them.
The contrast between the dark tombstones and lighter ghosts can make the display easy to see from a distance.
Add cracks, vines, grass shapes, or small bats to give the scene additional detail. You can also create ghosts with different expressions so the display feels more playful than frightening.
This design works well when grouped with other cardboard graveyard decorations.
Cardboard Scary Handprints
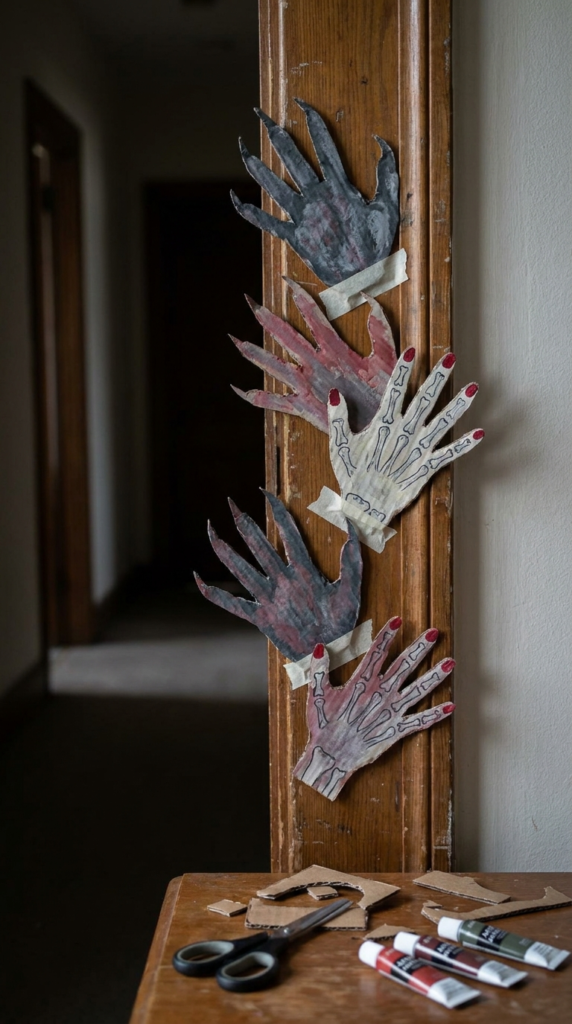
Turn handprint shapes into creepy Halloween decorations using cardboard. Trace a hand several times, cut out the shapes, and arrange them so they appear to reach around a doorway, wall, or display.
Paint the hands white, gray, red, or another Halloween-inspired shade depending on the look you want.
You can add scratches, painted nails, bones, or other details to make the shapes more distinctive. Several hands placed together can create the impression of something reaching out from behind a wall or door.
Because cardboard handprints are easy to reproduce, this can also become a group craft where each person designs their own hand.
Trick-or-Treat Ghost
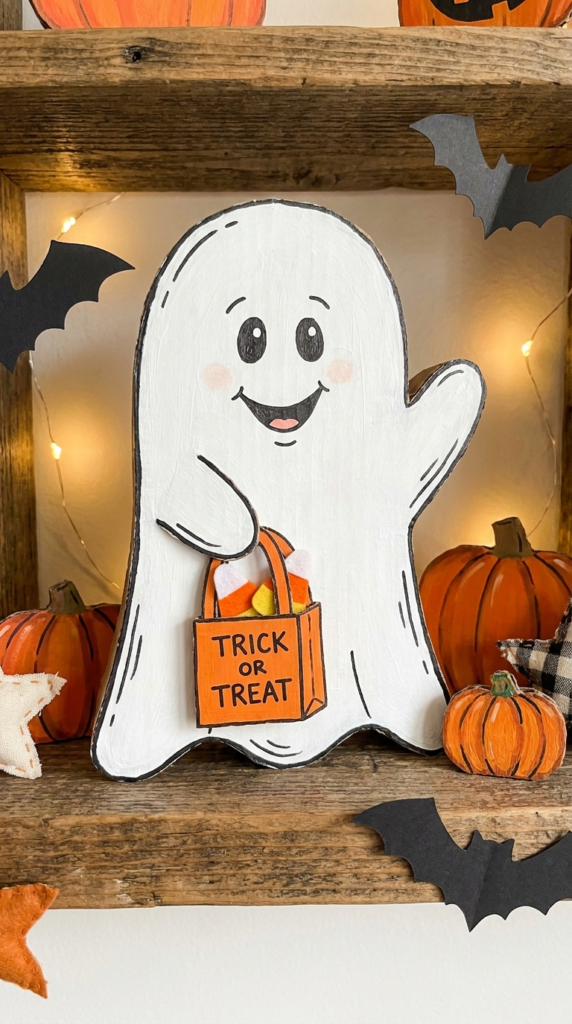
Create a cheerful ghost decoration with a cardboard body and a small trick-or-treat theme. A simple ghost silhouette can be painted white and decorated with a little cardboard candy bag or seasonal accessories.
Give the ghost a friendly facial expression rather than making it frightening. This makes the decoration suitable for homes with younger children while still fitting into a Halloween display.
Several ghosts can be arranged together, each holding a different candy-themed accessory. Add pumpkins, stars, or small bats around them to complete the scene.
This idea can also work as a reusable seasonal decoration if the cardboard is stored somewhere dry after Halloween.
Creepy Cardboard Welcome Display
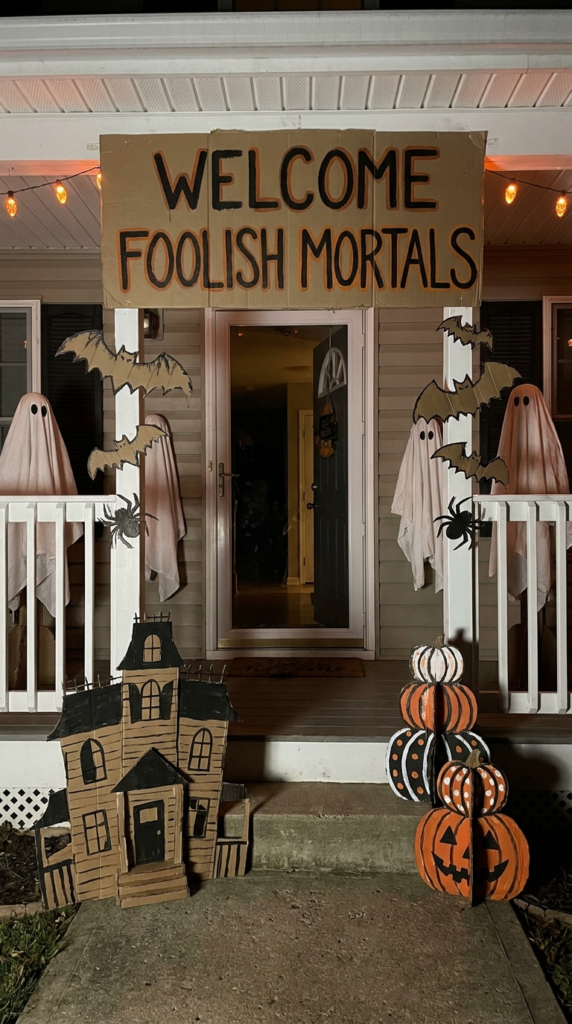
Finish the Halloween setup with a welcome display that combines several cardboard elements into one entrance scene. A large sign can serve as the central piece, surrounded by bats, spiders, ghosts, pumpkins, or a small haunted-house facade.
Choose a few main colors and repeat them throughout the decorations so everything feels connected. For example, black and white can form the base while orange provides seasonal accents.
A welcome display can be as simple as a decorated sign or as elaborate as a full cardboard scene. The key is to keep the arrangement practical and make sure the decorations do not interfere with doors, stairs, walkways, or visibility.
With a little planning, inexpensive cardboard can become the foundation for a creative Halloween entrance that feels personalized and festive.