
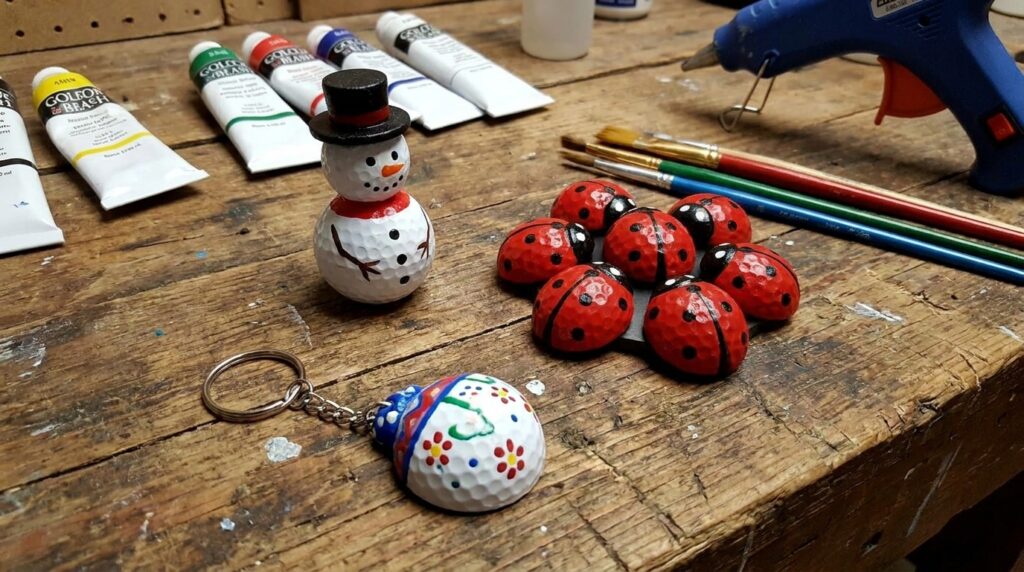
Golf balls can be more than just equipment for the course—they can also become a surprisingly useful material for creative craft projects. Their small, round shape makes them easy to transform into decorative figures, seasonal characters, garden accents, and other fun creations.
With some paint, glue, fabric, and a few basic supplies, you can give old or unused golf balls a completely new purpose. These projects can be a fun way to spend an afternoon while experimenting with different colors and designs. If you have a few golf balls sitting around, explore these golf ball craft ideas for simple and creative projects you can make at home.
1. Turn Painted Golf Balls Into Colorful Ladybugs
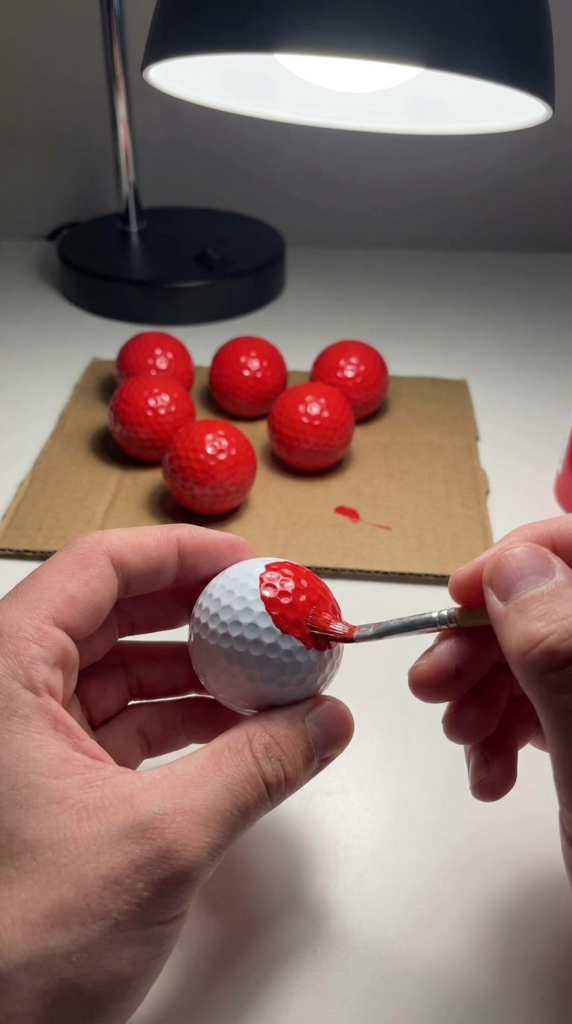
Give old golf balls a cheerful garden makeover by transforming them into tiny ladybugs. Start by cleaning each golf ball and allowing it to dry completely. Apply a coat of exterior red acrylic paint, letting it dry before adding another coat if the dimples still show through.
Once the red surface is dry, use a fine brush or outdoor paint marker to add black spots. Paint a narrow black line down the center to suggest the separation between the wings. Small white dots with black centers can create simple eyes near the top.
For an outdoor display, place the finished ladybugs around flowerpots, vegetable beds, or beneath shrubs. You can also attach them to short wooden stakes with a weather-resistant adhesive and position them above low-growing plants.
For better longevity, finish the painted surface with a clear outdoor sealant designed for painted crafts. This extra layer can help reduce fading and protect the artwork from ordinary outdoor moisture.
2. Create Miniature Golf Ball Bumblebees
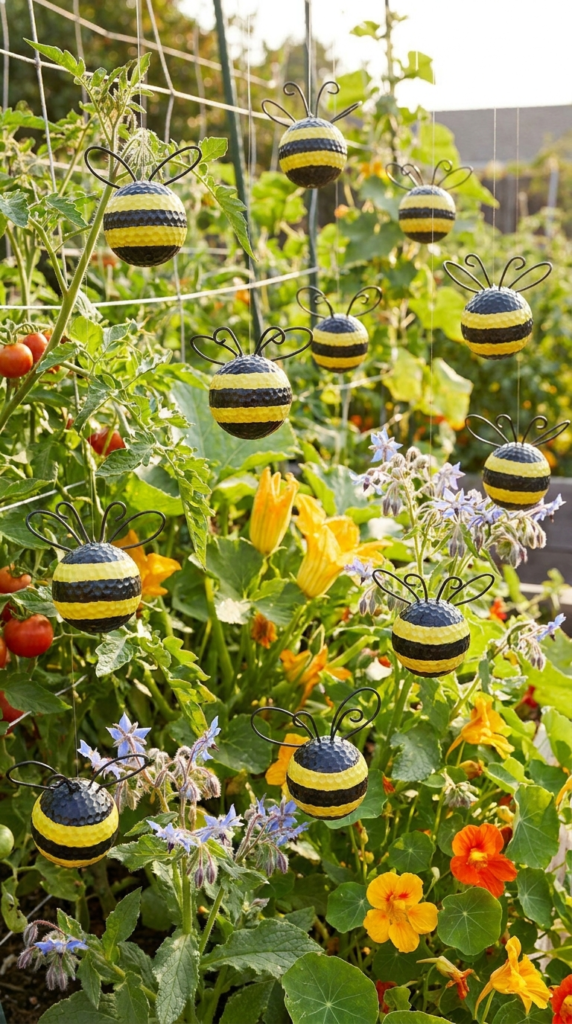
Golf balls have a naturally rounded shape that works well for making miniature garden insects. To create a bumblebee, paint the entire ball yellow and allow it to dry thoroughly. Add several black bands around the surface using exterior craft paint.
After the stripes have dried, create small wings from lightweight plastic, clear craft material, or thin pieces of recycled packaging. Secure the wings near the sides with an adhesive suitable for outdoor projects. Flexible black craft wire can be shaped into short antennae and attached to the top.
Arrange several bees around flowers, herb containers, or decorative planters. A combination of yellow, black, and green creates a lively look without requiring complicated construction.
If you want the project to last outdoors, use paints and adhesives specifically labeled for exterior use. Keeping the finished pieces sheltered from constant standing water can also help preserve them.
3. Make Tiny Golf Ball Mushroom Decorations
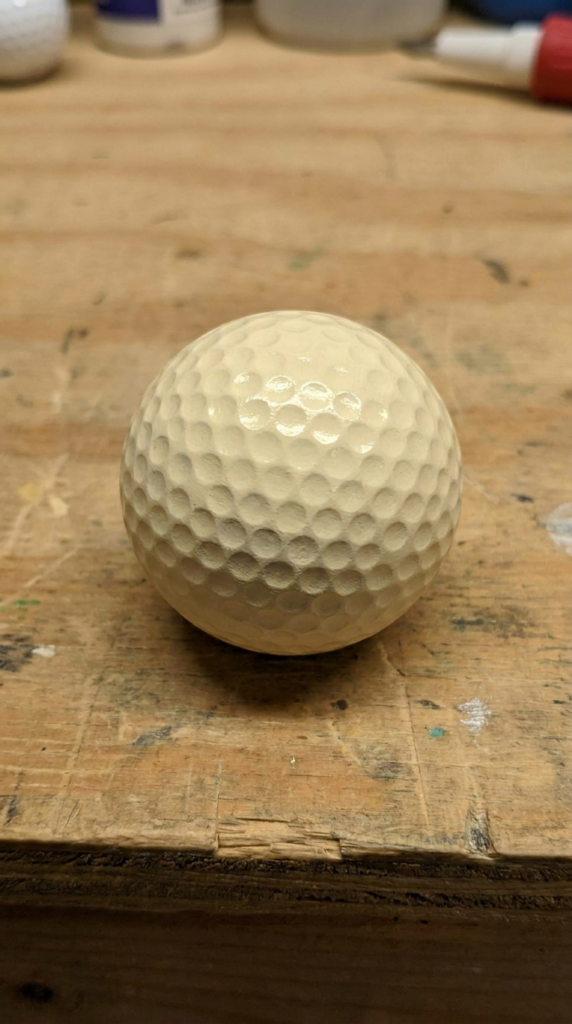
Create miniature mushroom decorations by combining painted golf balls with small lightweight saucers or similarly shaped craft pieces. The golf ball can serve as the stem while the inverted saucer becomes the mushroom cap.
Begin by painting the golf ball in a neutral shade such as cream, ivory, or warm beige. For the cap, choose a bright outdoor-friendly color and add small contrasting dots once the base coat has dried.
Attach the cap carefully to the golf ball with a weather-resistant adhesive. Remove any excess adhesive around the edges before it dries so the finished mushroom has a cleaner appearance.
Place several mushrooms beside stepping stones, among ground cover, or inside large decorative planters. Varying the colors and heights can make the display feel more natural.
For gardens that receive frequent rain, choose materials that are intended for outdoor use and check the adhesive manufacturer’s instructions for proper curing time.
4. Add Golf Ball Details to Decorative Stepping Stones
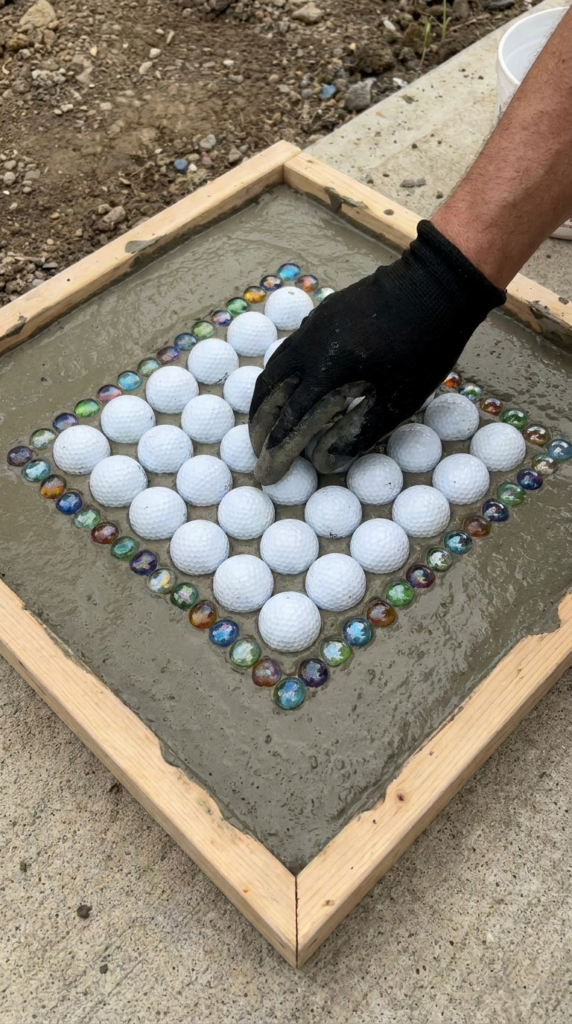
Golf balls can also become part of a larger garden project rather than serving as standalone decorations. Their textured surfaces can add visual interest to homemade concrete stepping stones.
Prepare a stepping-stone mold and fill it with concrete according to the manufacturer’s directions. While the material is still workable, carefully press selected golf balls partially into the surface. You can arrange them in rows, circles, or simple geometric patterns.
Other decorative materials, such as smooth pebbles or suitable outdoor craft pieces, can be positioned around the golf balls to create a more detailed design.
Allow the stepping stone to cure for the full period recommended for the concrete product before handling or installing it. Wear appropriate protective equipment when working with concrete, and avoid touching wet concrete with bare skin.
Because golf balls create raised and textured areas, think carefully about where the finished stone will be placed. A decorative garden path may be more appropriate than an area where people regularly run or walk quickly.
5. Turn Golf Balls Into Decorative Flower Stake Tops
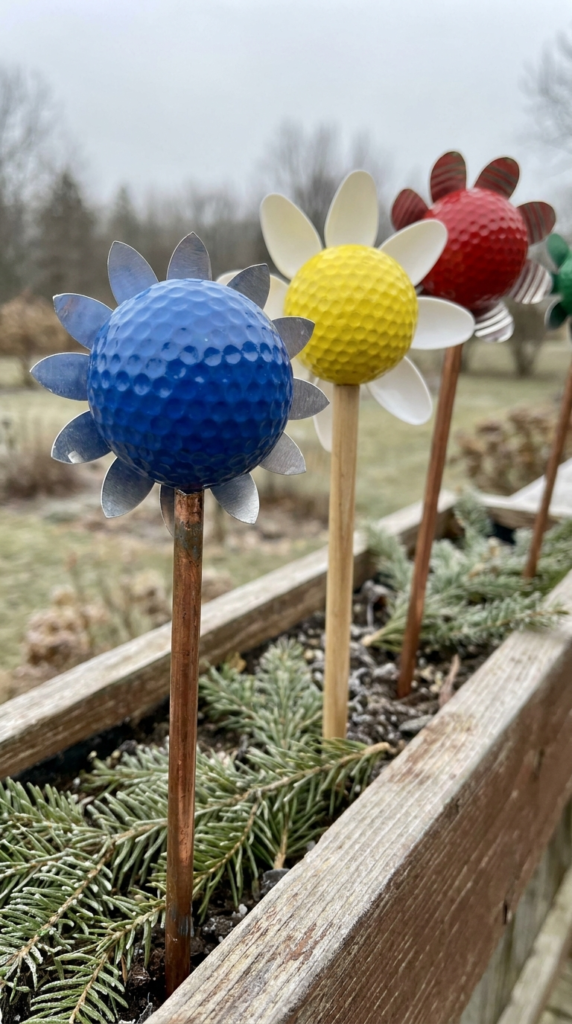
Create permanent-looking garden flowers by using painted golf balls as the centers of handmade blooms. This project works especially well when you want decorative flowers that remain colorful after seasonal flowers have faded.
Paint the golf ball in a bright shade that complements your garden. Exterior enamel or another paint formulated for outdoor surfaces can provide a more durable finish than ordinary craft paint.
For the petals, use lightweight materials such as thin craft plastic, aluminum sheets designed for crafts, or carefully prepared recycled materials. Cut the pieces into simple petal shapes and arrange them around the back or sides of the golf ball.
Attach the finished flower to a sturdy garden stake, wooden dowel, or another suitable support. Make sure the attachment is secure before placing it outdoors.
Several flowers in different colors can be grouped together in a planter or along a garden border. You can also vary the heights of the stakes to create a layered display.
6. Make Custom Golf Ball Covers for Solar Garden Lights
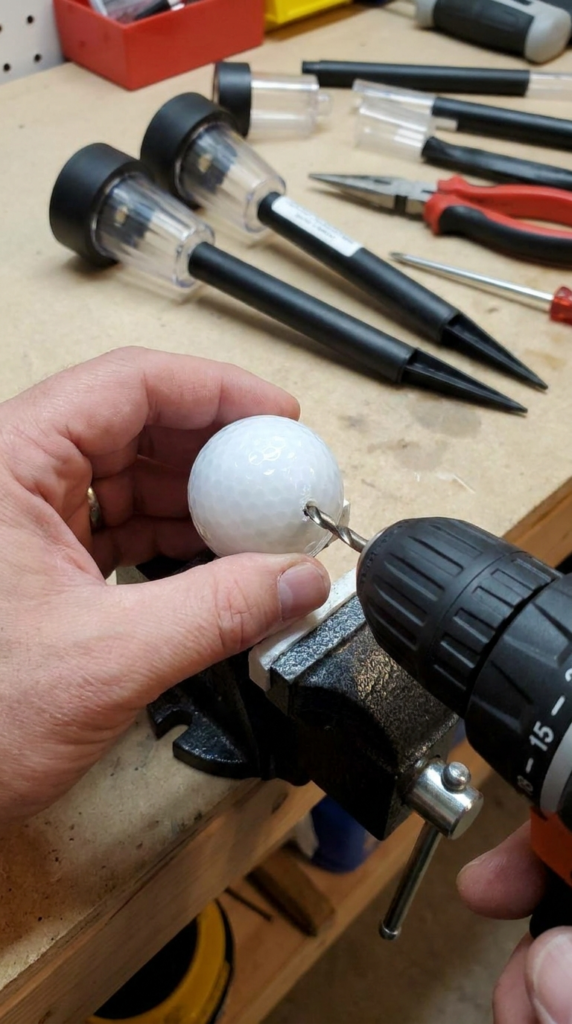
Give basic solar garden lights a more distinctive appearance by using suitable golf balls as decorative light covers. White or translucent golf balls can work particularly well because their surfaces can diffuse some of the light.
Before modifying a solar light, check how its existing light head is constructed and make sure the alteration does not block the solar panel. A suitable opening can be carefully created in the golf ball so the decorative cover sits around the LED portion.
The dimples on the golf ball can create an interesting pattern when light passes through or around the surface. This can make ordinary pathway lights look more customized after dark.
Choose a golf ball that fits securely without placing pressure on the light assembly. Avoid making modifications that could interfere with ventilation, wiring, or the solar panel.
This is a simple way to coordinate several inexpensive garden lights with the colors or theme of your outdoor space.
7. Use Golf Balls as Floating Water Garden Decorations
Because golf balls are designed to float, they can become simple decorative elements for suitable outdoor water features. Paint several balls in coordinated colors and place them in a birdbath, decorative basin, or fountain where appropriate.
For any water feature used by fish or wildlife, select coatings that are specifically appropriate for that environment. Avoid adding painted objects to natural ponds without first confirming that the materials are safe for the animals and water system.
You can use different shades of one color for a subtle arrangement or combine several bright colors for a more playful display. The balls will move gently with water movement, adding a little motion to an otherwise still surface.
For smaller decorative containers, use only a few golf balls so the arrangement does not become overcrowded. Remove the decorations periodically to clean them and check for peeling paint or damaged surfaces.
8. Build a Playful Golf Ball Caterpillar
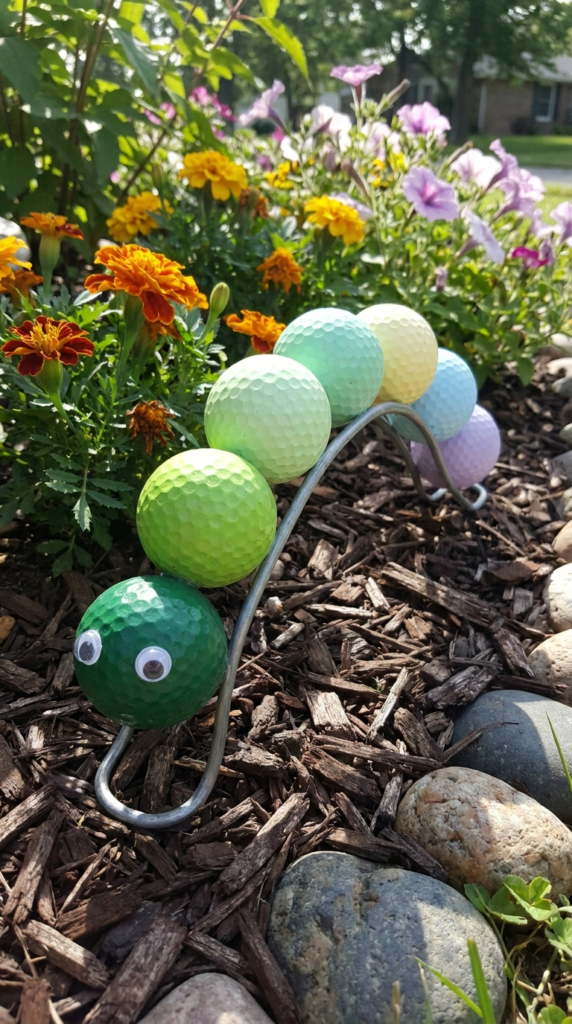
Turn several golf balls into a colorful caterpillar that can sit along a garden border. Collect five to seven balls and paint them in shades that work together, such as different greens, blues, or cheerful pastel tones.
Once the paint has dried, connect the balls using a flexible support system that is appropriate for craft use. The finished caterpillar can be arranged in a straight line or gently curved around a planter.
Decorate the first ball as the head by adding simple eyes and other facial details. Outdoor-rated craft materials can be used for additional features as long as they are securely attached.
For a more interesting garden display, position the caterpillar partially beneath foliage so that only some of the colorful sections are immediately visible.
This project can also be adapted into a seasonal decoration by changing the colors to match spring, summer, or autumn garden themes.
9. Add Golf Balls to an Outdoor Wind Chime
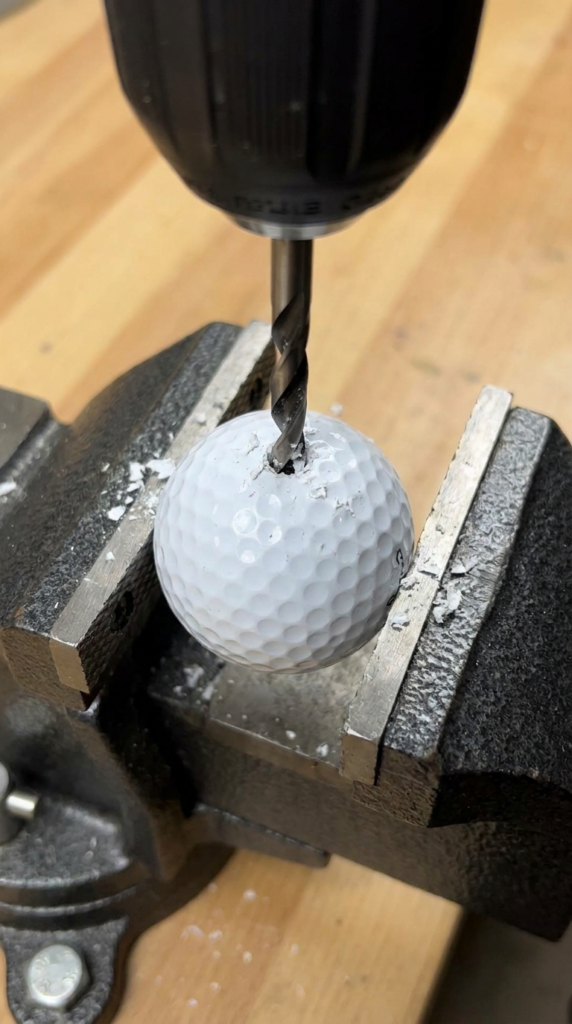
Golf balls can become decorative components in a homemade wind chime. Because they are relatively heavy compared with lightweight beads, they work best as visual accents rather than relying on them alone to produce sound.
If you need holes in the golf balls, use appropriate protective equipment and secure the material safely before drilling. A controlled work area is important because the rounded shape can make the ball difficult to hold.
Thread the prepared golf balls onto strong outdoor-rated cord and combine them with wooden beads, small metal pieces, or other weather-resistant decorations. Hang several strands from a sturdy piece of driftwood or another appropriate support.
Position the finished wind chime in an area where it receives a gentle breeze without repeatedly striking walls, windows, or delicate plants.
You can paint the golf balls beforehand or leave them in their original finish for a more understated look.
10. Paint a Whimsical Golf Ball Frog
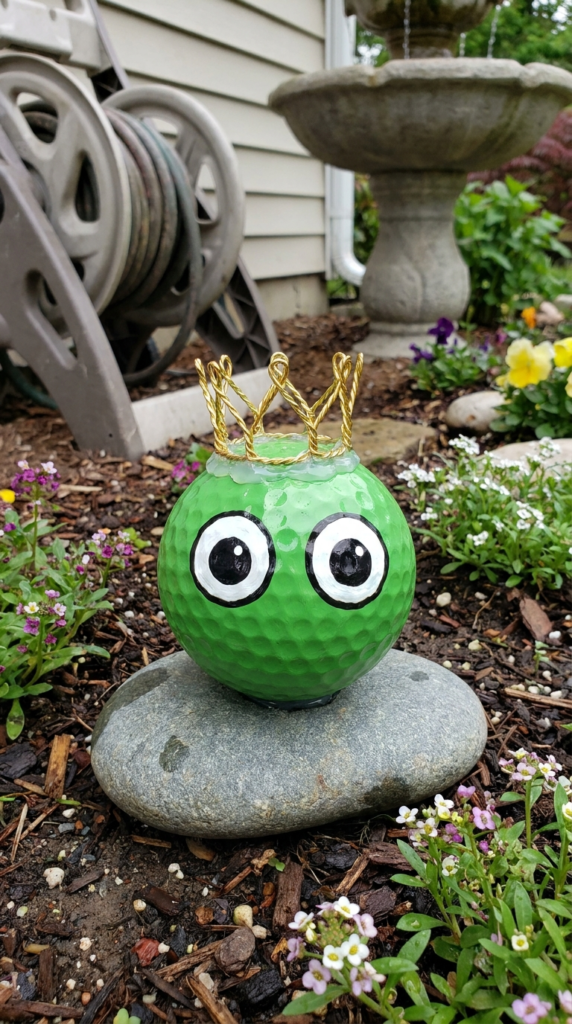
Create a small frog decoration using one golf ball and a few simple details. Start with a coat of green exterior paint and allow it to dry completely.
Add large frog eyes near the upper portion of the ball using white and black paint. Small painted details can suggest a mouth, cheeks, or other facial features without requiring complicated sculpting.
For a playful fairytale theme, add a miniature crown made from craft wire, lightweight metallic material, or another suitable decoration. Secure it firmly with an outdoor-compatible adhesive.
Place the finished frog on a garden stone, beside a planter, or near a decorative water feature. If the piece will remain outside throughout the year, apply a suitable protective coating after all paint has dried.
Several frogs in different shades of green can create a fun collection without taking up much space.
11. Create Mini Golf Ball Topiaries for Succulent Pots
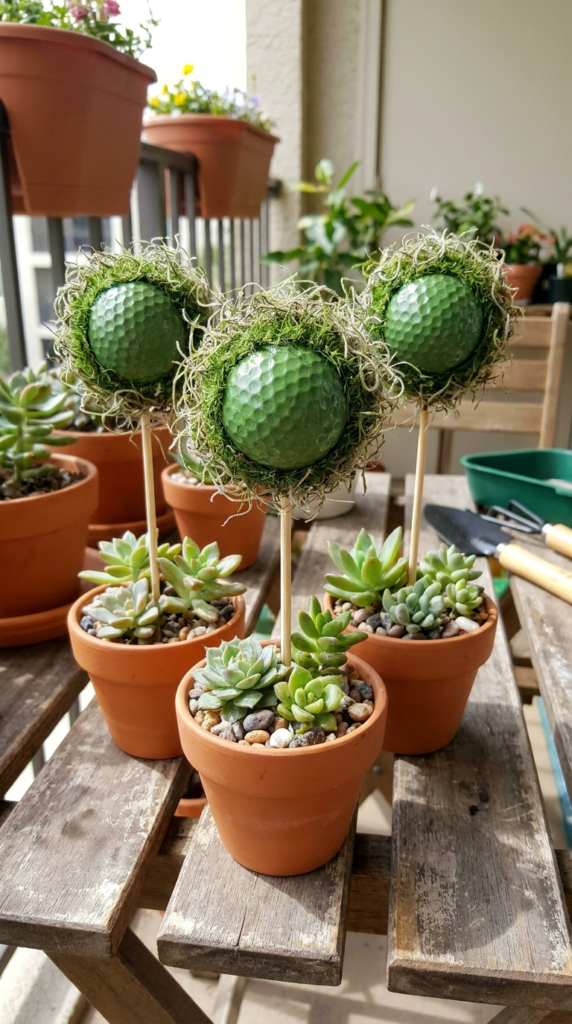
Small golf ball topiaries can add height and symmetry to compact planters. Paint one or more golf balls green, or use another color that complements the container.
Attach each ball to a wooden skewer, dowel, or other sturdy support that can safely be placed in a pot. The ball can be left painted or decorated with preserved moss or artificial greenery for a fuller topiary effect.
Insert the support carefully into the potting medium without disturbing the plant’s roots. These decorations are especially suitable for larger succulent arrangements where there is enough space for an additional vertical element.
For a coordinated display, make several topiary balls in different sizes or place them at different heights. Their rounded shape contrasts nicely with the angular shapes of many plant leaves.
Keep decorative materials away from the plant’s growing point and avoid covering the soil so heavily that it interferes with watering.
12. Recreate Allium Flowers With Golf Balls and Toothpicks
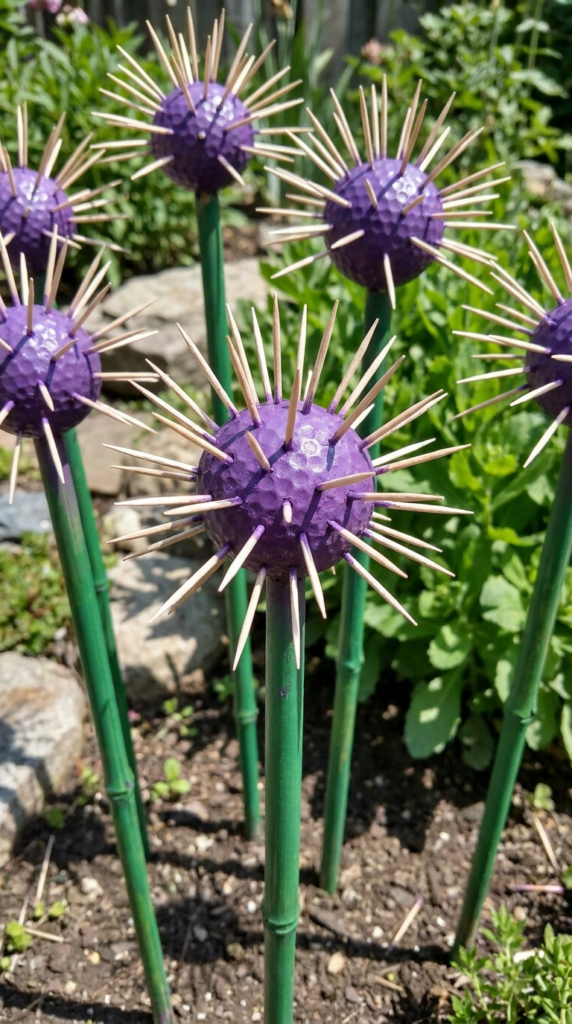
Use a golf ball as the center of a decorative allium-inspired flower. This project creates a rounded bloom with a texture similar to the clustered appearance of ornamental allium flowers.
Begin by marking small, evenly spaced points across the golf ball. Small holes can then be prepared carefully using an appropriate tool. Insert short pieces of toothpick into the openings with a suitable craft adhesive.
Once the adhesive has cured, paint the entire flower head with exterior purple paint. Allow the surface to dry before adding additional coats if necessary.
Attach the finished flower head to a green-painted dowel or another sturdy garden stake. Push the support into the soil deeply enough to keep the decoration stable.
Simple assembly steps
- Mark evenly spaced locations around the golf ball.
- Carefully prepare small openings for the decorative pieces.
- Apply a small amount of suitable adhesive to each toothpick.
- Insert the toothpicks and allow the adhesive to cure.
- Paint the completed flower head purple.
- Attach it securely to a green garden stake.
Create three or more flowers and use different stake heights to imitate the layered appearance of a flower bed.
13. Make Garden Snails With Golf Ball Shells
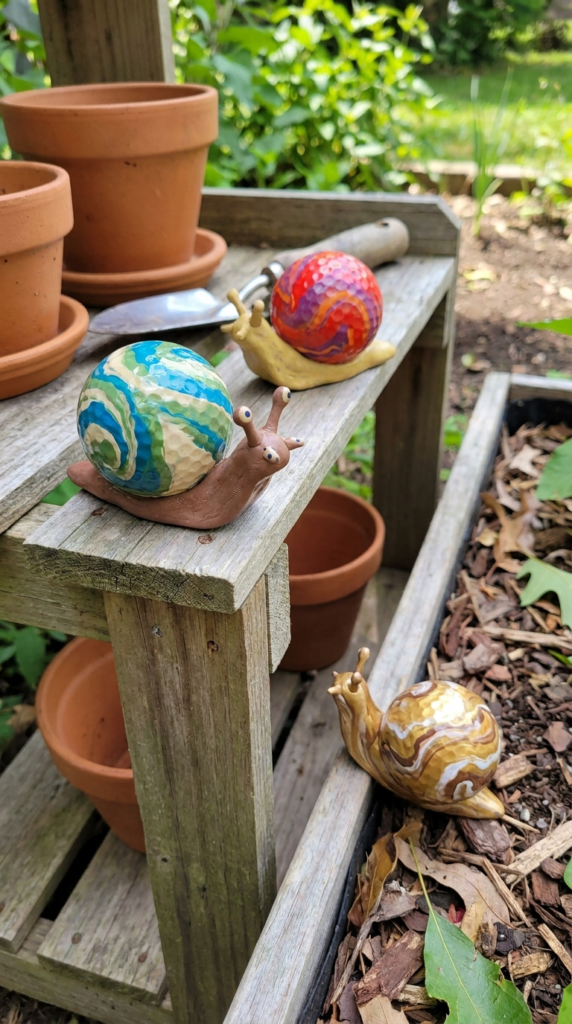
A golf ball’s round shape makes it an easy starting point for a miniature snail shell. Combine it with an outdoor-suitable modeling material to create a small garden creature.
Form a simple snail body from modeling clay and allow it to firm up according to the material’s instructions. Paint the golf ball in a natural or colorful shade and add a spiral pattern to make it resemble a shell.
Place the painted ball onto the clay body while the material is still workable or attach it after curing with a compatible adhesive.
Add simple eyes and antennae using paint or small craft pieces. A protective outdoor finish can be applied if the clay and paint are compatible with the coating.
These little snails work well around the edges of planters, near garden benches, or on a potting table. Making several with different shell colors can create a small decorative collection.
14. Turn Golf Balls Into Reusable Plant Markers
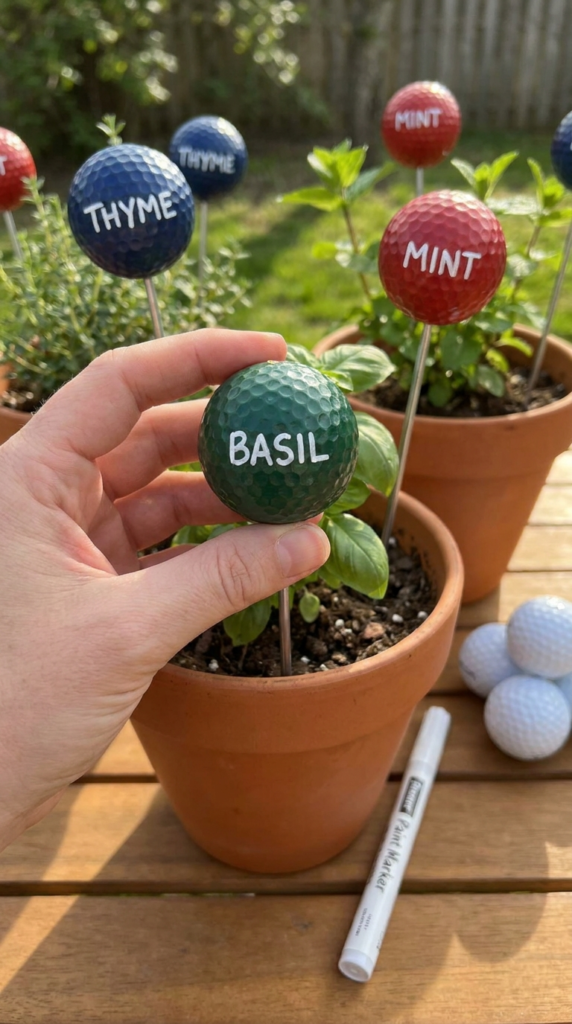
Make practical garden labels from golf balls by combining their unusual shape with simple painted lettering. This project is particularly useful for herb gardens and container plants.
Paint each golf ball in a solid color and allow it to dry. Use a contrasting outdoor paint marker to write the name of each plant, such as Basil, Thyme, Mint, Parsley, or Rosemary.
Attach the golf balls to sturdy plant stakes using an appropriate outdoor adhesive or another secure mounting method. Position each marker where it can be easily seen without blocking sunlight from the plant.
Dark golf balls paired with white lettering can provide strong contrast, while light-colored balls can be labeled with darker markers.
For a more organized garden, use one color for herbs, another for vegetables, and another for flowers. Refresh the lettering when necessary as outdoor exposure gradually affects painted surfaces.
15. Decorate Birdhouse Hangers With Painted Golf Balls
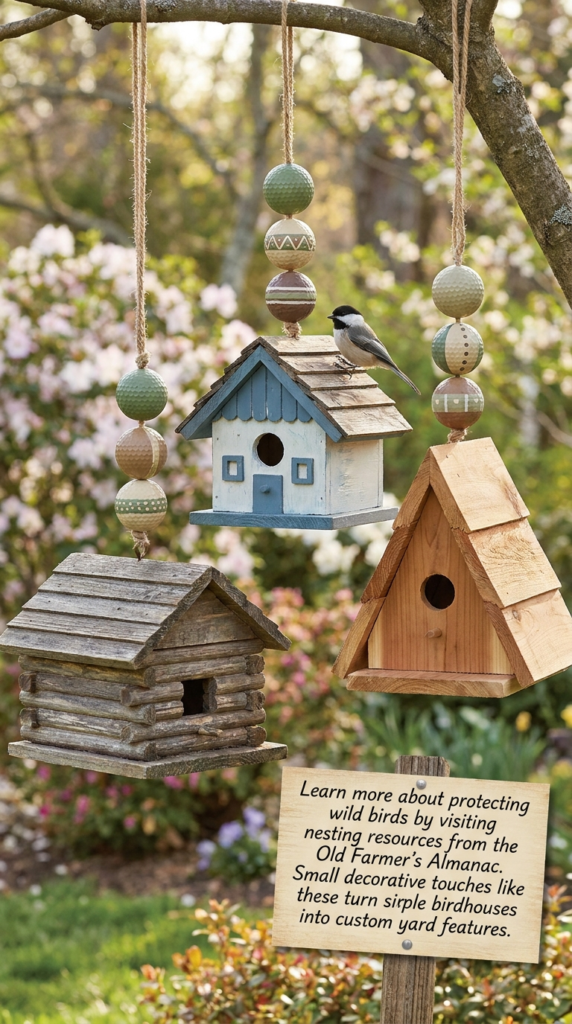
Add decorative details to a hanging birdhouse by incorporating painted golf balls into the suspension area. Instead of attaching them directly to the structure used by birds, place them along the exterior rope or chain where they function purely as decoration.
Paint the balls in earthy colors, simple patterns, or shades that coordinate with the surrounding garden. Allow every painted surface to dry thoroughly before attaching the decorations.
Use a secure outdoor-rated method to keep the balls in place. Make sure the added decorations do not obstruct the entrance, perch, ventilation, drainage, or any part of the birdhouse that birds rely on.
When decorating birdhouses, prioritize the needs of the birds over the appearance of the craft. Avoid loose pieces that could become hazards or materials that could be easily pulled apart.
A few carefully placed golf balls can give an ordinary hanging birdhouse a personalized appearance while keeping the functional areas clear.
16. Create Tiny Golf Ball Garden Gnomes
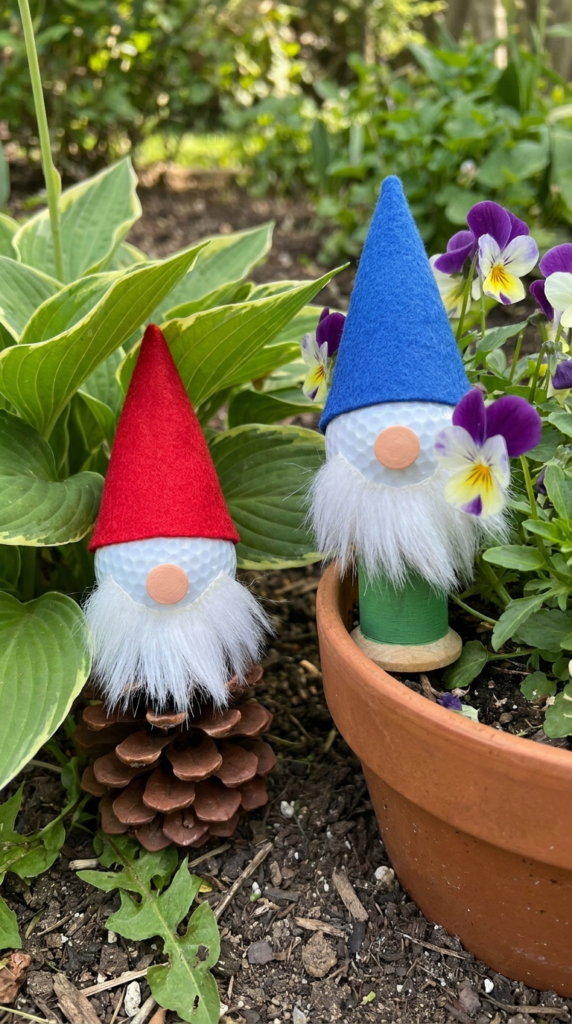
Golf balls make convenient heads for miniature garden gnomes. Paint the ball in a skin-tone shade or choose a more whimsical color if you prefer a fantasy-style decoration.
Add a simple nose near the center and paint small facial details. A cone-shaped piece of felt, fabric, or another lightweight material can be used as the gnome’s pointed hat.
For the beard, use a small amount of faux fur or textured craft material. Secure the pieces with an adhesive compatible with the materials and intended for the environment where the gnome will be displayed.
Attach the finished head to a small wooden spool, pinecone, or another stable body. Keep the overall construction lightweight so it can be positioned securely in a planter.
Place several miniature gnomes among foliage, beneath taller plants, or around the edge of a container garden. Different hat colors can give each character its own personality.
17. Turn Golf Balls Into Oversized Dragonfly Eyes
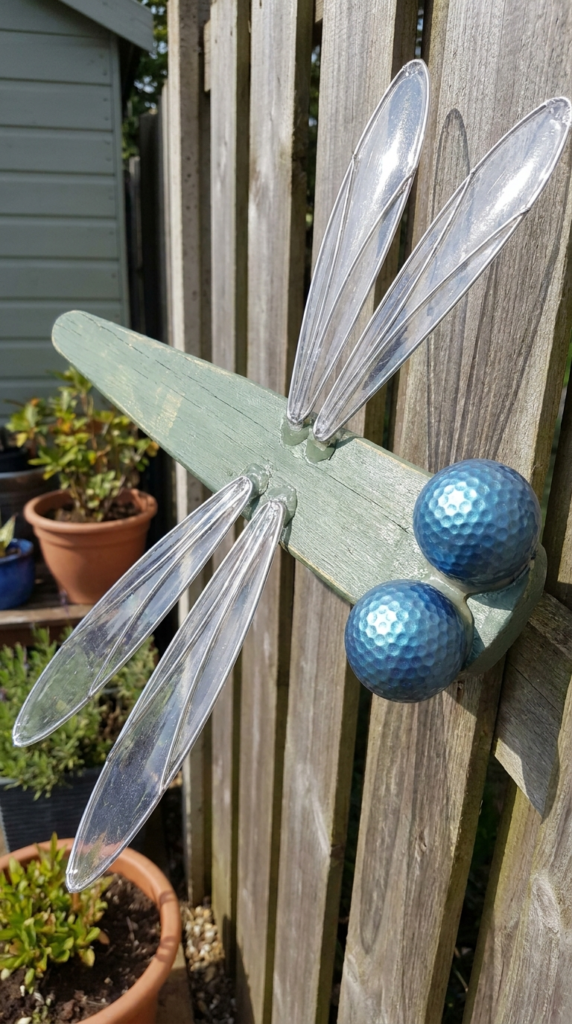
Create dimensional dragonfly garden art by using golf balls as oversized eyes. Begin with a flat body shape made from suitable wood, outdoor craft material, or another sturdy surface.
Paint the body in a color that complements the wings and garden surroundings. For the eyes, paint two golf balls metallic blue, green, or another vivid shade and allow them to dry thoroughly.
Attach the golf balls near the front of the body with a strong adhesive suitable for the materials and outdoor conditions. Make sure the pieces are fully secured before hanging the decoration.
For the wings, use lightweight outdoor-safe material and cut four elongated shapes. Transparent plastic, painted wood, or thin craft sheets can all be adapted depending on the desired style.
Mount the completed dragonfly on a garden fence, shed, patio wall, or another stable surface. Positioning the wings at slightly different angles can give the piece more visual depth.
For a coordinated garden display, make several insects using different body and wing colors. The oversized golf ball eyes create a playful three-dimensional effect while giving an otherwise flat garden decoration more character.