
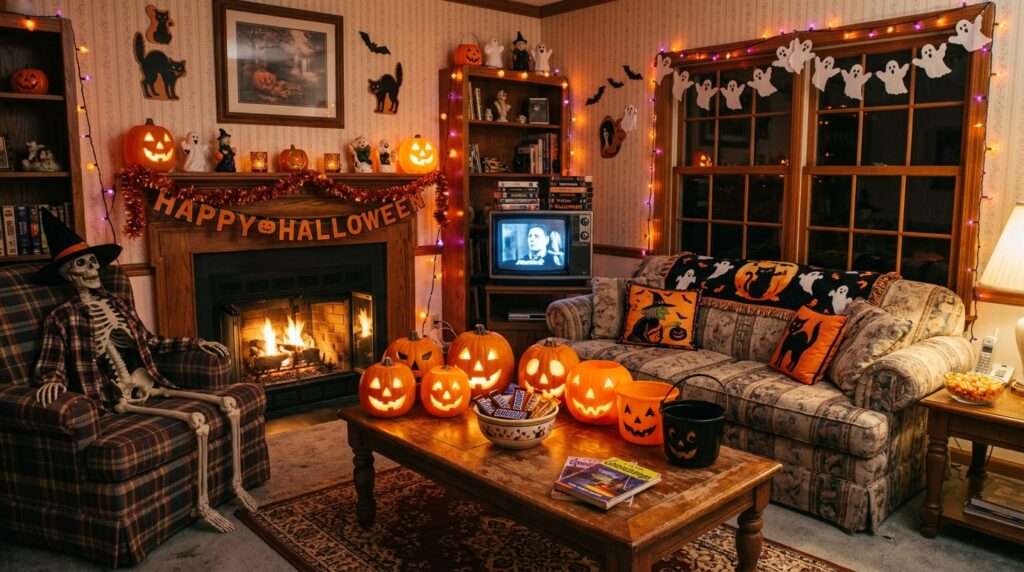
The 1990s had a distinctive Halloween charm, with playful decorations, classic costumes, bold colors, and a nostalgic atmosphere that still inspires seasonal decorating today. If you love the look and feel of that era, you can bring it into your Halloween celebration with vintage-inspired details and familiar decorations.
Think simple paper cutouts, orange and black accents, spooky illustrations, old-fashioned party supplies, and playful displays that feel a little less polished and a lot more nostalgic. Whether you’re decorating a room, planning a party, or creating a themed corner, these 90s Halloween aesthetic ideas can help you capture the fun and memorable spirit of Halloween from the decade.
1. Create the 90s Mood With Three Strong Decorating Cues
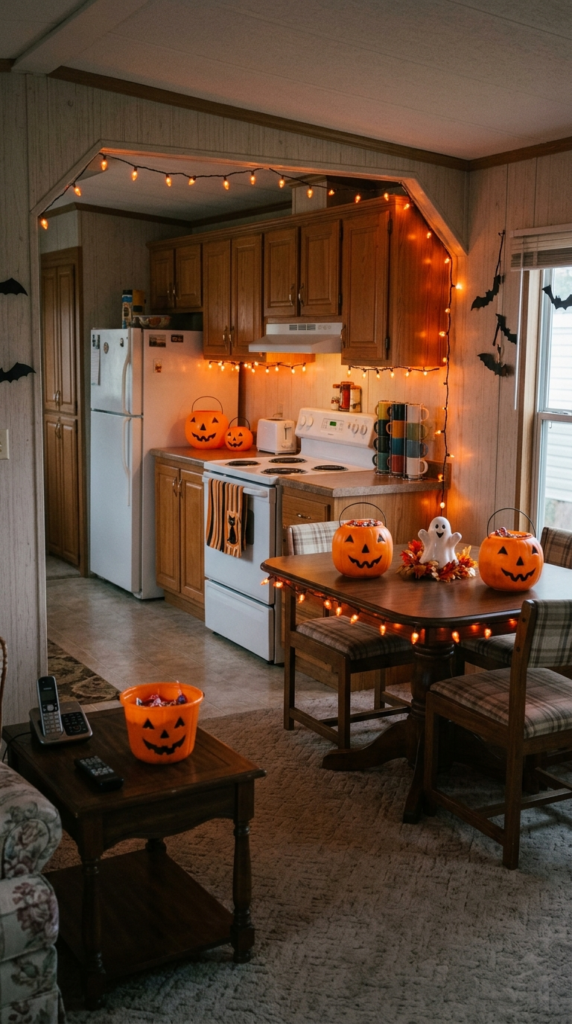
A convincing 90s Halloween look does not require covering every available surface with decorations. In a mobile home, a more controlled approach usually works better because the kitchen, dining area, and living room may share long sightlines.
Start with three recognizable cues: a playful color palette, nostalgic Halloween shapes, and warm seasonal lighting. Together, these can establish the decade-inspired mood without making the home feel overloaded.
For example, honey-oak cabinetry can work naturally with pumpkin orange, black, and cream. White appliances can provide contrast for colorful decorations, while darker wood furniture can support brighter orange lights or small green accents.
Next, choose one nostalgic object category to repeat. Plastic jack-o’-lantern buckets, black cats, friendly ghosts, paper bats, novelty towels, or molded pumpkin decorations can all work. The important part is repetition without excessive quantity.
If the room already communicates the theme when viewed from the doorway, stop adding objects simply for the sake of filling empty areas. A little visual breathing room helps the nostalgic pieces stand out.
2. Work With Pumpkin Orange, Black, Cream, and One Playful Accent
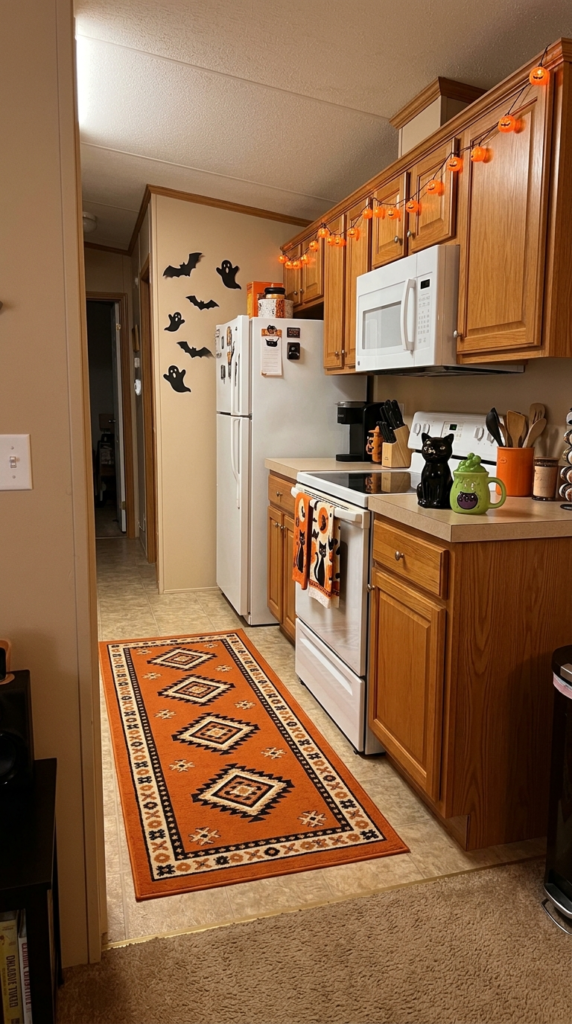
A 90s-inspired Halloween palette can be brighter and more playful than the muted rust, beige, and charcoal combinations commonly used in contemporary seasonal decorating.
Let pumpkin orange provide the main burst of color, use black for contrast, and bring in cream or beige to keep the room from becoming visually intense. A small amount of slime green, purple, or red can provide the unmistakable novelty associated with older Halloween decorations.
The permanent finishes of the mobile home should remain part of the palette. Honey-oak cabinets already provide warmth, while beige walls and counters can soften brighter decorations. White appliances can make black and orange accessories stand out more clearly.
Rather than giving every color equal space, assign each one a role.
Orange might appear on a runner, pumpkin, towel, or string of lights. Black can be used for bats, cats, silhouettes, or trim. Cream can come from the walls, countertops, furniture, or neutral textiles. A brighter green or purple accent can appear on one or two small objects.
This approach keeps the rooms connected without requiring every item to match.
Before adding more color, take a photograph from the adjoining room. If the orange immediately catches your attention while the original finishes remain visible, the palette is probably doing enough.
3. Make a Classic Plastic Pumpkin the Main Nostalgic Accent
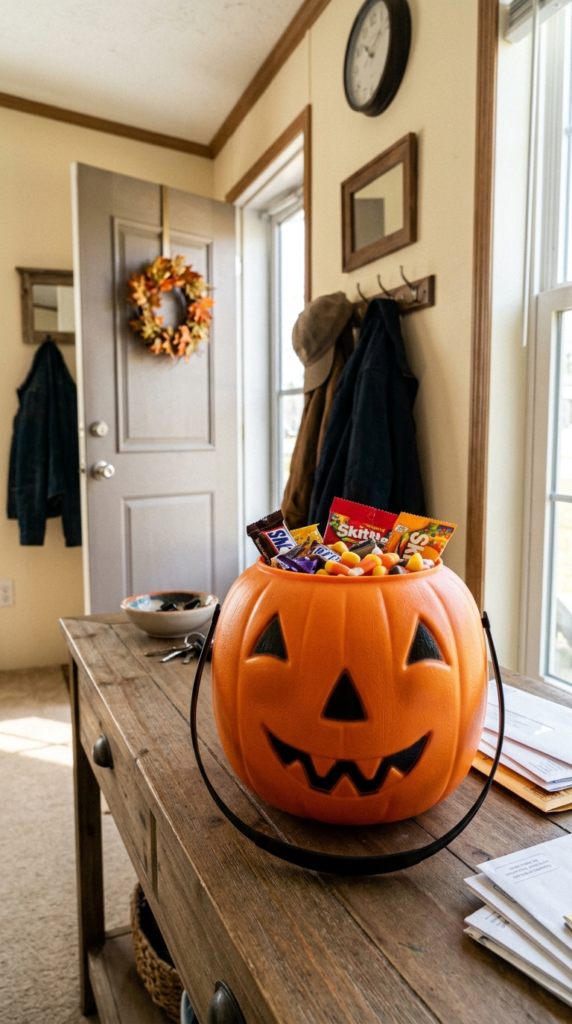
A single molded plastic jack-o’-lantern can immediately establish a 90s Halloween feeling. Its bright orange color, chunky shape, and familiar expression have a much stronger visual identity than several small decorations that do not share a common style.
Choose a location where a pumpkin would naturally make sense. An entry table, dining surface, open shelf, or unused section of countertop can provide a suitable home.
In a compact kitchen, avoid placing several pumpkin buckets across the floor or along every counter. One larger pumpkin at a noticeable height can create a stronger focal point while leaving the rest of the room functional.
You can also use the bucket practically. Fill it with individually wrapped candy near the entrance, use it as a temporary container for lightweight seasonal supplies, or leave it empty as a decorative accent.
The goal is recognition rather than collecting as many vintage-looking pieces as possible.
Try removing the smaller pumpkins from the room and leaving only the largest one. If the space still immediately reads as Halloween, you have found a strong focal point.
That same principle can be applied throughout the mobile home: one memorable object can often accomplish more than a collection of competing decorations.
4. Use Orange Mini Lights to Create the After-Dark Atmosphere
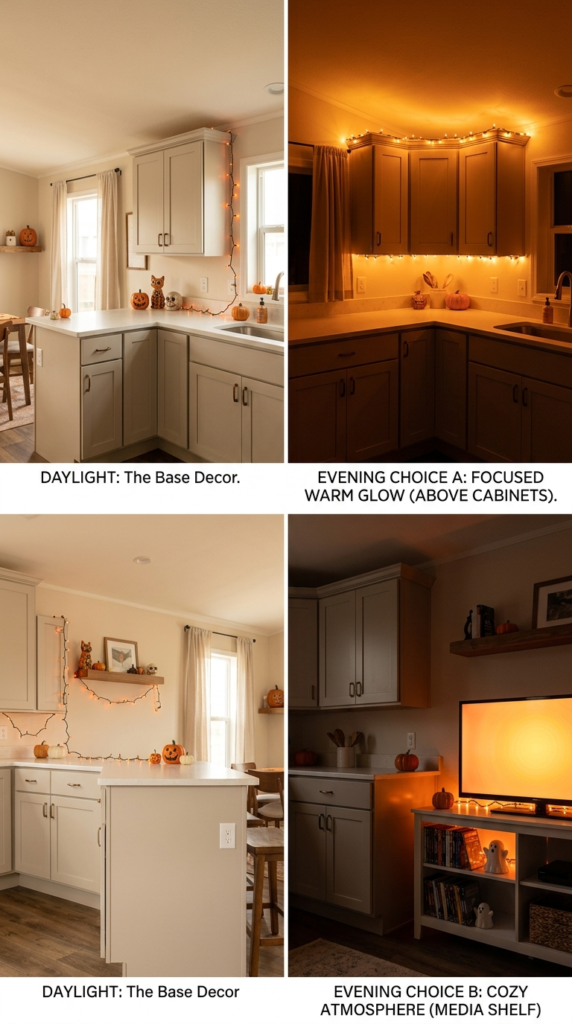
Daylight shows the decorations, but evening lighting can completely change the feeling of a Halloween room.
A short strand of orange mini lights can connect otherwise ordinary features such as kitchen cabinets, a television stand, a window, or a small shelf. Because the lights occupy very little physical space, they are particularly useful in a mobile home where floor and counter space may be limited.
Choose one primary lighting route instead of outlining every edge.
A strand above the kitchen cabinets can add a warm glow without taking over the worktop. Lights around a window can create a simple silhouette when viewed from outside. A small strand near a media shelf can create a cozy movie-night atmosphere.
The best location depends on how the room is used after dark.
If the kitchen is busy, keep the lights above the working area rather than across cabinet doors or handles. If the living room is the main gathering space, the media area may deserve the strongest glow.
Avoid positioning decorative lights where they interfere with cabinet operation, window hardware, walkways, or appliances. Use products according to their instructions and keep electrical connections away from water and other hazards.
One well-planned strand can be enough. Add another only when it solves a separate dark or visually empty area.
5. Turn a Small Media Shelf Into a 90s Halloween Movie-Night Corner
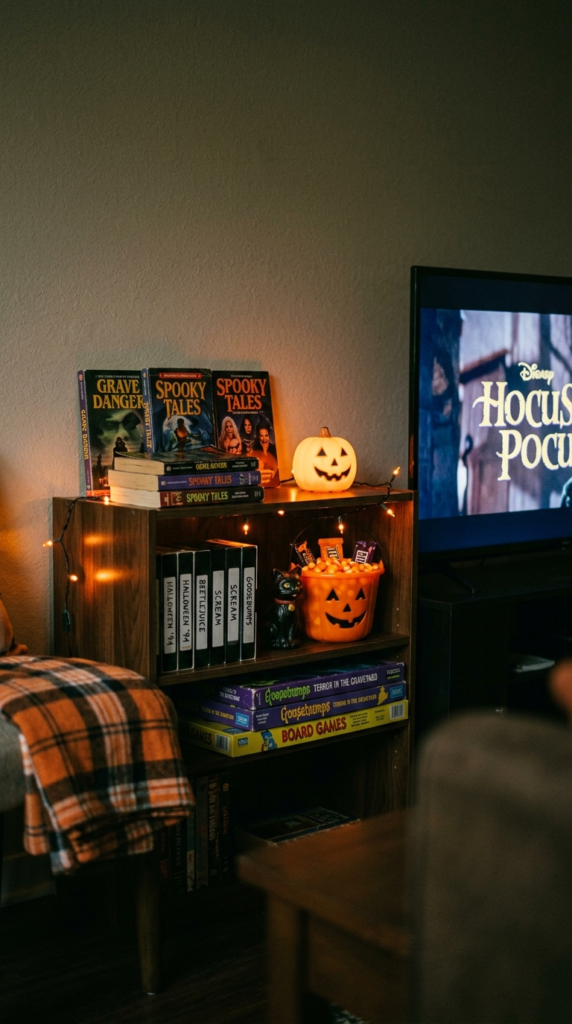
You do not need an old television or an authentic VHS collection to capture the feeling of a 90s Halloween movie night.
Instead, recreate the ritual around the entertainment area. A few horror paperbacks, generic VHS-style cases, Halloween books, a small pumpkin, a black cat figure, and orange lighting can create the right atmosphere around a modern screen.
Keep these pieces concentrated on one shelf, bookcase section, or entertainment unit.
If you already own older books, board games, movie cases, or Halloween items, select only the ones that contribute visually. You do not need to display the entire collection.
A mobile-home living room can become crowded quickly when decorations spread onto the floor or across the television stand. Keeping the media display contained gives the nostalgia a clear boundary.
Think about the story the shelf is telling. It should suggest an October evening spent watching Halloween movies, reading spooky books, and eating candy.
If an item does not contribute to that scene, it probably does not need to be displayed.
The result will feel more intentional when the surrounding living room remains relatively quiet.
6. Keep the Honey-Oak, Beige, and White Finishes
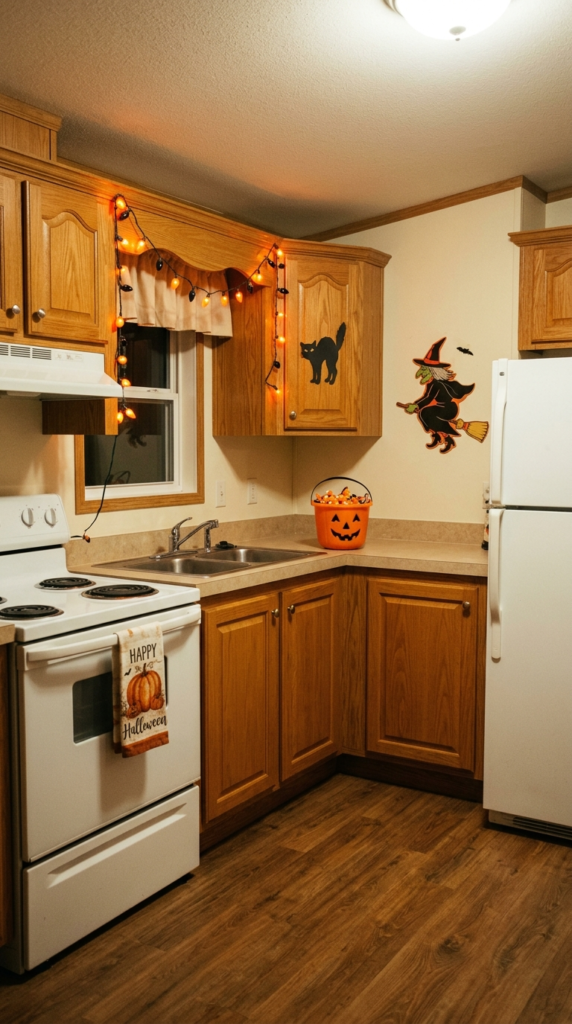
One of the simplest ways to make a 90s Halloween mobile home feel authentic is to stop treating its existing finishes as something that needs to be hidden.
Honey-oak cabinets, beige laminate counters, cream walls, white appliances, vinyl flooring, and warm brown furniture can all become part of the nostalgic backdrop.
These finishes provide the ordinary domestic setting that makes brighter Halloween decorations feel believable. A black cat silhouette looks different against warm oak than it does against a completely modern white-and-gray interior.
Before changing permanent surfaces, test the Halloween decorations against what is already there.
Place a pumpkin-orange towel beside the stove, a black paper cat against an oak cabinet, or a bright jack-o’-lantern on a beige counter. Step back and see whether the existing finishes actually improve the composition.
They may provide exactly the warmth the decorations need.
This is also an effective way to control your seasonal budget. A 90s-inspired Halloween theme does not require repainting cabinets, replacing countertops, or covering every surface with temporary finishes.
Let the home itself provide part of the decade reference.
7. Give the Kitchen One Dedicated Halloween Display Zone
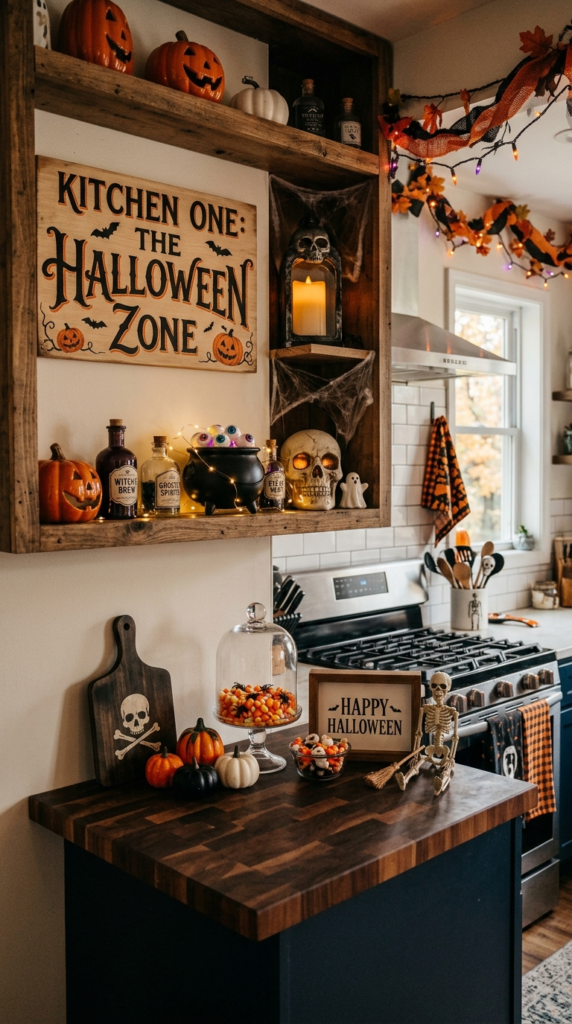
The kitchen should look festive without becoming difficult or unsafe to use.
First identify the areas used for cooking, food preparation, washing dishes, and operating appliances. Those spaces should remain as clear as possible. The Halloween display can then occupy a less active section of the room.
An unused end of a counter, the dining-side edge of the kitchen, a suitable shelf, or an appropriate area above cabinetry may work.
For example, a contained display might include one plastic pumpkin, a small retro-style Halloween print, and a short decorative light strand. That can create a strong seasonal moment without covering the entire kitchen.
Safety matters particularly in this room. Keep paper decorations, towels, curtains, wooden utensils, and other combustible materials away from stovetops and other sources of heat. Decorations should also stay clear of appliance vents, controls, and areas needed for normal food preparation.
The goal is to create a decorated zone rather than a decorated obstacle course.
Once one part of the kitchen looks complete, leave the surrounding surfaces relatively quiet. This makes the main vignette more noticeable and keeps everyday cooking practical.
8. Turn One Window Into a Simple 90s Halloween Scene
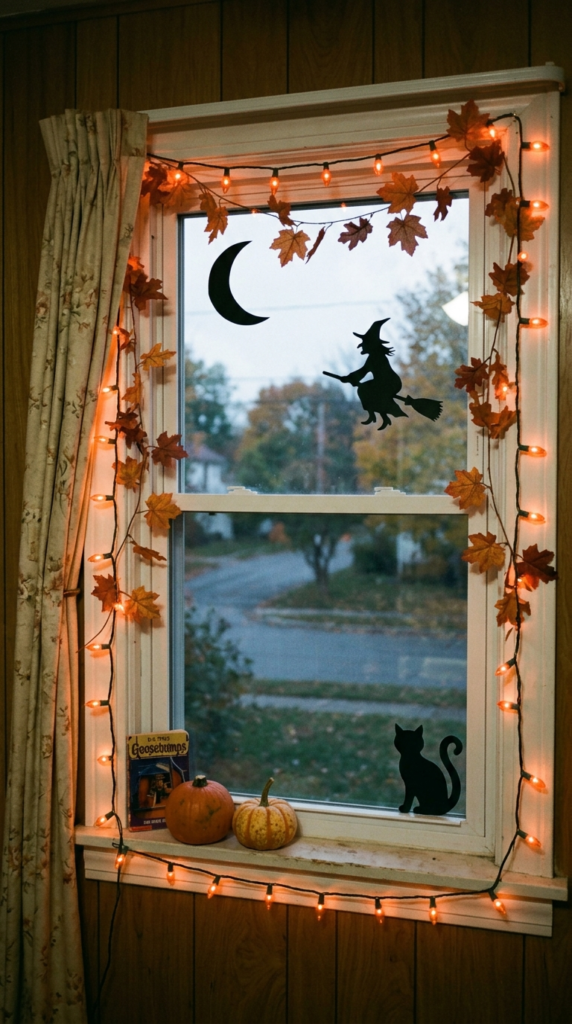
Windows provide an excellent decorating opportunity because silhouettes become especially noticeable when daylight or interior lighting passes around them.
Treat the entire window as one composition rather than attaching decorations randomly to every available surface.
Start around the frame with a small strand of orange lights or a loose arrangement of faux autumn leaves. Add one or two recognizable silhouettes, such as a black cat, crescent moon, ghost, witch, or skeleton.
If the window has a suitable sill, a few small pumpkins can complete the scene. Keep them stable and make sure they do not interfere with blinds, curtains, latches, screens, or the opening mechanism.
Leaving some glass uncovered is important in a compact mobile home. A completely covered window can make a small room feel darker and more crowded during the day.
Instead, create a strong visual frame around part of the glass.
Stand across the room and view the window as one rectangle. If the silhouettes remain easy to recognize and the surrounding lighting gives them enough contrast, there is no need to keep adding decorations.
The strongest window displays often depend on the space between the objects as much as the objects themselves.
9. Use Paper Bats and Die-Cut Figures on the Walls
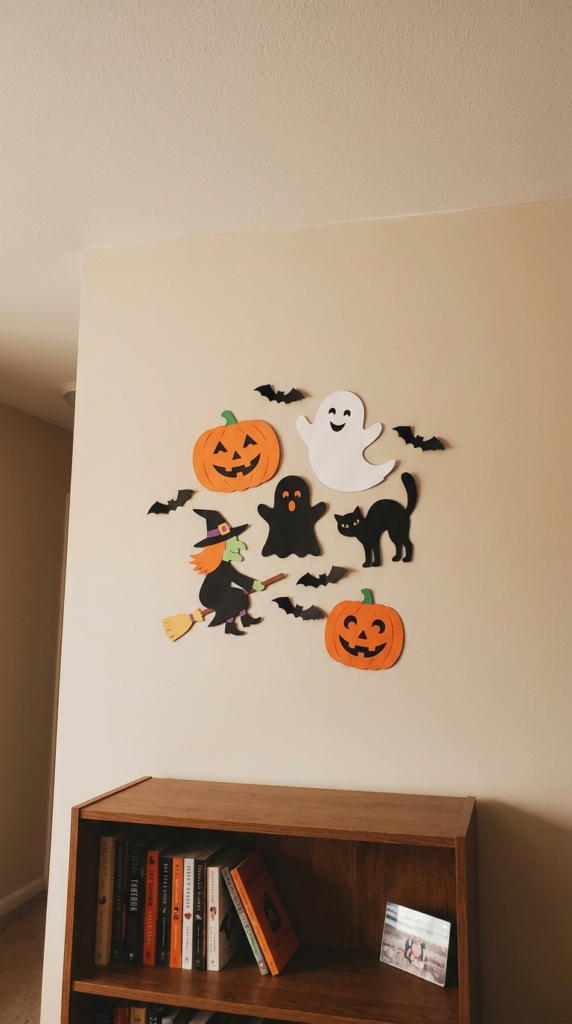
When floor space is limited, vertical decorations can provide plenty of Halloween personality without reducing the usable area of the room.
Paper bats, ghosts, black cats, witches, skeletons, pumpkins, and other flat die-cut figures are inexpensive ways to create a playful 90s-inspired display.
They work particularly well above doorways, along upper walls, around cabinets, beside a media shelf, or in an otherwise empty vertical section.
The key is to create a grouping rather than scatter individual pieces throughout the entire home.
For example, arrange several bats so they appear to travel in one direction. A small group of character silhouettes can also work well when each figure has enough room around it.
Before attaching the decorations, arrange them on a table or floor first. Take a quick photograph so you can recreate the spacing on the wall.
Use removable attachment methods appropriate for the surface, especially if you are decorating a rental or mobile home where wall damage is a concern.
If one motif becomes the main theme, allow it to repeat naturally in only a few locations. A concentrated bat display will usually look more intentional than dozens of unrelated figures covering every wall.
10. Bring in Nostalgic Halloween Textiles
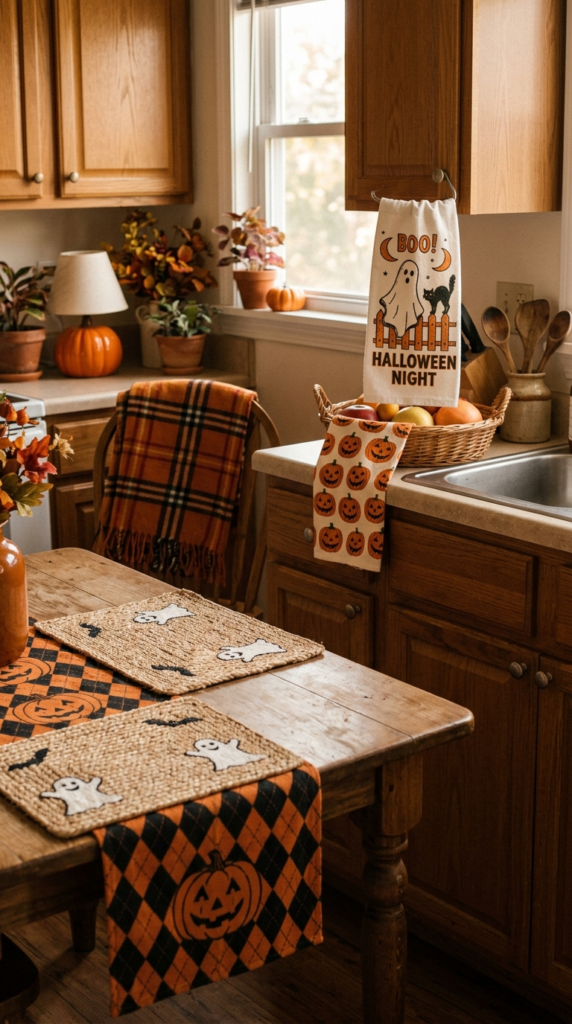
Textiles are one of the easiest ways to change the appearance of a small home because they can replace items that are already present.
Instead of adding another decoration, swap a regular kitchen towel for a pumpkin or ghost design. Replace an everyday runner with a black-and-orange pattern. Use a Halloween hand towel in the bathroom or a seasonal placemat on the dining table.
This creates a noticeable seasonal change without consuming additional storage or countertop space.
The distinction between replacement and extra textiles is useful.
A replacement towel takes the place of the towel you were already using. A seasonal mat replaces the ordinary mat. A Halloween tablecloth replaces a bare tabletop or everyday covering.
An extra blanket, additional runner, second tablecloth, and multiple decorative towels all require more room and can quickly make a compact home feel crowded.
For rugs and mats, check the entire walking path before leaving them in place. Make sure doors can open freely and that the material does not bunch at a threshold.
Choose a few playful designs rather than trying to coordinate every textile in every room.
11. Choose One Strong Witch or Moon Silhouette
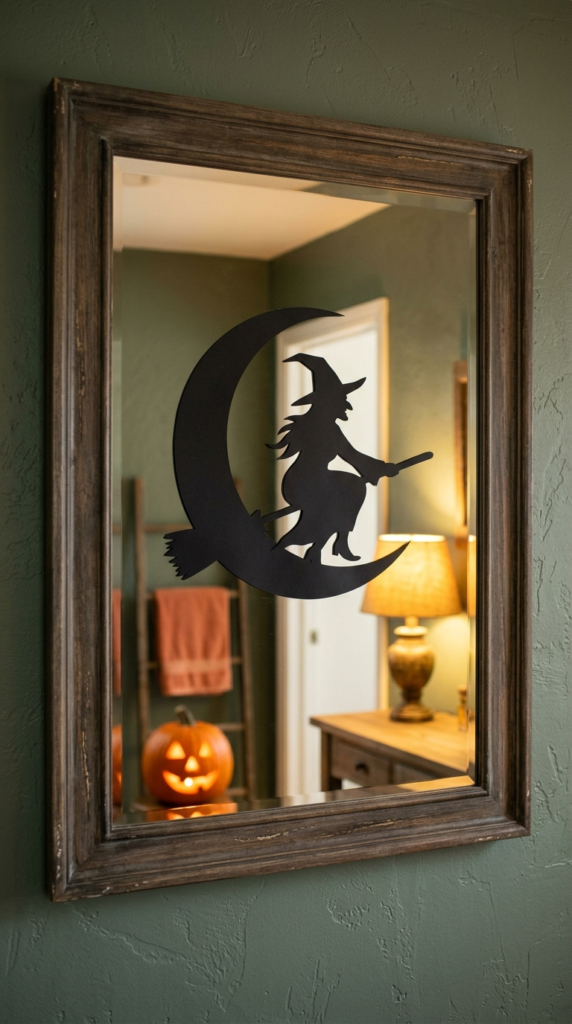
A large, recognizable Halloween silhouette can have more impact than a collection of small signs.
A witch flying across a moon, a black cat, a ghost, or a simple pumpkin silhouette can create the illustrated quality associated with older Halloween decorations.
Mirrors can be particularly useful for this idea because the silhouette becomes part of a larger reflected scene. A removable black witch or moon placed on an appropriate mirror surface can interact visually with a pumpkin, towel, or warm light in the background.
The same concept works on a quiet wall.
Choose one high-contrast image and give it enough empty space around it to remain recognizable.
This also provides an opportunity to reduce unnecessary word art. If the room already contains signs saying “Boo,” “Spooky,” “Trick or Treat,” and “Happy Halloween,” another sign may not contribute much.
Instead, allow a memorable character or silhouette to carry the visual message.
The 90s influence can come from the simplicity and graphic quality of the decoration rather than from covering the room with slogans.
12. Limit the VHS and Paperback Collection to One Shelf
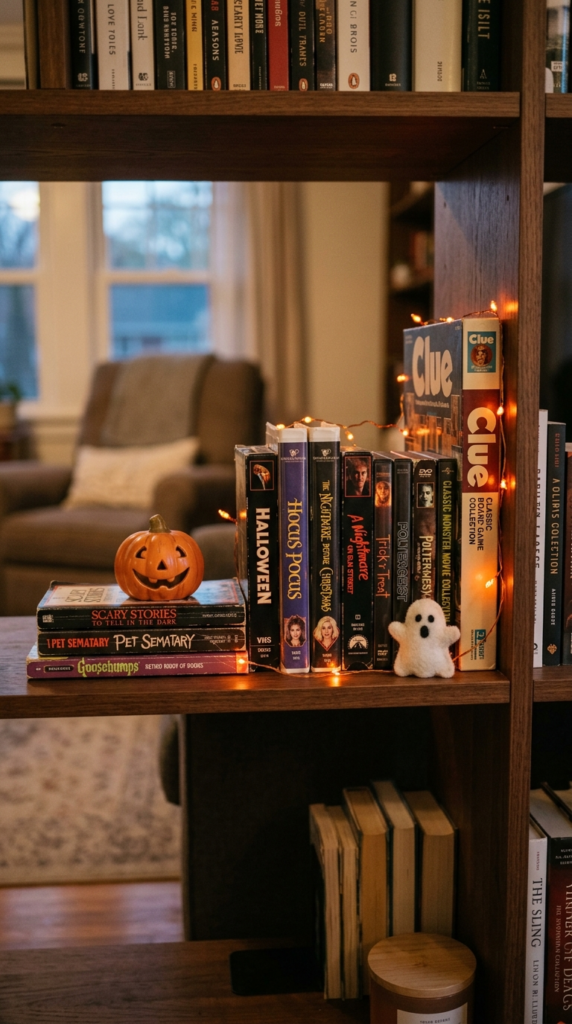
A small collection of spooky books, movie cases, game boxes, or Halloween media can create one of the most personal areas in the home.
Use items you already own whenever possible. Old paperbacks, childhood Halloween books, board games, movie cases, or vintage-looking storage boxes can provide the visual shapes needed for the display.
Add one or two seasonal objects, such as a molded pumpkin or small ghost, and perhaps a short orange light strand.
The important part is establishing a boundary.
Choose one shelf, one bookcase bay, or one section of the entertainment unit. Keep the collection within that space rather than allowing it to expand across the room.
This prevents a nostalgic display from turning into general storage.
Vary the heights slightly so the shelf does not look like a row of identical objects. A stack of books can sit beside upright cases, while a small pumpkin can provide a rounded shape.
Once the shelf feels complete, stop.
A concentrated collection reads as a deliberate Halloween memory corner. The same collection spread across shelves, floors, and furniture can quickly make a small living room feel disorganized.
13. Give the Bathroom a Simple 90s Halloween Snapshot
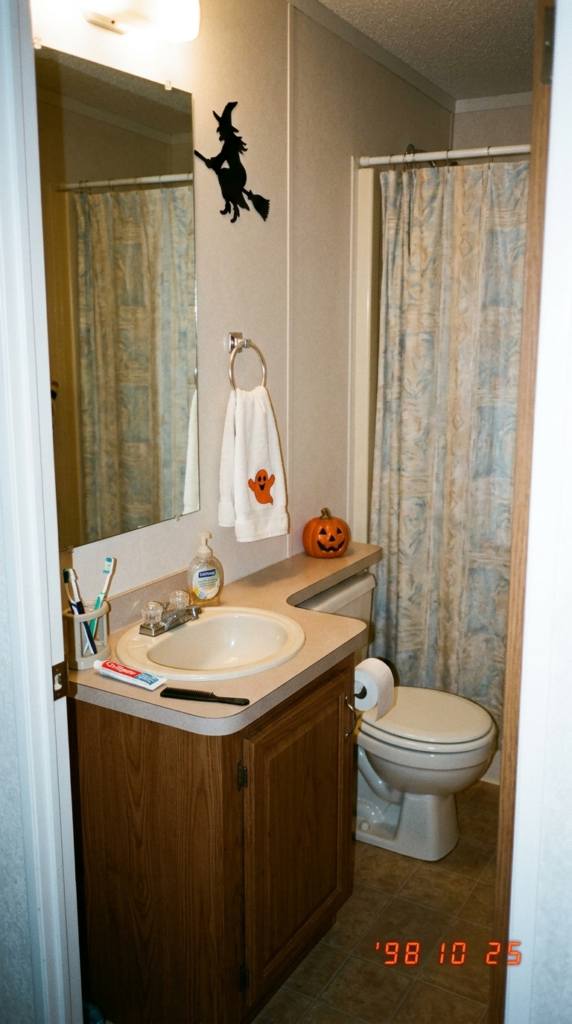
A small bathroom only needs a few recognizable details to feel seasonal.
Start with the items the room already needs: soap, toothbrushes, toilet paper, hand towels, and other everyday essentials. Once those are in place, identify the remaining dry surfaces where one or two decorations can safely fit.
A ghost hand towel is an easy starting point. Add a small pumpkin on an appropriate dry surface or a removable black-cat or witch silhouette near the mirror.
The idea is to make the bathroom feel like a quick Halloween snapshot rather than a fully decorated room.
Because the space is small, even one novelty object can become a major visual element. Avoid placing decorations where they interfere with sinks, faucets, outlets, shower controls, ventilation, or normal movement.
A useful combination might be one seasonal towel, one silhouette, and one small pumpkin.
If there is no room for all three, let the towel do most of the work.
The 90s feeling can remain softer here than in the living room. A few familiar shapes and a little orange lighting are enough to connect the bathroom to the rest of the mobile home.
14. Give the Bedroom a Cozy 90s Sleepover Feeling
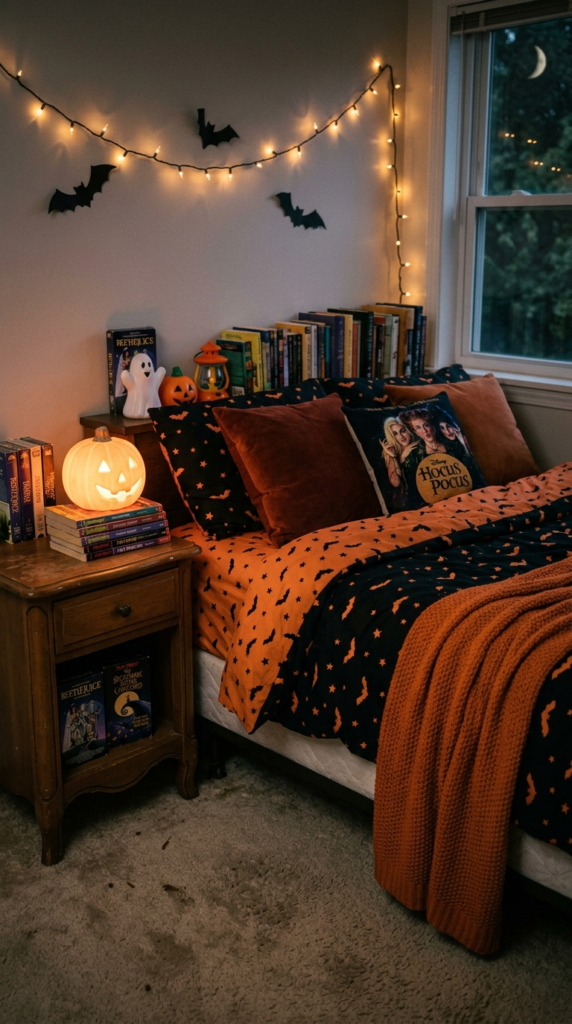
The bedroom can interpret the 90s Halloween aesthetic in a softer way.
Instead of filling the room with bright plastic decorations, focus on the feeling of an October sleepover. A pumpkin-orange throw, black-and-orange bedding, spooky paperbacks, a small pumpkin light, or a few paper bats can establish the theme without making the room feel like a party store.
Choose one major focal point.
The bed itself can carry the Halloween color story through a throw or pillow. Alternatively, create a small nostalgia corner on a nightstand, dresser, or shelf.
Avoid decorating every surface simultaneously. The bedroom needs to remain comfortable for sleeping, walking, dressing, and everyday use.
Lighting can help here as well. A small warm pumpkin lamp or low-intensity orange light can create atmosphere without requiring additional objects.
If you have older books, movie cases, or childhood Halloween items, display a few beside the bed or in one small corner.
The strongest version should feel like a cozy Halloween night rather than a miniature haunted house.
15. Style the Dining Table Like a 90s Halloween Party
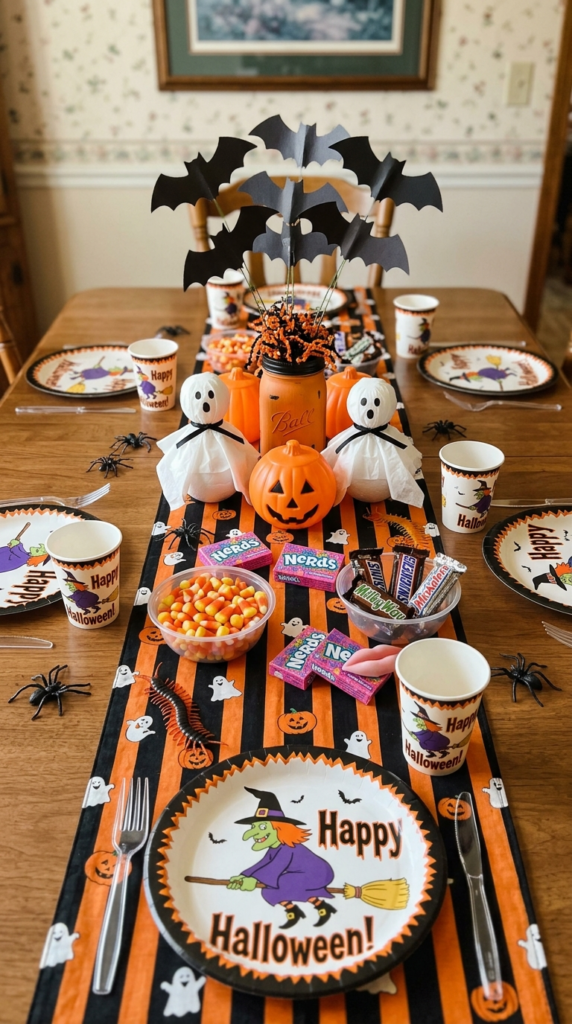
The dining table is one place where a little more seasonal decoration can make sense because the tabletop naturally provides a defined boundary.
A black-and-orange runner, plastic pumpkins, paper bats, friendly ghosts, Halloween plates, candy, and simple homemade decorations can create the atmosphere of a school-party or family Halloween gathering.
The amount of decoration should depend on how often the table is used.
If the table serves as an everyday workspace, dining area, or homework surface, choose a removable setup. A seasonal runner and one low centerpiece may be enough.
If the table is mainly being prepared for a Halloween gathering, you can create a fuller arrangement with themed dishes, candy bowls, paper decorations, and multiple small pumpkins.
Keep the center low enough for people to see across the table. Leave adequate space for plates, drinks, and serving dishes when the table is being used.
The best stopping point is when the table looks festive before the chairs are even pulled out.
If decorations make it difficult to sit, serve food, or clear dishes, the arrangement has become too dense for the way the room is actually used.
16. Choose Vintage-Looking Shapes Without Chasing Rare Originals
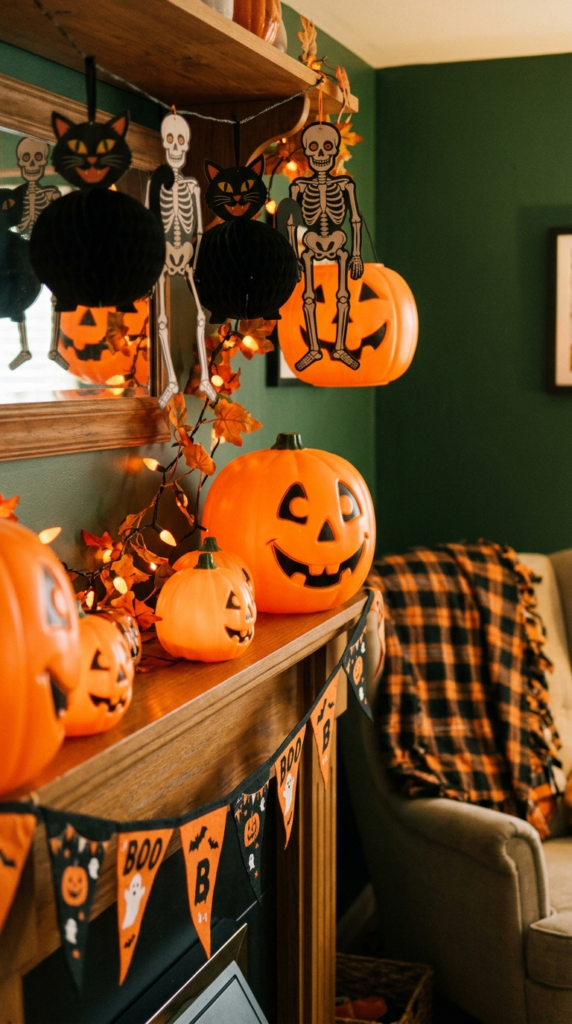
You do not need every decoration to be an authentic item from the 1990s.
For this aesthetic, the most important characteristics are often visual: bright molded plastic, chunky pumpkin shapes, cartoon-like faces, bold black outlines, novelty textiles, paper decorations, and warm orange lighting.
Authentic vintage pieces can certainly add personality, particularly when you find an item you genuinely like. But modern reproductions can create a similar visual effect without the price, fragility, or storage requirements that sometimes come with older collectibles.
Storage is especially important in a mobile home.
Before purchasing a large seasonal decoration, consider where it will live for the other eleven months of the year. A huge pumpkin may look impressive in October but become difficult to store in a compact home.
A smaller reproduction with the right shape, color, and expression may create nearly the same decorating impact while taking up considerably less space.
Think about what actually changes the room.
If the answer is the object’s color, silhouette, material, or nostalgic proportions, focus your budget on those characteristics rather than paying extra simply because something is old.
17. Connect the Entire Mobile Home With a Nostalgic Halloween Trail
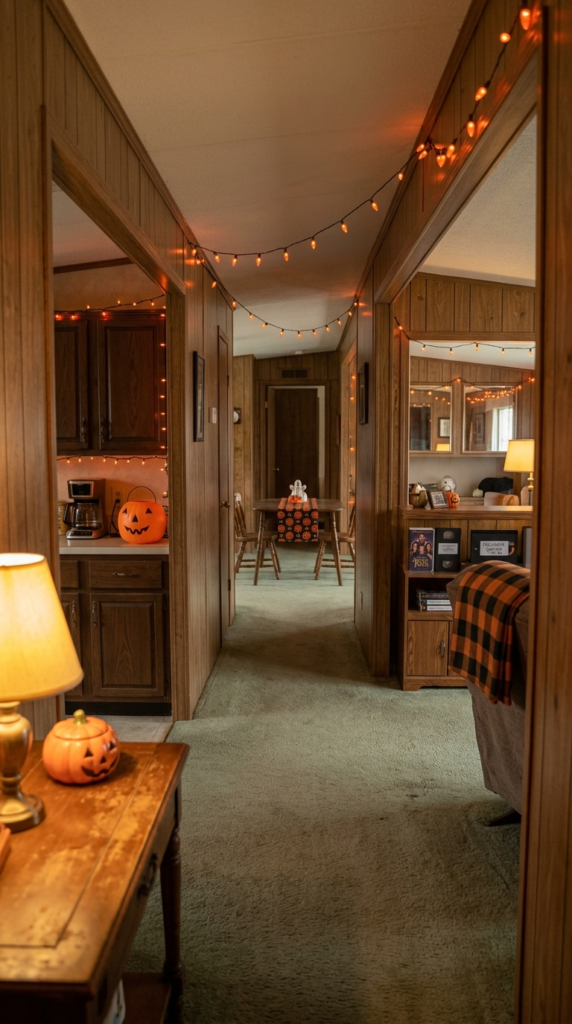
The final step is to look at the home as one connected space rather than as a collection of individually decorated rooms.
Mobile homes often have long sightlines, which means a decoration placed in the kitchen can be visible from the living room. Use that connection to create a gradual Halloween story.
For example, the kitchen might feature orange mini lights and a plastic pumpkin. The dining area could introduce a black-and-orange runner and a small party centerpiece. The living room might contain the VHS-inspired media shelf, while the bedroom and bathroom use softer versions of the same palette.
Not every room needs the same number of decorations.
In fact, quieter areas can make the decorated zones feel stronger.
Stand at the entrance or at the end of the longest visible hallway and look through the connected rooms. Notice where your eye goes first, second, and third.
If every space contains the same combination of orange pumpkins, black bats, signs, lights, and novelty textiles, the individual focal points begin competing with each other.
Instead, let the eye discover the Halloween theme in stages.
One room can provide color. Another can provide nostalgia. Another can provide lighting. A smaller room can simply repeat one familiar motif.
The result is a mobile home that feels connected by one 90s Halloween aesthetic without requiring every available surface to be decorated.
The most convincing nostalgic spaces are not necessarily the ones with the most decorations. They are the ones where a few recognizable colors, shapes, objects, and lighting choices work together consistently.