
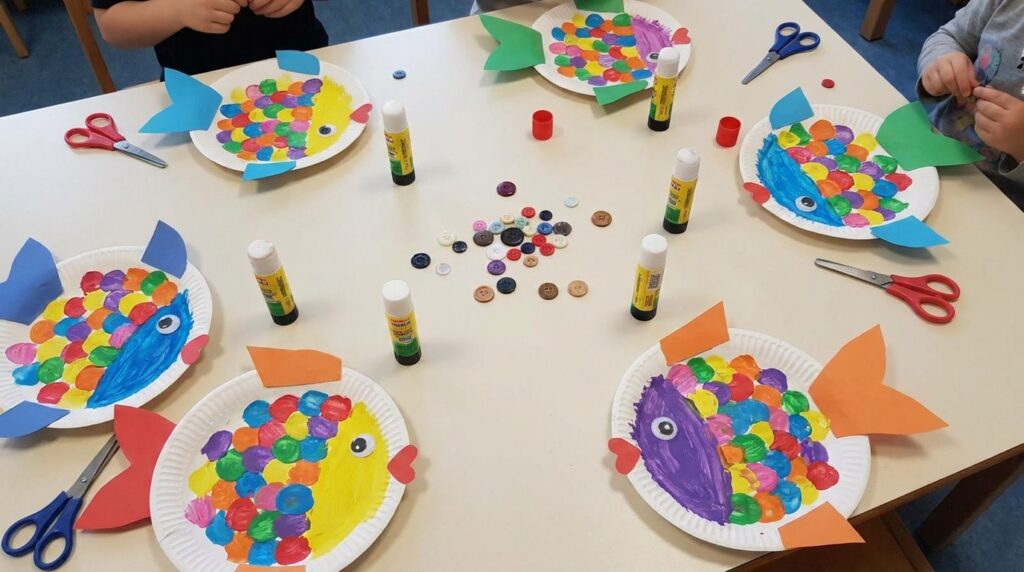
Fish crafts are a fun way for kids to explore colors, shapes, and creativity while making playful ocean-inspired artwork. With simple materials such as paper plates, colored paper, cardboard, paint, yarn, and craft sticks, you can create all kinds of colorful fish projects at home or in the classroom.
Children can experiment with different patterns and decorations to make each fish unique, whether they’re learning about sea life or simply enjoying a creative activity. From simple beginner projects to more detailed designs, there are plenty of possibilities to explore. These lovely fish craft ideas can inspire a fun afternoon of crafting and imaginative underwater adventures.
1. Make a Colorful Fish From a Paper Plate
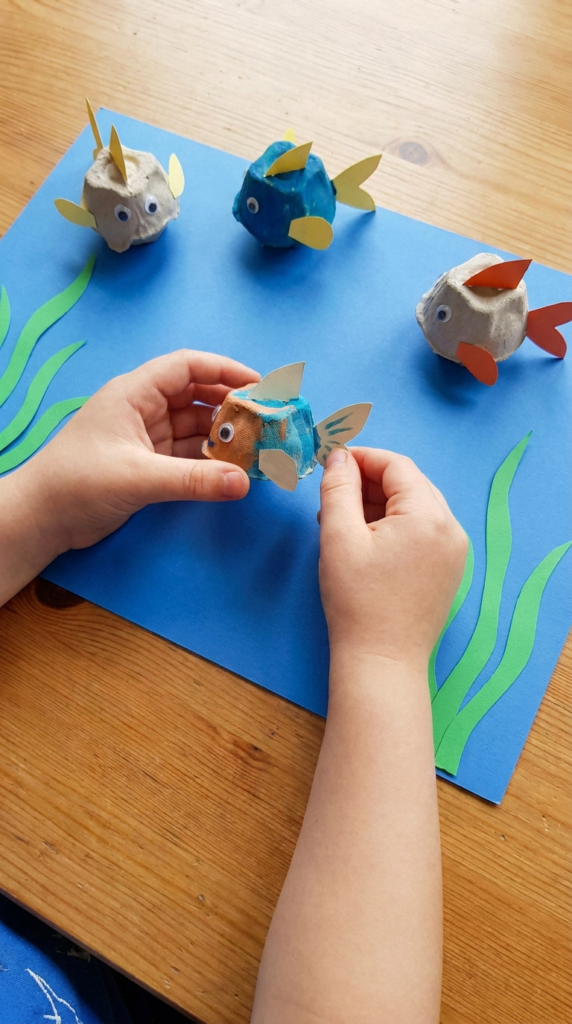
A paper plate is an easy starting point for a cheerful fish craft. Paint the plate in any color, then use construction paper to add fins, a tail, and other details. For a simple fish shape, cut a triangular section from one side of the plate and reposition the piece on the opposite side as a tail. Add a googly eye or draw one with a marker, then decorate the body with stripes, dots, or paper scales.
This project works well for toddlers and preschoolers because most of the preparation can be handled by an adult while children focus on painting and decorating. If you’re crafting with very young children, use child-safe materials and supervise any cutting. Finished paper plate fish can be displayed on a refrigerator, classroom wall, or bedroom bulletin board.
2. Turn an Egg Carton Into a Little Fish
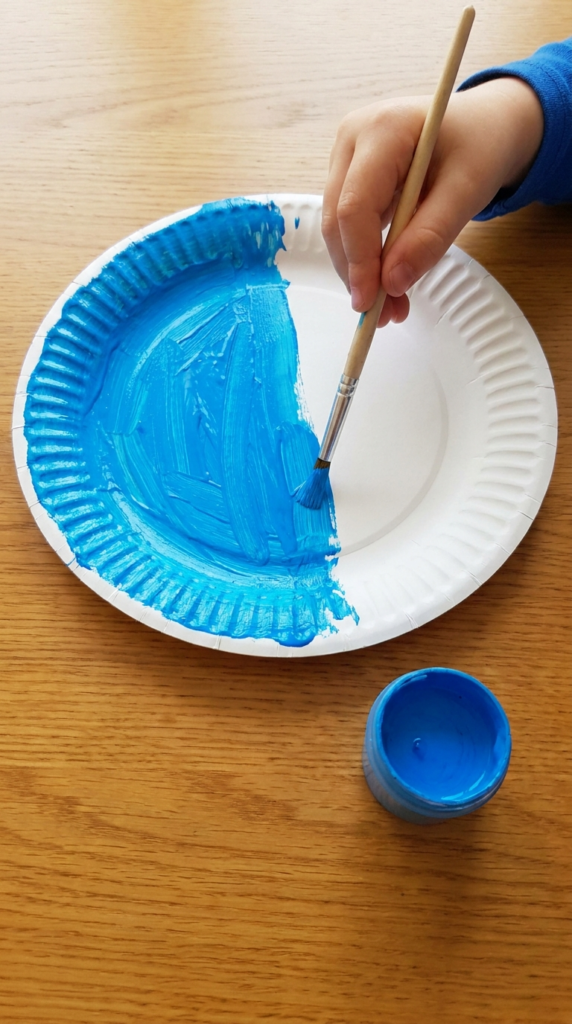
An empty cardboard egg carton can become the base for an imaginative fish project instead of going straight into the recycling bin. Cut individual cups from the carton and let children paint them in bright colors. Once the paint dries, add paper fins, a tail, and a face to create a tiny three-dimensional fish.
You can make several fish at once and arrange them together as an underwater scene. Blue construction paper can serve as the background, while scraps of green paper can become seaweed. This craft also creates an opportunity to talk about reusing household materials and finding new purposes for everyday objects.
Adults should handle the cutting of the egg carton, especially when working with younger children. Choose clean, dry cartons and use washable or child-appropriate craft paint.
3. Create Textured Fish With Tissue Paper
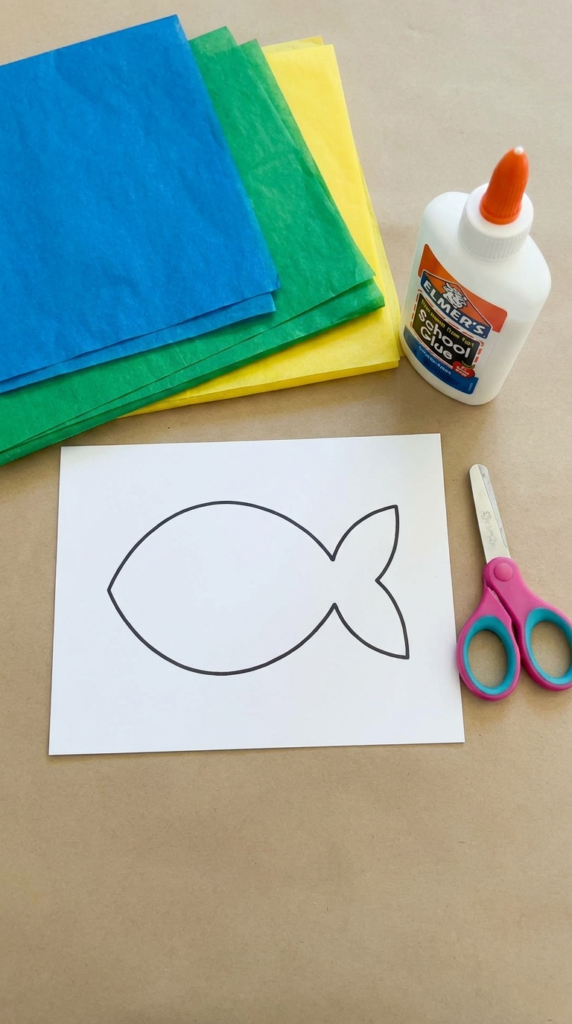
Tissue paper can give a simple fish outline plenty of color and texture. Start with a fish shape drawn or printed on sturdy paper. Children can tear tissue paper into small pieces, crumple them slightly, and glue them inside the outline.
Using several shades of blue, green, yellow, pink, or purple can create a colorful underwater design. Overlapping pieces also gives the fish a layered appearance. For an easier activity with younger children, prepare the fish outlines in advance and let them concentrate on choosing colors and arranging the tissue paper.
The finished artwork can be displayed near a sunny window, although ordinary tissue paper should not be expected to behave like transparent stained glass. For a window decoration, use materials specifically designed for that purpose. Always supervise children when using liquid glue.
4. Make a Keepsake Handprint Fish
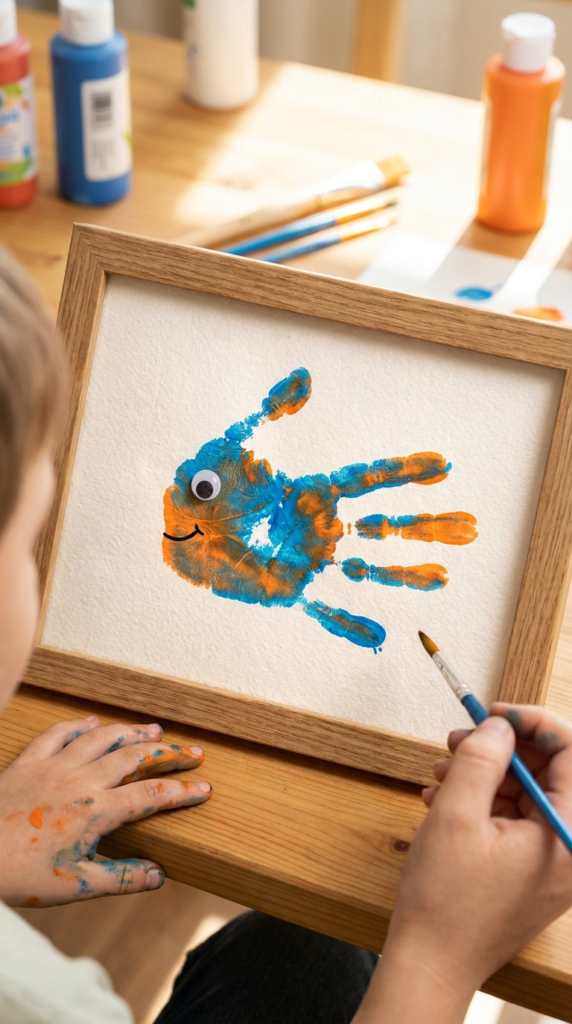
Handprint crafts turn a simple painting activity into a memorable keepsake. Apply washable, child-safe paint to a child’s hand and gently press it onto a sheet of paper. Depending on the orientation, the fingers can become fins while the palm forms the main body of the fish.
Once the handprint is dry, add an eye, bubbles, seaweed, or small paper decorations around it. Older children can add their own drawings and patterns to the background.
This project can be especially meaningful when used as a classroom activity or family keepsake. Consider writing the child’s name and the date on the finished artwork so it can be saved and compared with future handprints as they grow.
5. Design a Colorful Coffee Filter Fish
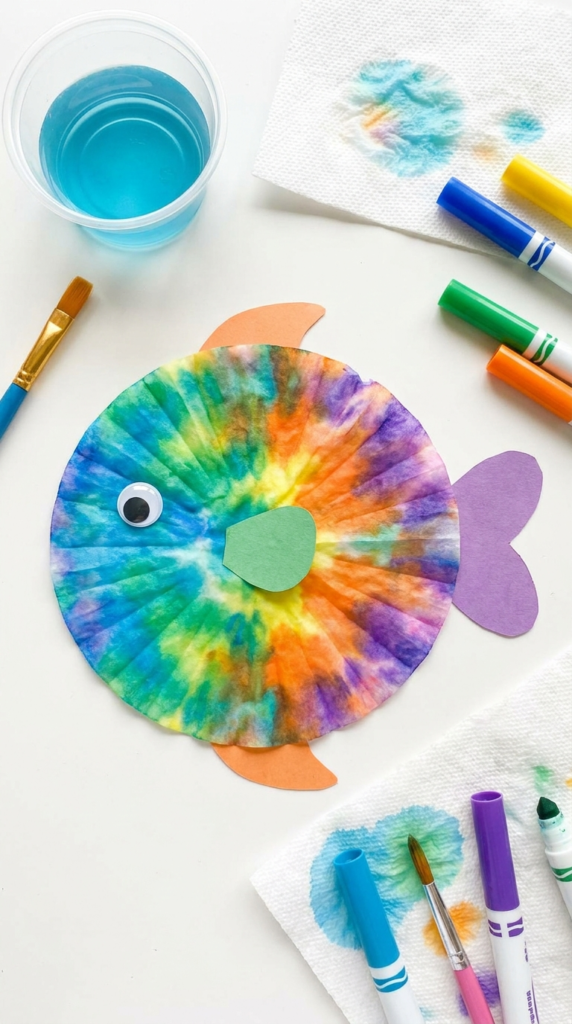
Coffee filters are useful for simple color-blending projects because they absorb water easily. Flatten a coffee filter and let children decorate it with washable markers. They can use different colors in sections, dots, stripes, or abstract patterns.
Lightly mist the filter with water and allow the colors to spread into one another. Let it dry completely before cutting or shaping it into a fish. Once dry, add paper fins and an eye.
The resulting pattern can be surprisingly vibrant. Several finished fish can be attached to string to create an underwater-themed hanging decoration, or they can be displayed together on a classroom bulletin board. Place newspaper or another protective surface underneath the project because marker and water can spread beyond the filter.
6. Turn a Paper Bag Into a Fish Puppet
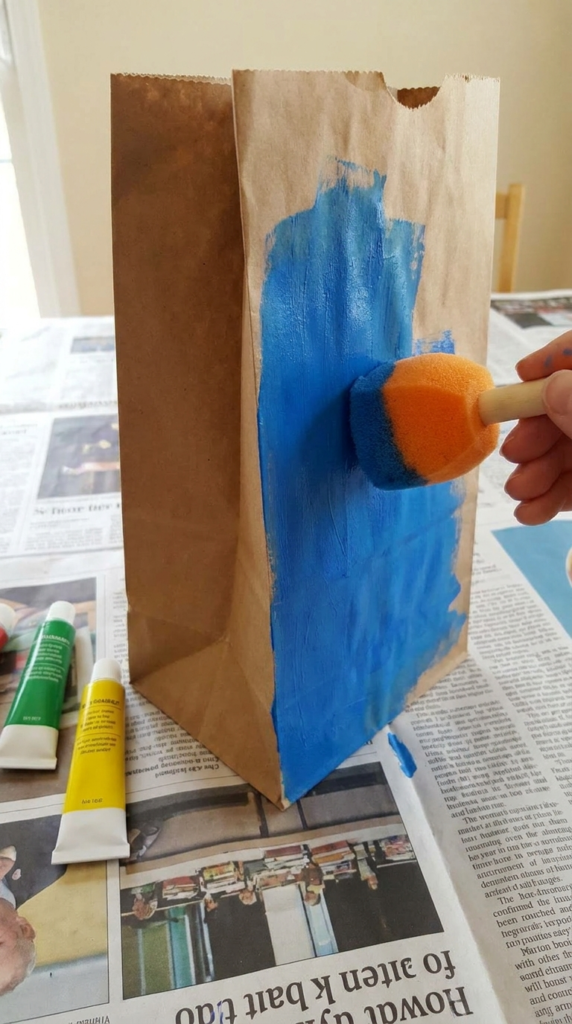
A paper bag can become an entertaining fish puppet with just a little decorating. Paint or color the bag, then add fins, a tail, eyes, and other details using construction paper or craft foam.
The folded bottom portion of the bag can be incorporated into the puppet’s mouth, allowing children to move it with their hand. Encourage them to create different fish characters with unique colors and expressions.
Once the craft is complete, turn it into an imaginative play activity. Children can make up an underwater story, perform a short puppet show, or create several sea creatures for a group activity.
For younger children, adults can prepare the paper shapes ahead of time. Avoid adding loose small decorations if the craft is being used around children who may put objects in their mouths.
7. Fold an Easy Origami Fish
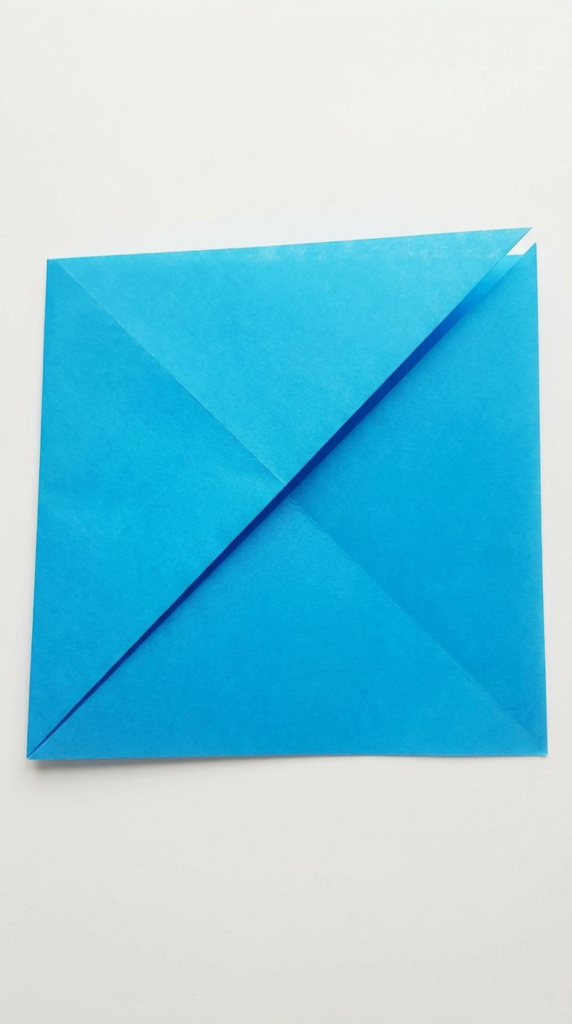
Origami offers a different type of fish-making experience because the finished design comes from folding rather than cutting and gluing. Choose square sheets of lightweight paper and follow a simple fish-folding pattern appropriate for the child’s age.
Younger children may need help with the creases, while older kids can practice following each step independently. Once the fish is folded, add eyes and simple details with markers or colored pencils.
Patterned, brightly colored, or metallic-looking paper can create interesting results, but ordinary construction or origami paper works well too. Making several fish in different sizes can turn the activity into a larger underwater scene.
Origami is also useful for practicing careful hand movements and following sequential instructions, making it both a creative and structured activity.
8. Recycle a Cardboard Roll Into a Fish
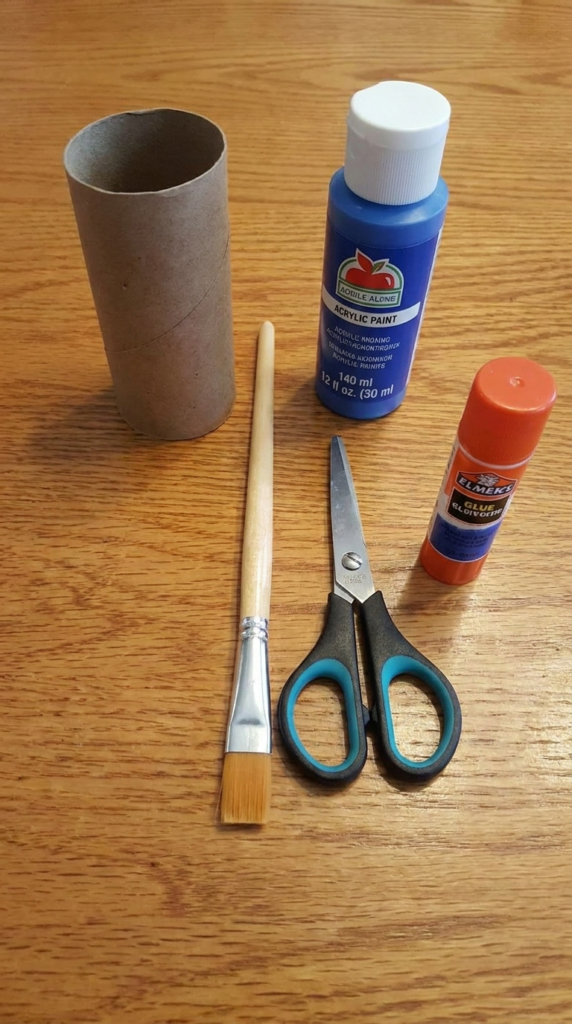
Empty cardboard toilet paper rolls are another convenient material for children’s crafts. Flatten or gently shape one end of the roll and cut it into a tail-like form. An adult should handle the scissors when necessary.
Paint the cardboard in a bright color and allow it to dry. Paper fins can then be attached to the sides, while markers or additional paper pieces can be used for the face and scales.
Create several fish using different colors and arrange them together on a shelf or a large sheet of blue paper. Children can turn their collection into an imaginary aquarium or underwater story scene.
Because cardboard rolls are lightweight, they are easy for children to decorate and display. Using recycled household materials can also help children see how ordinary objects can become creative project supplies.
9. Print Fish Shapes With a Sponge
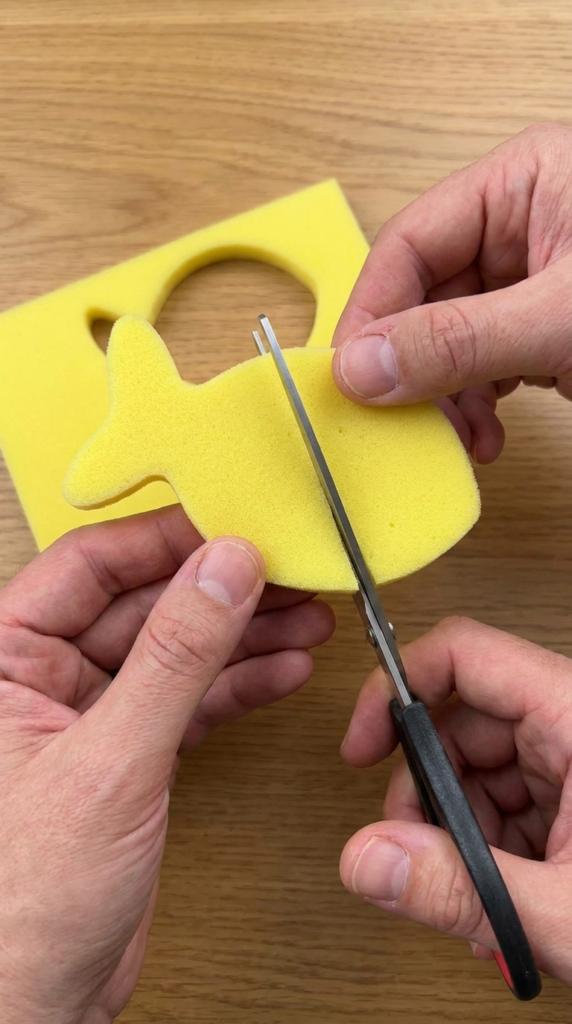
Sponge printing is a straightforward process-art activity for young children. Cut a clean craft sponge into a simple fish shape before beginning the activity. An adult should do the cutting and keep sharp tools away from children.
Pour a small amount of washable paint onto a tray. Children can gently press the sponge into the paint and then stamp it onto paper. Each print can be decorated differently with drawn eyes, fins, bubbles, or additional paint.
The technique works especially well for toddlers and preschoolers because the child can focus on pressing and stamping rather than handling complicated craft materials.
Protect the work surface with newspaper or a washable covering, and keep sleeves rolled up or use an art smock. The finished prints can become cards, wrapping paper, classroom artwork, or part of a larger ocean-themed collage.
10. Paint a Fish With a Simple Watercolor Resist
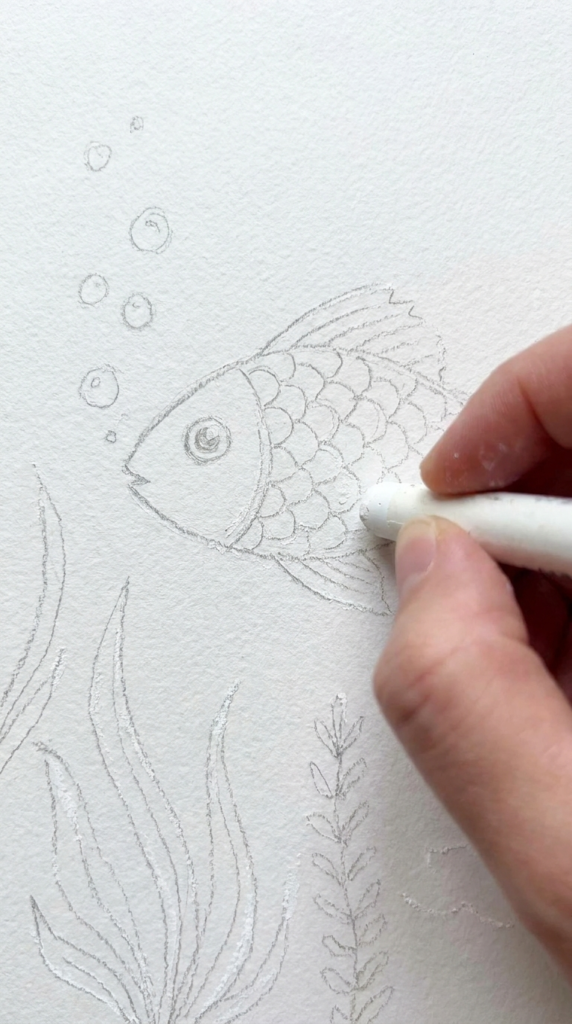
Watercolor resist painting creates an interesting effect by combining waxy drawing materials with watercolor paint. Start by drawing a fish on watercolor paper using a white crayon or oil pastel. Add scales, fins, bubbles, and other underwater details.
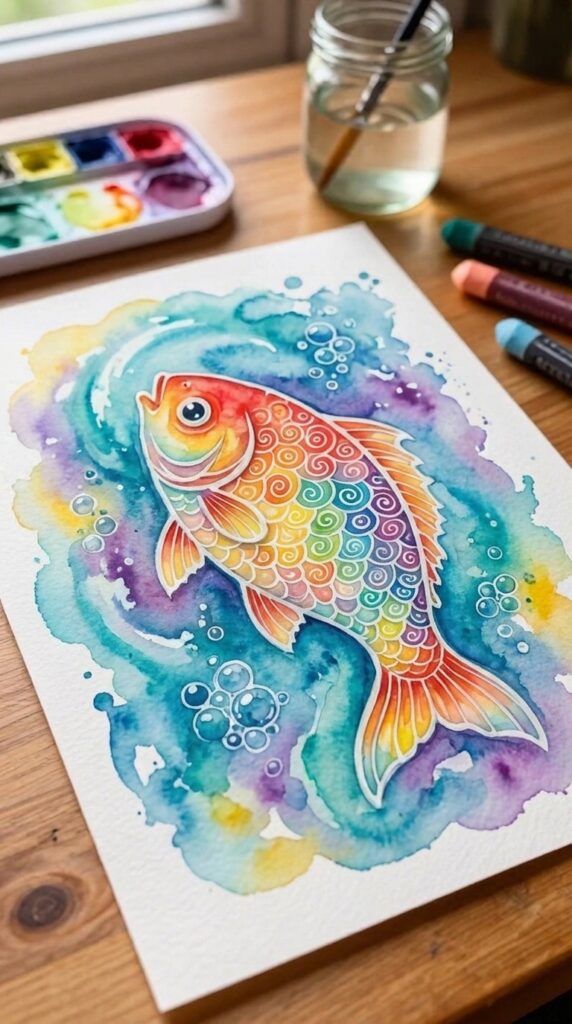
Next, brush diluted watercolor over the entire page. The waxy lines resist the watery paint, allowing the fish design to remain visible while color spreads across the surrounding area.
Children can experiment with different color combinations to create tropical fish, deep-sea scenes, or imaginary underwater creatures. This activity also encourages them to observe how different art materials interact.
Use washable watercolor paints when working with younger children and protect clothing and furniture from splashes. Allow the paper to dry flat before displaying it.
11. Make Textured Fish Prints With Bubble Wrap
Bubble wrap can create a fun scale-like texture when used as a printing tool. Cut a manageable piece of bubble wrap into a basic fish shape or attach it temporarily to a cardboard fish-shaped template.
Apply a thin layer of washable paint to the bubble side, then carefully press it onto paper. Lift the bubble wrap straight up to reveal the repeated pattern left behind by the bubbles.
After the print dries, children can add eyes, fins, tails, and additional details with markers or paper. Try using different paint colors for several fish and arrange them together as a colorful underwater display.
Because bubble wrap can become a choking hazard for young children, keep it away from children who may chew or mouth craft materials and supervise the activity closely.
12. Create a Fish Collage From Old Magazines
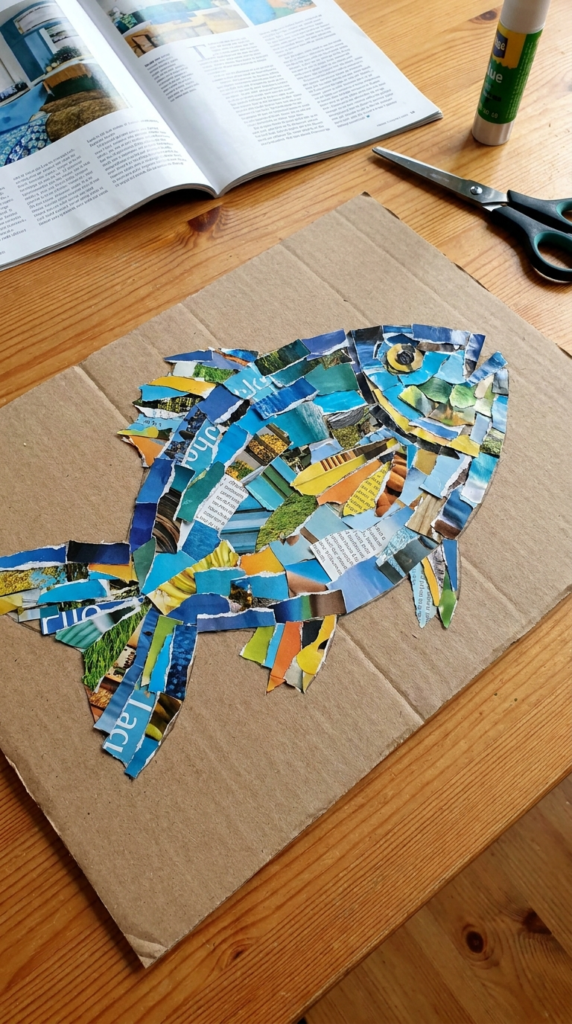
Old magazines can provide a wide variety of colors, patterns, and photographs for a fish collage. Draw a large fish outline on cardstock or another sturdy piece of paper. Children can then search through old magazine pages for colors they want to use.
Tear or cut the selected pages into smaller pieces and arrange them inside the fish outline. Younger children can work with larger pieces, while older kids may enjoy creating more detailed patterns.
A collage can be organized by color, such as using different shades of blue and green, or it can be completely imaginative. Add paper eyes and fins afterward to make the fish stand out.
This project encourages children to make choices about color, placement, and composition while giving old paper materials another use. If scissors are involved, select child-appropriate scissors and supervise their use.
13. Sculpt a Fish From Air-Dry Clay
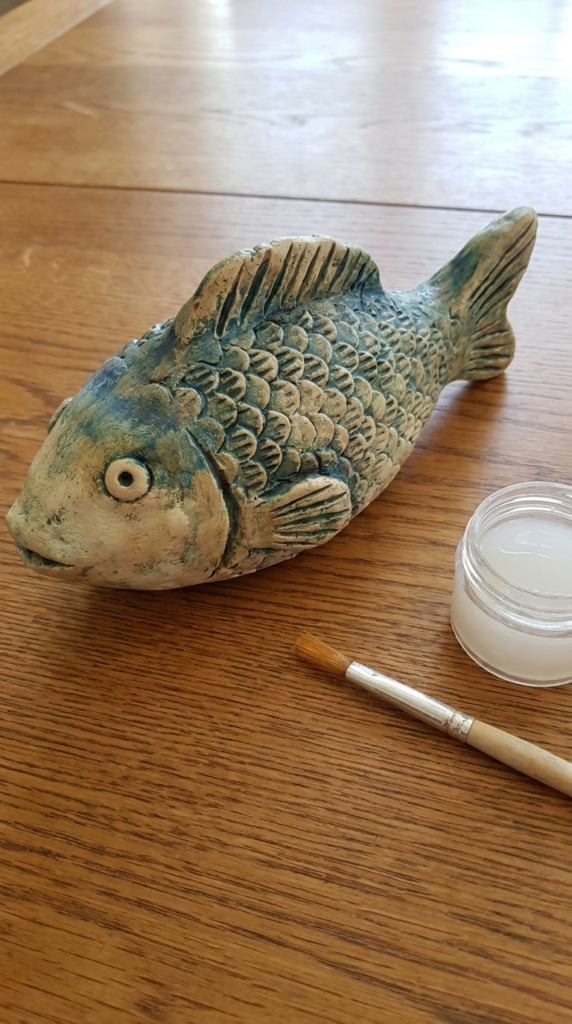
Air-dry clay allows children to create a fish they can hold rather than a flat picture. Begin with a manageable piece of clay and shape it into a basic oval or fish body. Add separate pieces for fins, a tail, and other features.
Texture can be added with child-safe modeling tools. For younger children, adults can help with the basic shape while the child focuses on decorating it.
After the sculpture has completely dried according to the clay manufacturer’s directions, it can be painted with suitable craft paint. Finished pieces can become shelf decorations, handmade gifts, or part of a collection of clay sea creatures.
Always supervise children when using sculpting tools. Avoid using sharp objects such as toothpicks around young children; choose blunt modeling tools designed for children’s crafts instead.
14. Wrap a Cardboard Fish With Colorful Yarn
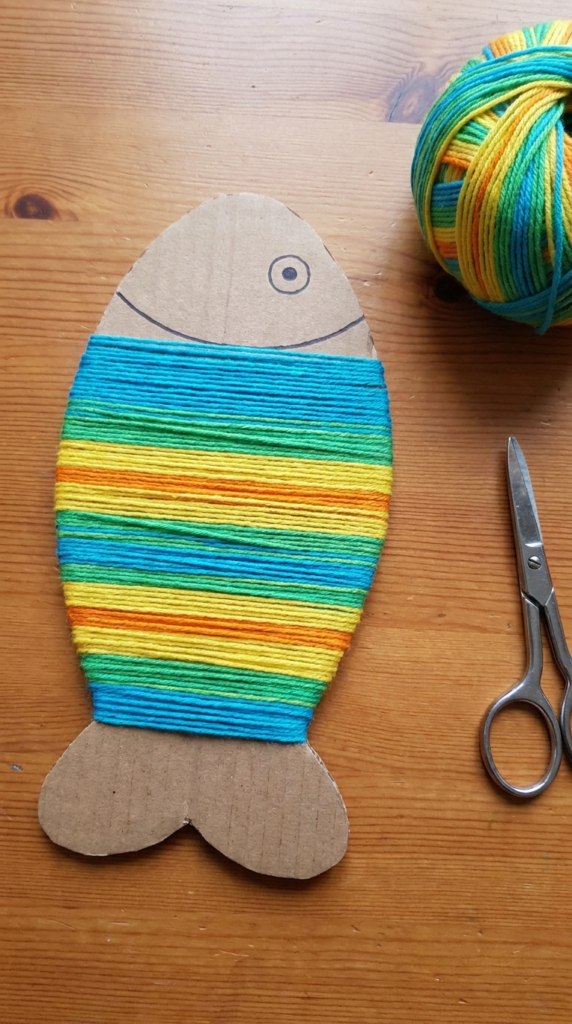
Yarn wrapping combines simple shapes with a hands-on textile technique. Cut a fish shape from sturdy cardboard, or prepare a cardboard template before children begin. Add small notches around the edge if needed to help keep the yarn in place.
Children can wrap yarn around the cardboard repeatedly, changing colors whenever they want to create stripes, blocks of color, or a multicolored pattern. The repeated wrapping motion requires concentration and coordination.
For younger children, an adult can help hold the cardboard while the child wraps the yarn. Older children can experiment with different yarn thicknesses and color combinations.
Once the body is covered, add paper fins, an eye, or other details. Because the finished fish has a noticeable texture, it can work well as wall art or part of a larger handmade ocean display.
15. Make a Wearable Fish Visor
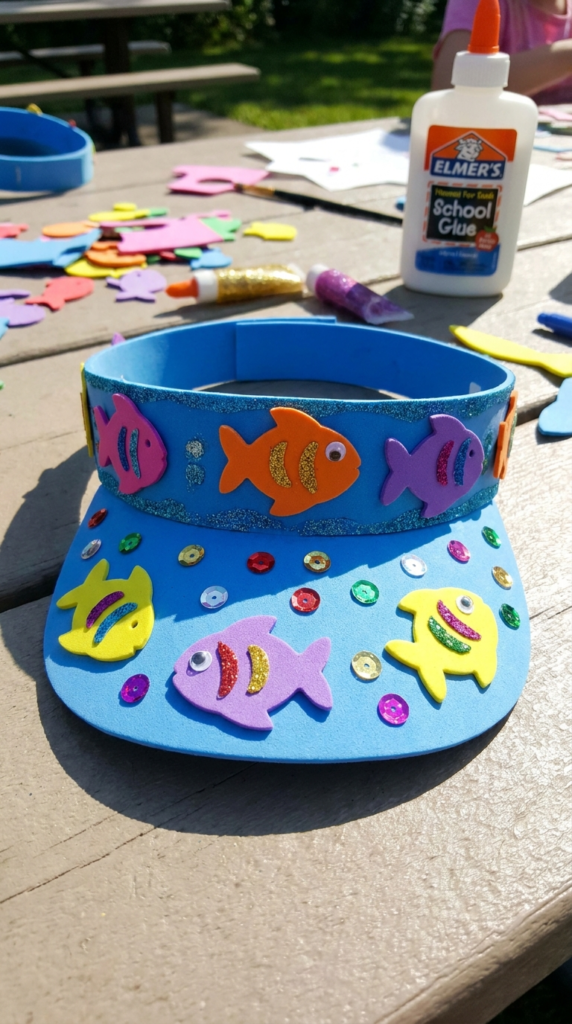
A fish visor combines crafting with imaginative dress-up. Use craft foam or another lightweight craft material to create fish-shaped decorations that can be attached to a plain visor.
Children can choose the fish’s colors and add simple details such as fins, eyes, stripes, scales, or bubbles. Stickers and lightweight decorations can also be used if they are securely attached and age-appropriate.
This type of project can work well for ocean-themed classroom activities, summer programs, birthday parties, or other group craft sessions. It also gives children an opportunity to wear something they designed themselves.
Use craft materials suitable for the child’s age and supervise glue use. Avoid adding sharp or heavy decorations that could make the visor uncomfortable or unsafe to wear.
16. Paint Colorful Fish on Smooth Rocks
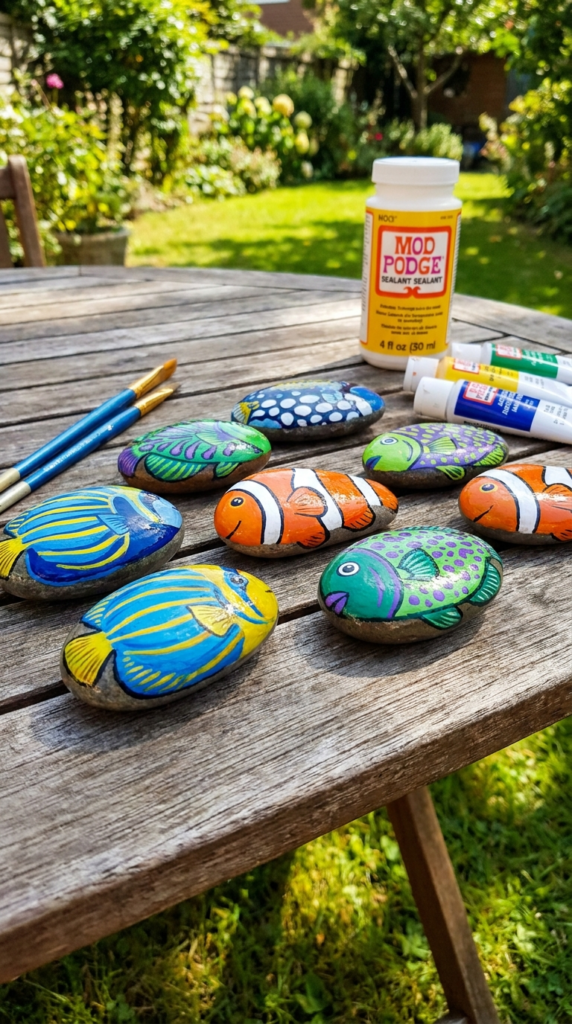
Smooth rocks make sturdy canvases for small fish designs. Choose clean, dry stones with relatively flat surfaces and wash them before painting. Once completely dry, children can sketch a simple fish shape and fill it with colorful patterns.
Acrylic craft paint can create strong colors, although adults should supervise its use and follow the product’s instructions. Add stripes, dots, scales, or unusual color combinations to give each rock its own personality.
Once the artwork is dry, the painted stones can be displayed indoors as paperweights or decorations. If you plan to use painted rocks outdoors, choose an appropriate outdoor sealer and follow its safety directions.
Never collect rocks from areas where removal is prohibited, and avoid placing decorated stones where they could create a hazard for people, pets, or wildlife.
17. Create an Abstract Fish With Straw-Blown Paint
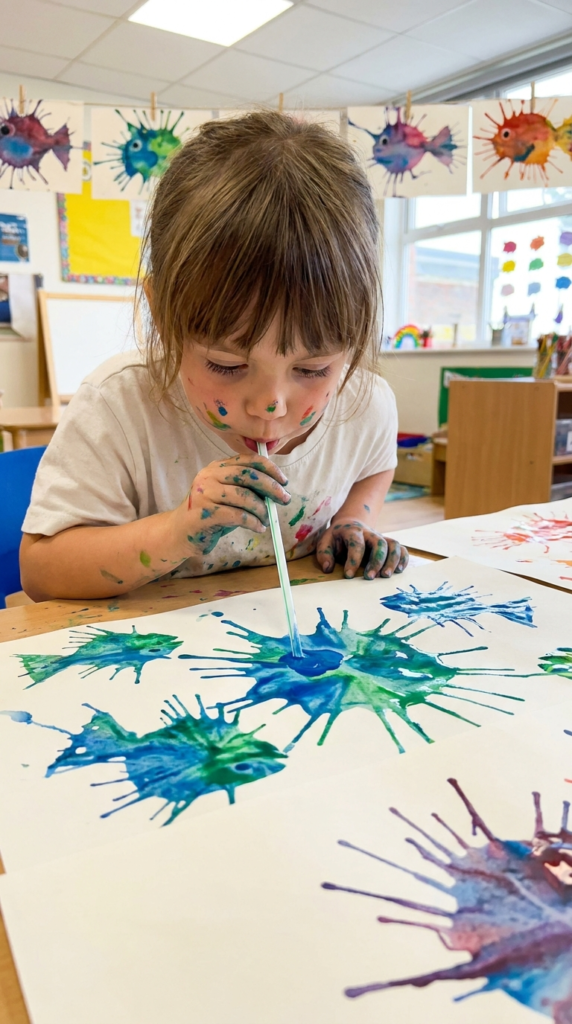
Straw-blown painting can produce unusual shapes and branching patterns that children can turn into imaginative fish. Place a small amount of appropriately diluted, washable paint on paper and have the child blow gently through a straw to move the paint outward.
Once the paint dries, look at the resulting shapes and add eyes, fins, tails, and other details with markers or additional paper pieces. Since every paint pattern develops differently, children can turn abstract splashes into completely different fish.
This activity should be closely supervised. Children should blow through the straw rather than inhale, and the paint mixture must be non-toxic and suitable for children’s art activities. Do not use the straw for drinking afterward.
The finished paintings can become colorful ocean scenes, with children adding seaweed, bubbles, coral, and other underwater elements around their fish. It is a fun example of how process art can encourage children to create without needing every result to look exactly the same.